Getting Started
All the setup and preparation for opening a new Open ACU account.
- Getting Started Checklist
- Settings and Templates
- Users
- Locations
- Services
- Add Practitioner Bios to Patient Portal
Getting Started Checklist
Your Open ACU account has a main portal for the administrative and practitioner staff to enter and maintain a clinic's locations, practitioners, patients, appointment schedule and health records. This article overviews the steps to get your clinic up and going with these steps. (Follow the links for more)
Checklist for getting started with your new Open ACU account:
Basics
- Users: Create User accounts for employees. Each clinic employee should have a separate User account. There are four levels of permissions for Users: Owner, Practitioner, Super Admin and Admin. Instructions here for creating User accounts.
- Locations: Add your clinic location details. You can have up to 2 locations with a basic account. Additional locations are $10 monthly per location. Instructions here for adding and editing Locations.
- Settings and Templates: Create your account's basic settings, plus your logo and color preferences for emails and the patient portal. Full list and description of Settings here.
- Services: Add the Services that your clinic offers. Instructions here for adding, editing and deleting Services.
- Patients: If you have a patient list, import your patients. Instructions here.
- SMS settings: If you have opted in to text message appointment reminders, activate your SMS settings using the verbiage codes.
- Take credit card payments: To take credit card payments within Open ACU you will need to add the feature to your account and then complete the Stripe onboarding process. Instructions here for adding the credit card payments feature and saving your payments settings.
Schedule
- Schedule blocks: Open your schedule by creating blocks. You can save blocks as templates in your Blocks Library to streamline the process of opening future blocks.
- Schedule appointments: Once your blocks are created, you can schedule appointments.
- Other schedule functions: Get familiar with other schedule features, such as canceling an appointment, squeezing an appointment, waiting lists, the Day Notification, checking in an appointment, and checkin transactions.
EHR
- Intake form settings: Set up your intake form settings, including verbiage for instructions and terms, and intake questions. Instructions here. You can also edit your intake questions.
- EHR preferences: Each individual practitioner should set their own note format preferences. Instructions here.
- Treatment codes: Treatment codes are shorthand for the points that a practitioner uses most frequently. Each practitioner should create their own list of treatment codes.
- Treatment groups: Treatment groups are shorthand for point combinations that a practitioner uses frequently. Each practitioner should create their own list of treatment groups.
- Other schedule functions: Get familiar with other EHR features, such as entering EHR notes, viewing treatment history, private EHR notes, and printing health records.
Patient Portal
Using Open ACU:
Open ACU has many features designed to integrate scheduling, health records and accounting into one seamless platform. You'll want to familiarize yourself with some of these basic features when you first start using Open ACU:
Schedule Management
- Schedule appointments: schedule appointments from your admin portal
- Cancel an appointment: cancel appointments, including how to assign a cancellation fee
- Waiting list: Add patients to the daily waiting list
- Squeeze appointments: Add extra appointments when your schedule is full
- Blocks: All about how to add, edit, save and delete schedule blocks
- Day Notification: Add an alert to the top of the schedule
Patient Managment
- Create a New Patient: add a new patient to your database
- Patient Profile: add and edit information on a patient's profile
- Patient Duplicate: manage and merge duplicate patient accounts
- Patient Icons: key to the patient icons you'll see on the schedule
- Inactive Patients: how to inactive or reactivate a patient
- Patient Portal: information about your patient portal
Transactions
- Checkin transaction: record payment when a patient checks in and pays for treatment
- Checkin without payment: check in a patient and record their transaction later
- Purchase transaction: record a payment that isn't connected with an appointment
- Reverse a transaction: what to do when you've entered a transaction incorrectly
Health Records
- Viewing intake forms: view patient responses to intake form questions
- Viewing EHR records: view a patient's past EHR notes
- Entering EHR notes: how to record EHR notes, via the Blocks page or Appointments page
- Private EHR note: record a note that can be viewed by all Practitioners but not Admins
- Printing health records: print records for legal or insurance requests
Tokens and Credits
- Tokens and credits overview: track individual patient balances with tokens and credits
- Using tokens and credits: use tokens and credits for payments and/or fees
- Purchasing tokens and credits: add tokens and credits at checkin, or with a purchase transaction
- Managing balances: manually change tokens and credit balances
Reports
- Appointment reports: view appointments for a given date range
- Transaction report: view transactions for a given date range
- Detail TRXN report: view transactions in more detail
- Cancellation report: view cancellations for a given date range
- Practitioner reports: view totals summary and patient rate of return for a given date range
- Appointment log: view all details of a specific appointment
- Service report: view appointments and revenue by service for a given date range
Settings and Templates
Your settings page is where you set your application preferences, templates and rules for your account, and your patient portal logo and colors. You can get to the Account Settings page but clicking Account —> Settings on the sidebar menu, or by clicking on your clinic’s name at the top of the page.
Logo and colors
Upload your clinic logo and edit colors buy clicking the Edit Logo, Colors button next to your clinic name:
![]()
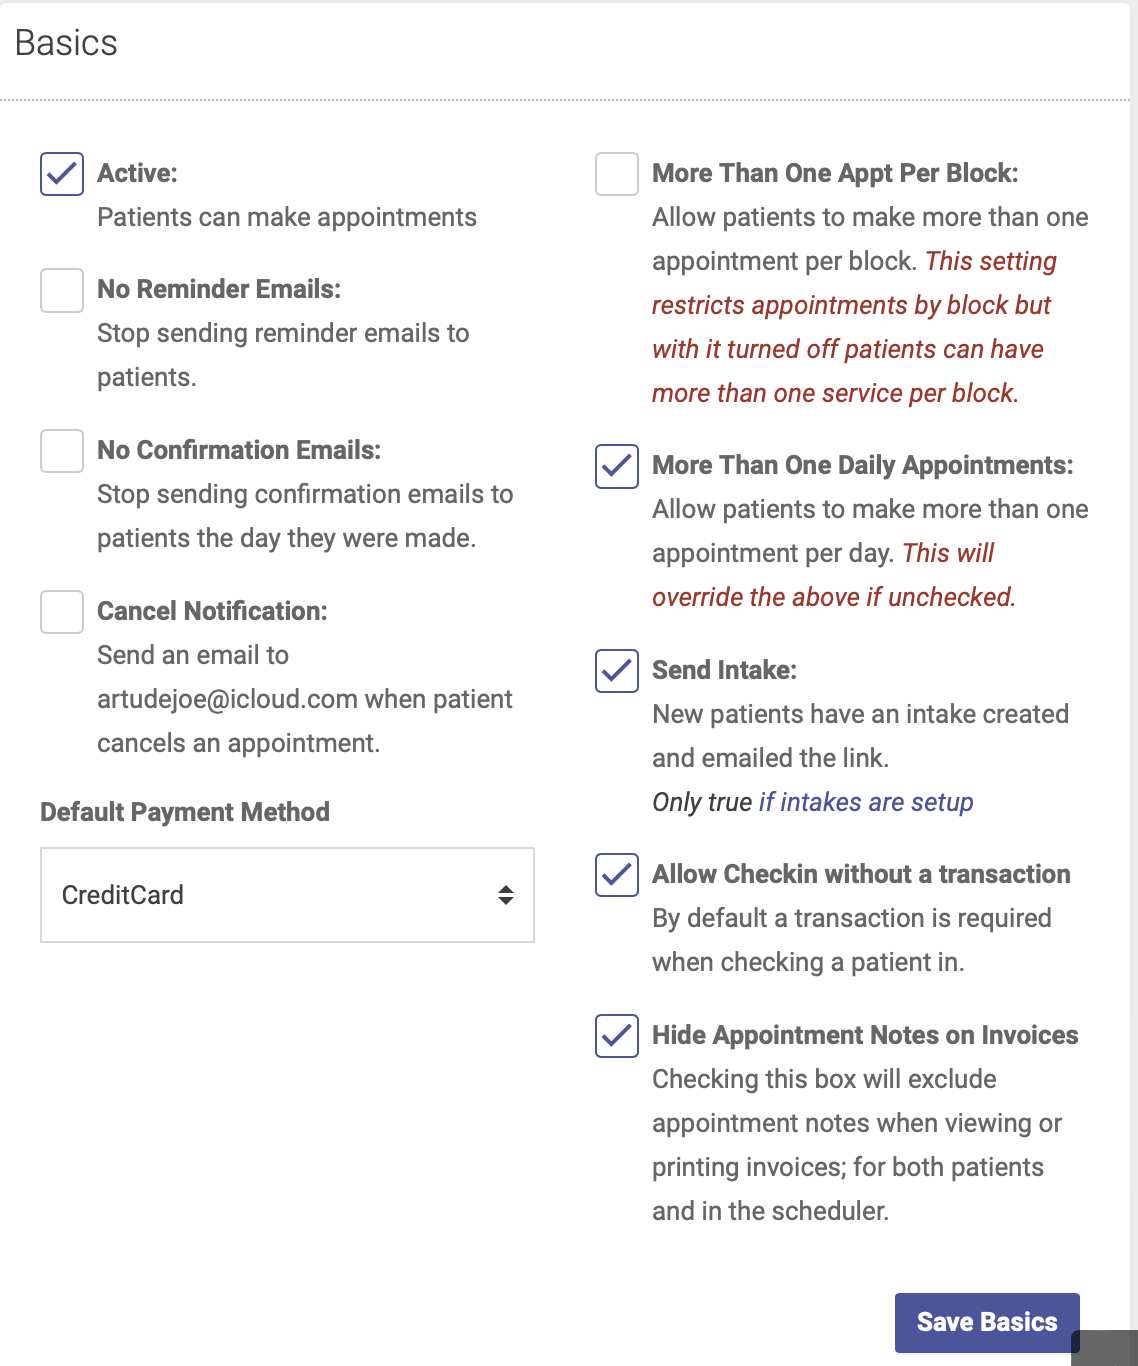
Basics
- Active: keep this box checked to allow patients to make appointments online
- No reminder emails: check this box if you DON’T want to send reminder emails. If you DO want patients to receive reminder emails, leave this box unchecked.
- No confirmation emails: check this box if you DON’T want to send confirmation emails. If you DO want patients to receive confirmation emails, leave this box unchecked.
- Cancel notifications: check this box to have notifications of canceled appointments sent to your contact email. Note: you can also see a list of canceled appointments buy running a cancelation report.
- Default payment method: select whichever payment method your patients use most often. This will be the default method when you record a payment.
- More than one appt per Block: By default, patients cannot schedule more than one appointment per block via the patient portal. Checking this box will override that rule and allow a patient to make more than one appointment per Block.
- More than one daily appointment: By default, patients cannot schedule more than one appointment per day via the patient portal. Checking this box will override that rule and allow a patient to make more than one appointment per day.
- Send intake: when this box is checked, a new patient will automatically receive a link to their intake form when they create their account. Note: this will only work if you’ve set up your intake forms.
- Allow checkin without transaction: checking this box will allow you to check in a patient without having to record their payment at time of checkin. You can record their payment at a later time by following the instructions to check in without a transaction.
- Hide appointments notes on invoices: checking this box will exclude appointment notes when viewing or printing invoices, both for patients and for admins.
Scheduler Site Settings
In this section you’ll store your contact information, website, and the text for your email templates.
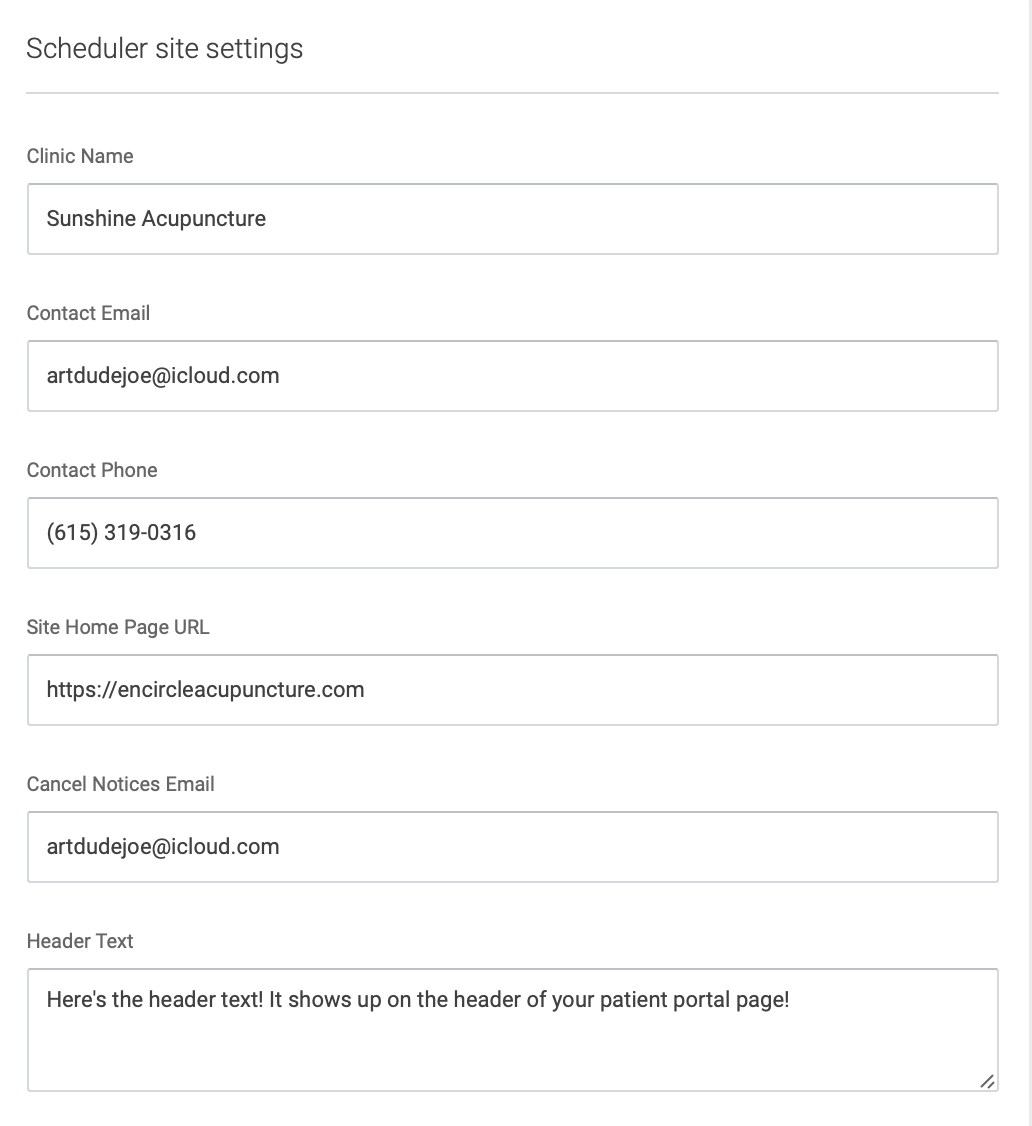
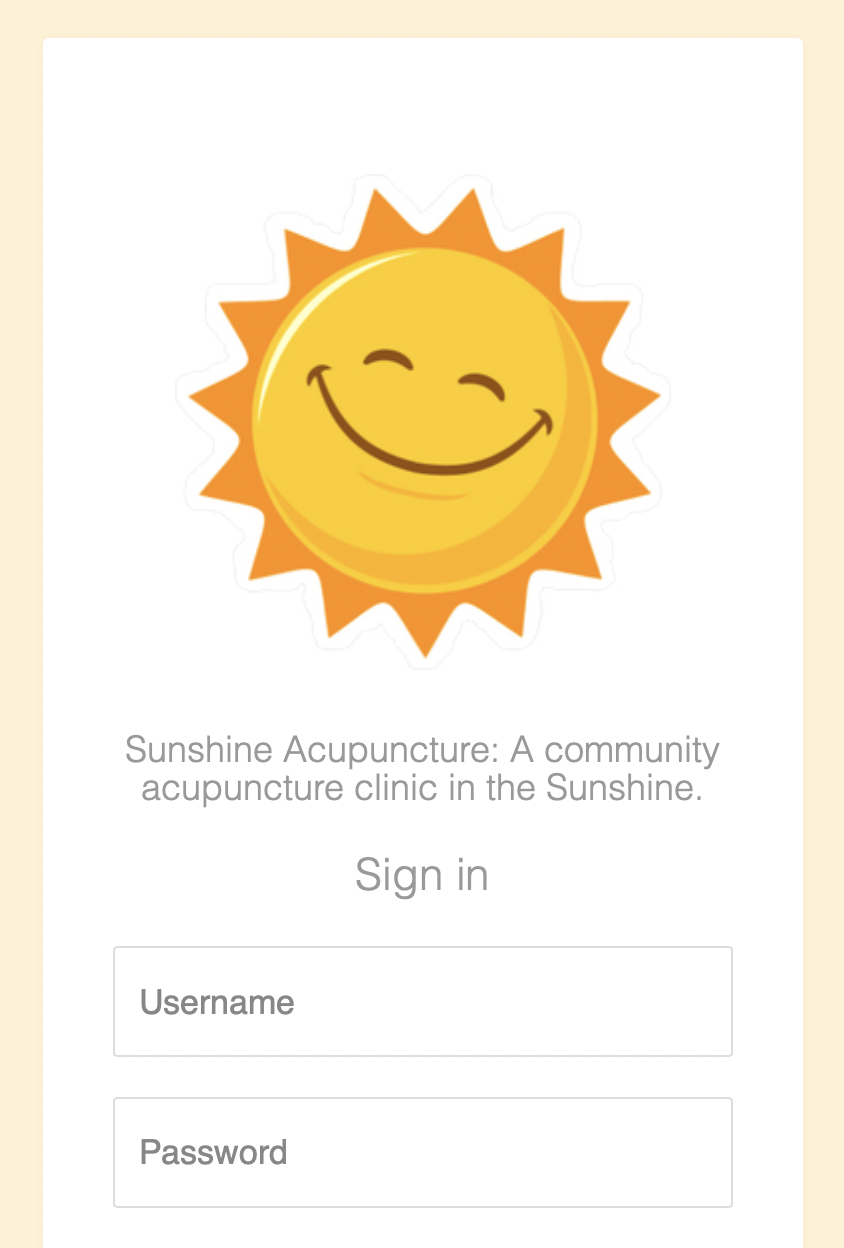
The text in the Slogan field will appear under your clinic's logo on the patient portal login page:
The New Account Instructions field is where you’ll save the instructions patients will see on your website for creating their account:

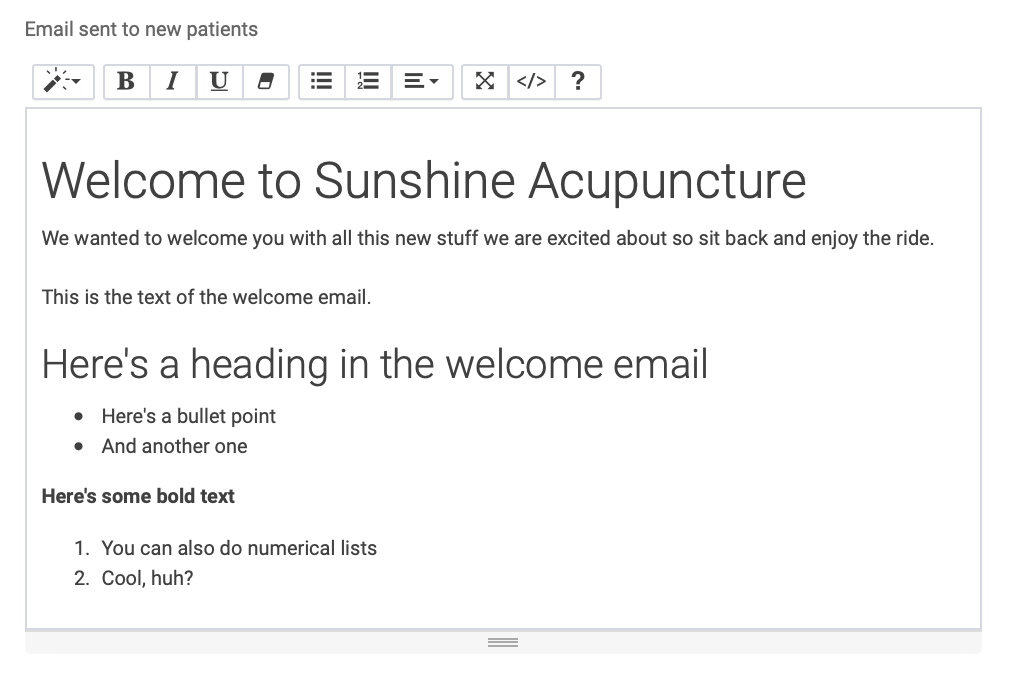
The Email sent to new patients will automatically be sent to a new patient once their account is created:
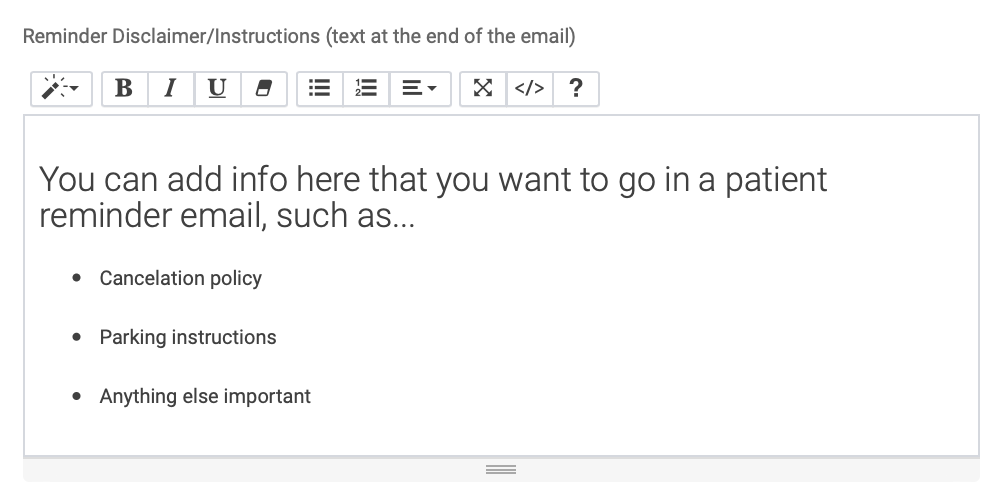
The Reminder/Disclaimer Instructions will go at the end of appointment reminder emails:
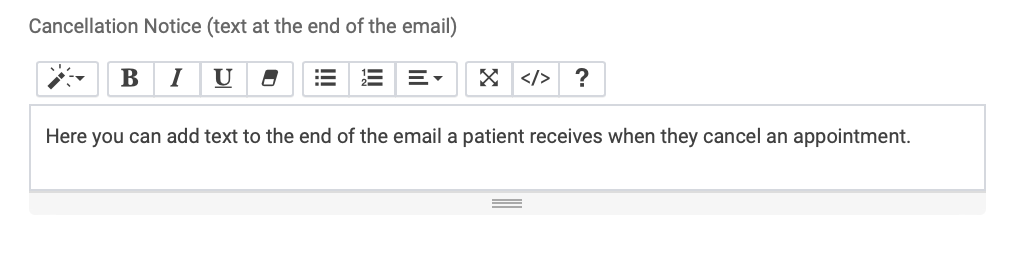
The Cancelation Notice is where you’ll add text for the email a patient can receive when an appointment is canceled.
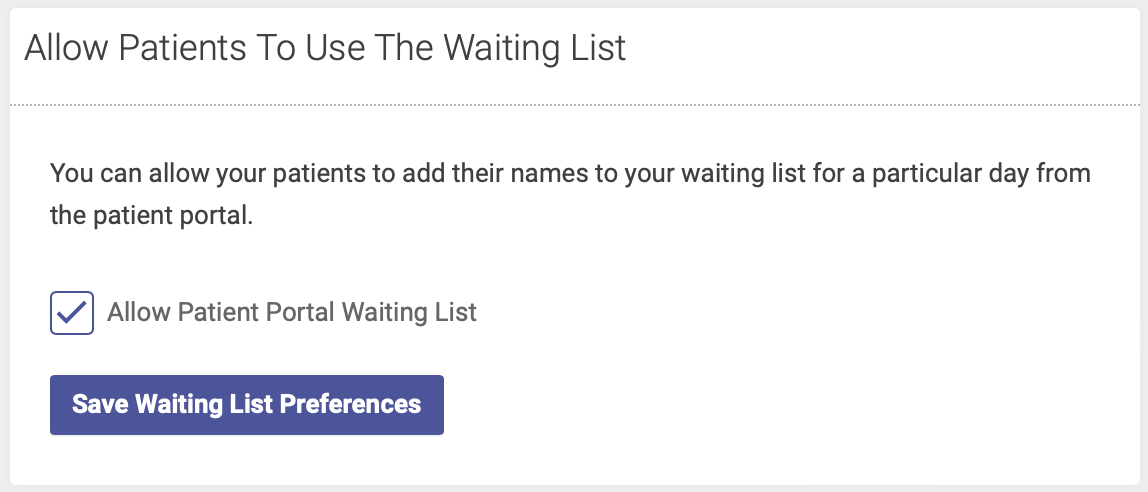
Waiting List Settings
If you want to allow patients to add their names to the daily waiting list via the patient portal, check the Allow Patient Portal Waiting List box and click Save to save your preference.
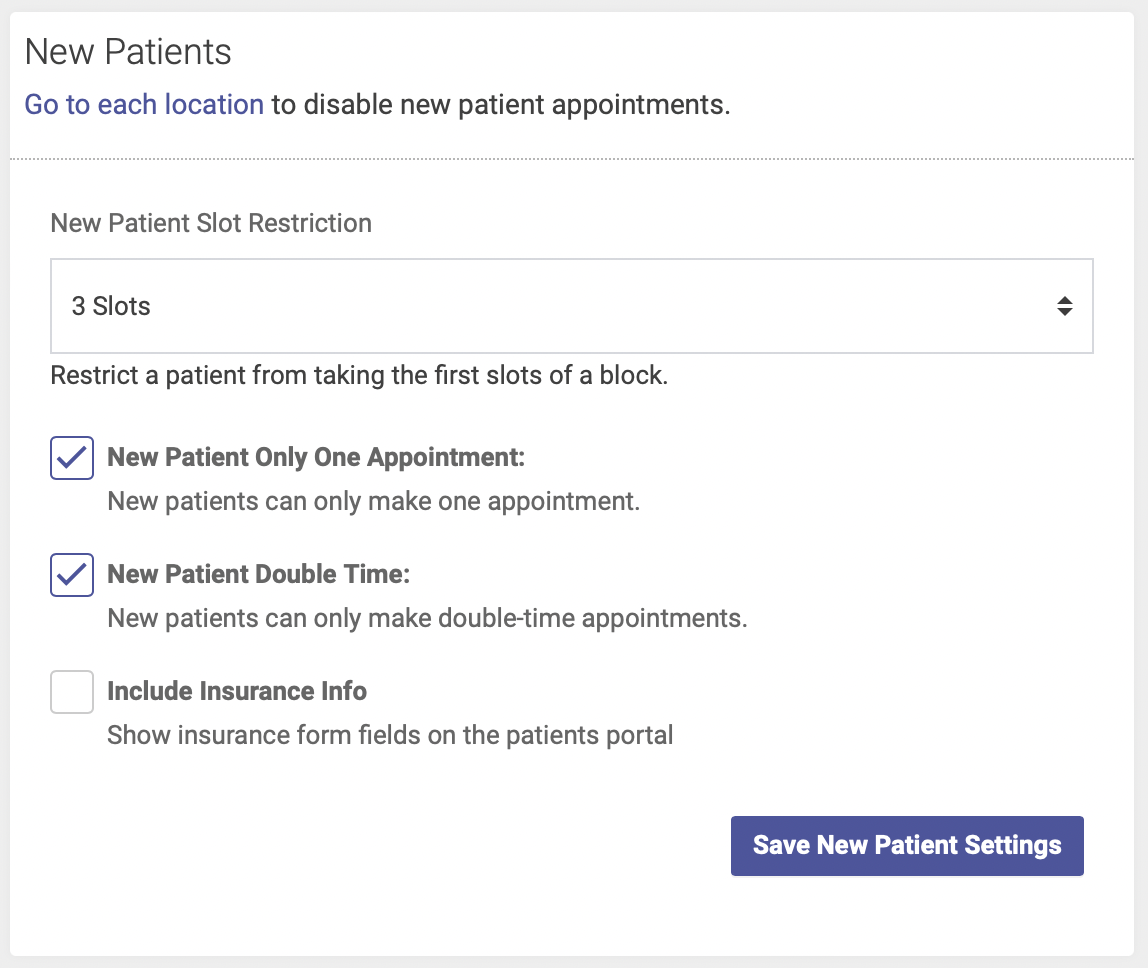
New Patient Settings
This is where you’ll save settings related to when new patients can schedule appointments. You can:
- Restrict new patients from taking the first slot(s) of a block, using the new patient slot restriction drop-down menu
- Restrict new patients from making more than one appointment by checking the Only One Appointment box
- Restrict new patients from making single-slot appointments by checking the New Patient Double Time box
- Include or omit insurance info on the patient portal.
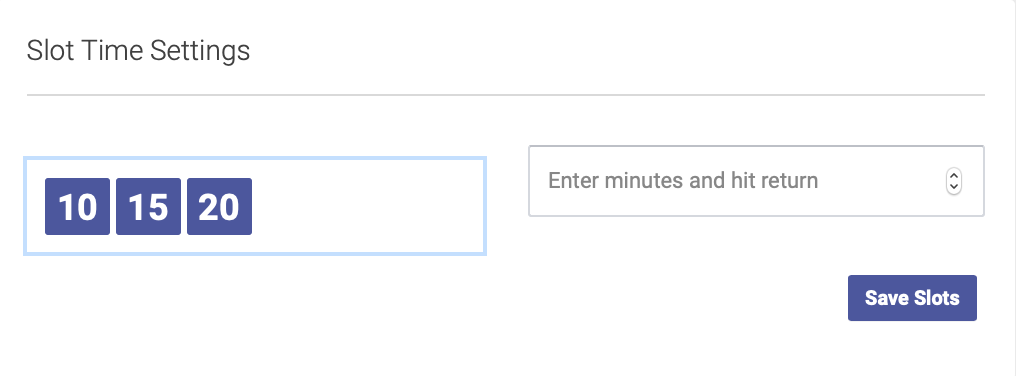
Slot Time Settings
In this section you can add and delete your options for slot duration. To add an option, enter the number of minutes and click return. To delete an option, simply click on the number in the box on the left.
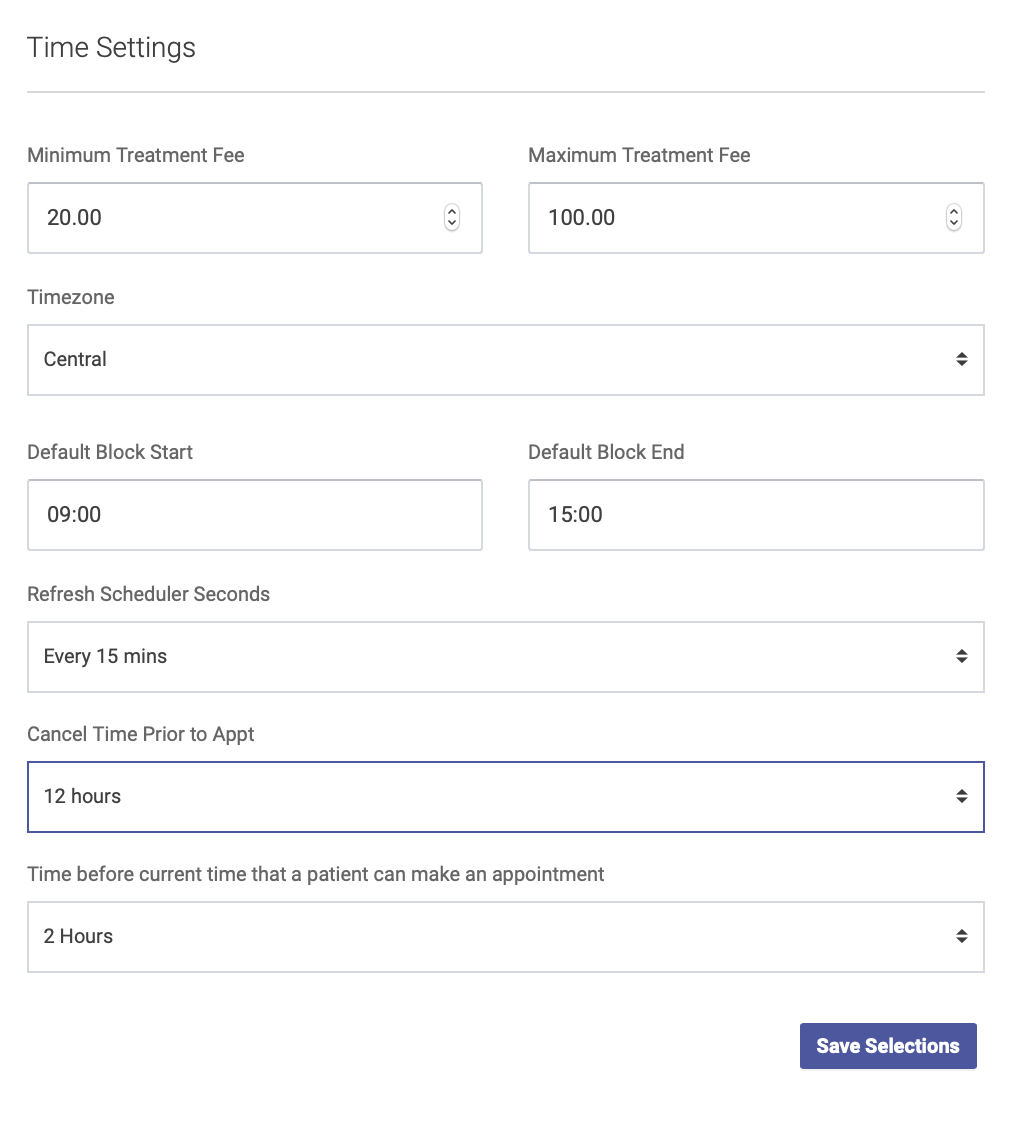
Time Settings
This is where you’ll save basic time and fee settings for your scheduler:
- Minimum and maximum treatment fees (these can be manually overridden during the checkin process)
- Time zone
- Default start and end times for blocks (these can be manually changed when creating blocks)
- Scheduler refresh: will automatically refresh your scheduler after a period of inactivity
- Cancel time prior to appointment: determine how long before an appointment you’ll allow a patient to cancel online
- Time before: determine how much lead time you’ll allow for a patient to make an appointment online
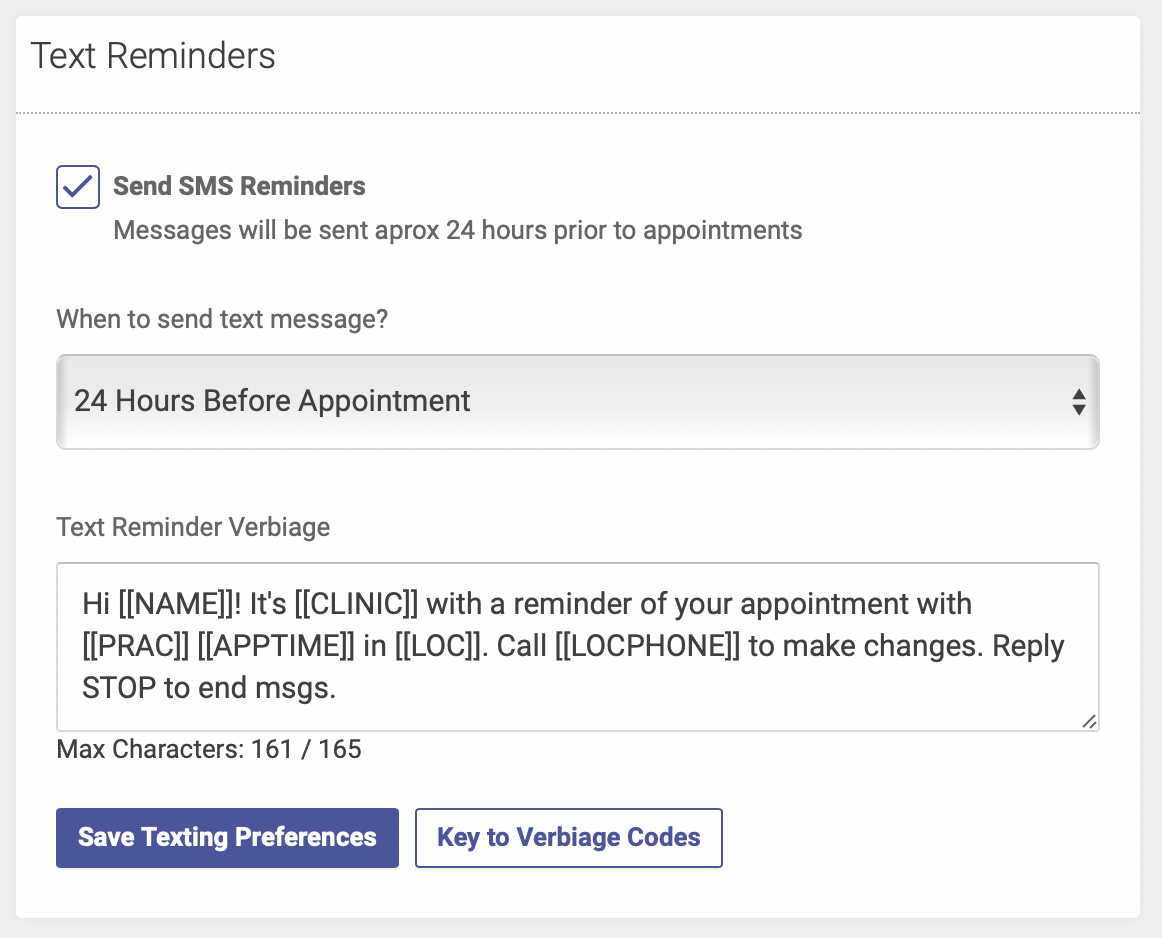
Text Reminder Settings
Note: Only available if you have opted in to the text message reminder feature for an additional $5 per month.
Complete the following steps to activate SMS reminders:
- Check the Send SMS Reminders box
- Select your preference for when text messages are sent - they can be sent either 24 or 48 hours before the appointment.
- Enter your verbiage for your text message - click the Key to Verbiage Codes button for options to customize your messages.
- Click Save Texting Preferences and you're done!
See this reference for the text code variables you can use or click the Key to Verbiage Codes button on your admin page.
Users
To add or manage a User, click on the Users page from the main menu.
Different user types have different permissions:
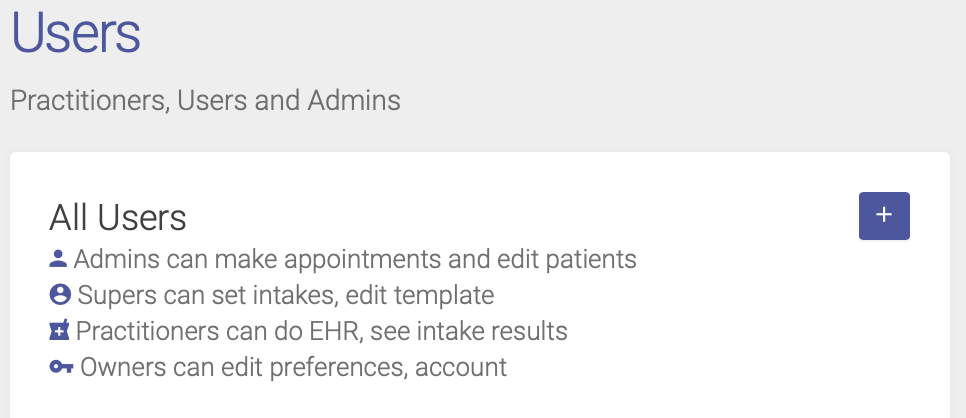
Admins can make appointments and edit patients. Admins cannot view EHR records or intake responses.
Super admins have the same permissions as admins, plus they can edit templates and intakes. Super admins cannot view EHR records or intake responses.
Practitioners have the same permissions as admins, plus they can view EHR records and intake responses, and create and edit EHR notes.
Owners have full access to all schedule and EHR features.
To add a user, click the plus sign, complete the information and click Add when you’re done.
To change user settings or to delete a user, click their name on the list of Users.
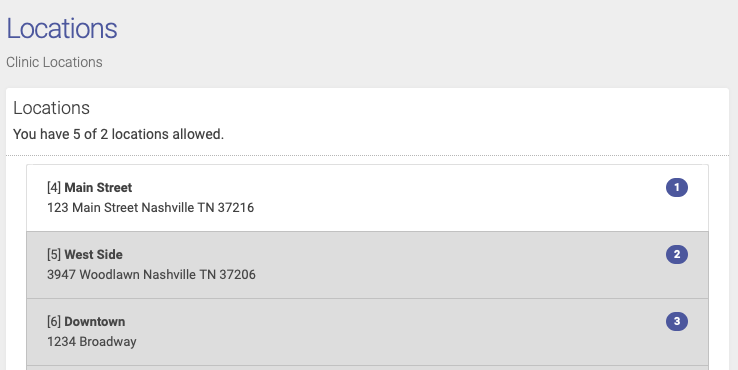
Locations
Open ACU gives all accounts 2 free active locations. You can add a location to your account for $10 a month. If you need more than 10 locations contact us for bulk location pricing.
Adding A New Location
If you don't need to purchase more locations you can add one at anytime. Just go to Locations and click the [+] Plus sign to the right. If you need to add locations to your account click "Add A Location".
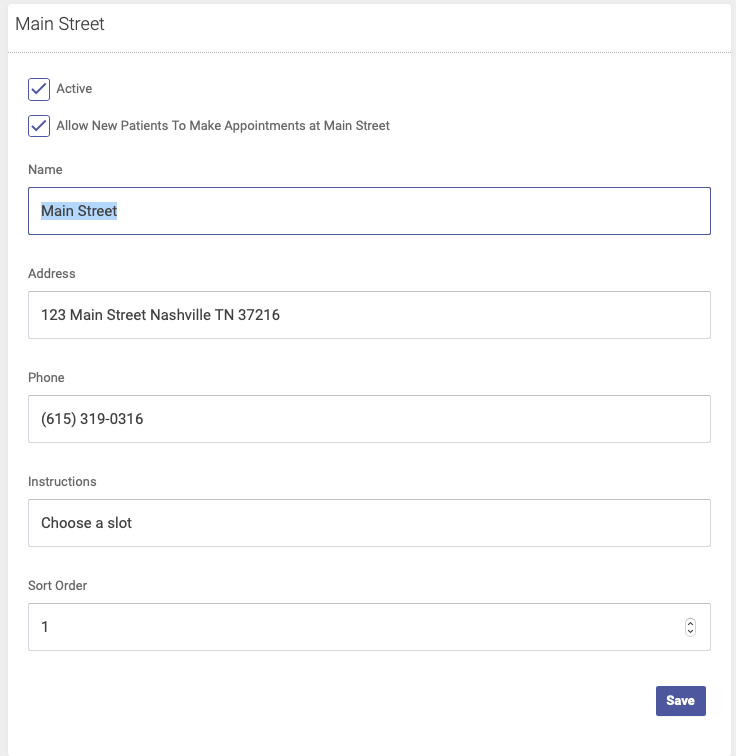
Each location has these options
- Active. This checkbox makes the location available online to patients and in the appointments grid of your admin. Unchecking it hides it from those options. Inactive locations still show up in reports and remain associated with appointments that occurred in those locations. You cannot delete a location. If you need to you make contact us to do so for you but that still may not guarantee a deletion.
- Allow New Patients To Make Appointments. Uncheck this to prevent new patients to make any appointments at this location.
- Name *required. This text shows up when the patient is choosing the location. Enter something descriptive and short.
- Address *required. Enter a well formed address as it will enhance the patient's ability to locate your clinic via GPS.
- Phone *required. Enter a location specific to the location.
- Instructions optional. Enter a short text with specific location instructions. This will appear on the location page of your schedule in the Patient Portal.
To edit your locations
- Go to Locations in the main menu on the left.
- Select one of your locations in the left column by clicking or tapping.
- Edit the location details and click save.
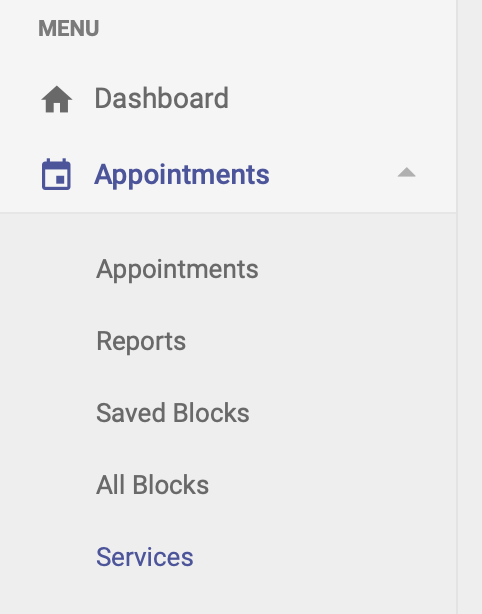
Services
Every schedule block is required to be assigned one or more Service choices; therefore you will need to create at least one Service choice in your Open ACU account.
To add a Service, you’ll go to the left-hand side menu and click Appointments —> Services:
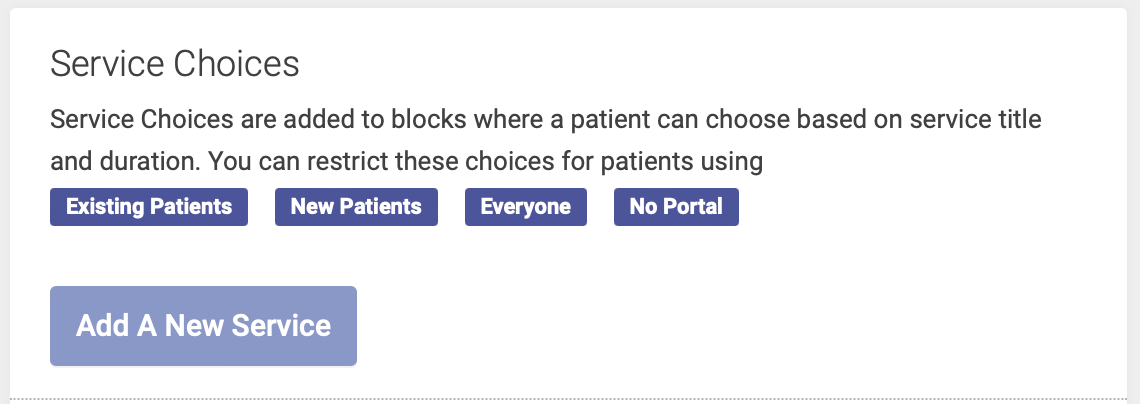
Service choices
Service choices will allow patients to select which service they'd like to schedule. You will choose patient restrictions for each service:
- New patient: only new patients can schedule this Service
- Existing patient: New patients cannot schedule this Service; it's only available to someone who's already been to the clinic
- Everyone: anyone can schedule, new or existing patients
- No portal: this Service does not appear as an option on the Patient Portal, but is visible on the admin portal
Adding a Service
To add a new Service, click the Add a New Service button:
You will then create your Service in the Service Editor box. Add the following details for each service:
- Service Title: this will appear on the admin and patient portals, so make your title short and descriptive
- Slot duration: this will determine how much time a Service will take up on the schedule, and not necessarily the length of the entire appointment. For example, a "Community Acupuncture" Service might take up 10 minutes on the schedule, but the appointment length might be an hour. In this case, you'd choose 10 minutes for your Slot Duration. The Slot Duration options in the drop down menu are based on the Slot Time Settings that you saved on your Settings page.
- Who Can Book: select which patients you want to be able to book this Service: Existing Patients, New Patients, Everyone, or No Portal (hidden on the patient portal but still visible on the admin side)
- Click the Telehealth box to make this a virtual appointment (must include a URL where the patient will join the Telehealth appointment)
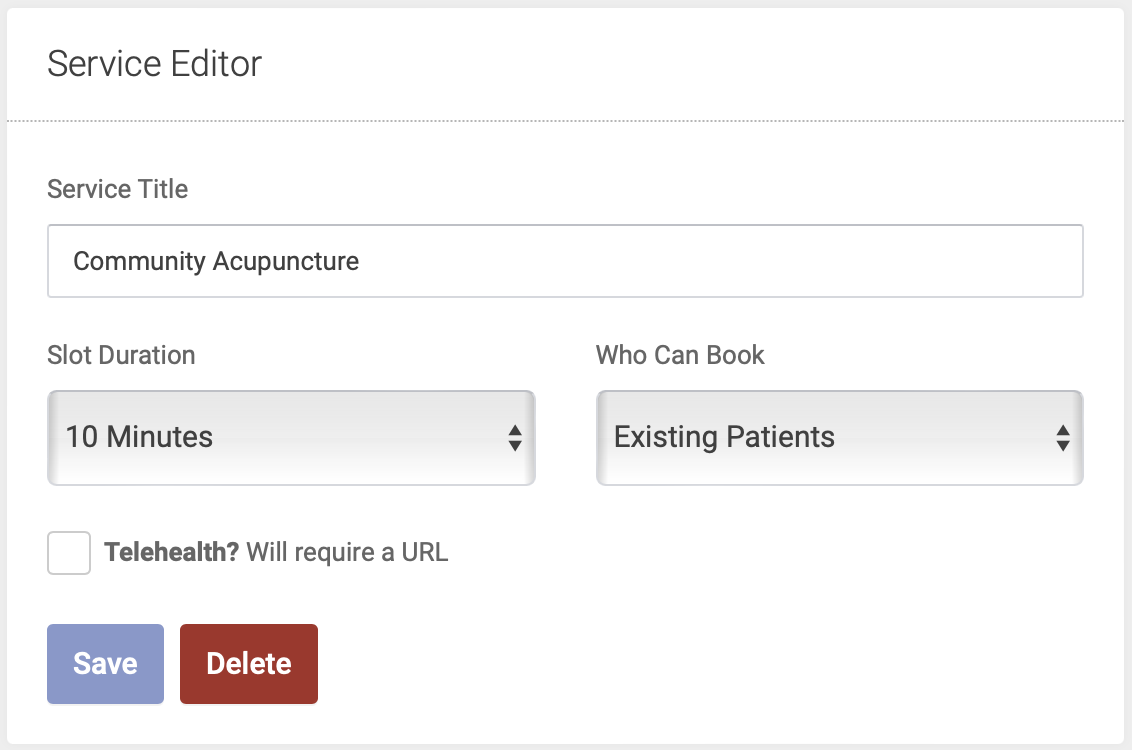
Click Save to save your new Service.
Key Tips on Service Titles
Giving your Service a proper title will give clarity to both you and your patients when scheduling appointments. So choose a Service title wisely! Here are some tips:
- On the patient portal, patients will see the Service Title but not the slot length. So choose a title that helps them easily identify which Service they are scheduling.
- Example: If you are offering 30- or 60-minute massages, include the length of time in your title. Don't just title both of them "Massage." One should be titled "30 minute massage" and the other should be "60 minute massage."
- The Service Title will also appear on the patient invoice, which they might submit for an insurance or legal reimbursement. So again, choose a descriptive title.
- Example: "Acupuncture" is a better title than "Acu"
- If a Service is only for new or existing patients, include that in your title. That way all admin users will easily know if there are any restrictions on who can be scheduled for a specific service.
- Example: If you are only offering reiki to existing patients, a good title is "Reiki - existing patients"
- You can offer combination services that will allow patients to book multiple services per block.
- Example: You could create a Service called "Acupuncture + Cupping" and designate an appropriate slot length to allow enough time for both services.
Editing a Service
To make changes to an existing Service, find your Service on the list on the Services page, and click Edit.
The Service Editor box will open on the right hand side of the page. In the Service Editor box, you can change the Service title, duration, who can book, and telehealth options:

Click Save to save the changes to your Service.
Deleting a Service
To make changes to an existing Service, find your Service on the list on the Services page, and click Edit.
The Service Editor box will open on the right hand side of the page. Click the red Delete button to delete your service. Once you delete a Service, it will not be available for any future schedule blocks. It will still appear on existing blocks that have already been scheduled.
Viewing Service choices
The Service choices will appear at the top of every schedule block, and the slot duration will appear next to every Service name. This will tell you which Services are available for a given block.
On the admin portal
The Service options will appear at the top of every block:

On the patient portal
On the patient portal, the Service options will appear in one of two ways:
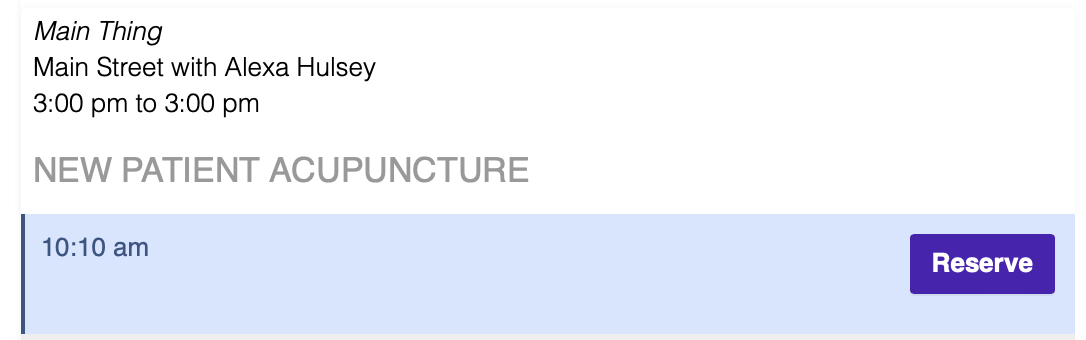
If only one Service is available
If there is only one service option for a given block, the Service name will appear at the top of the block:
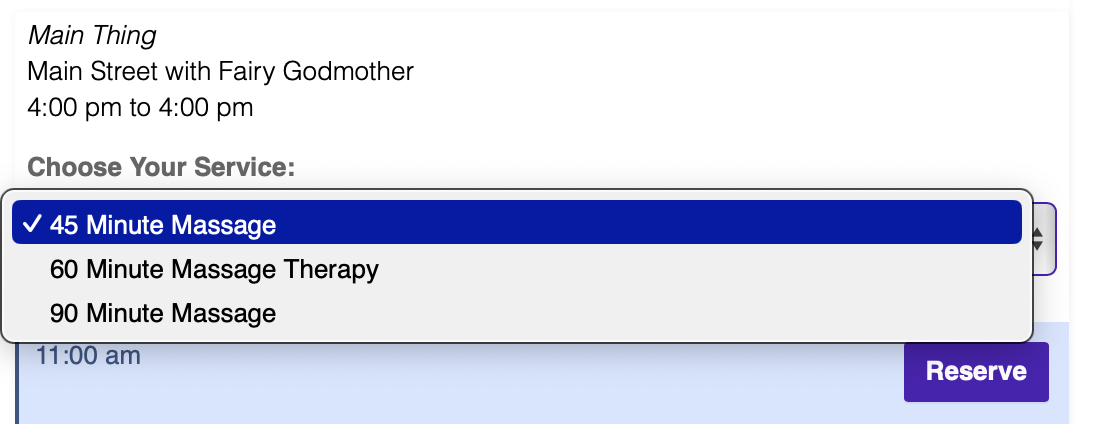
If multiple Services are available
If a block has multiple Service choices, they will appear as a drop down menu at the top of the block:
Add Practitioner Bios to Patient Portal
You can add your practitioners (and owners) biographies to your patient portal site.
To add Bios to your patient portal:
- Log into your Open ACU admin account as an owner.
- No other users have access to the other user profiles.
- Go to the > Users page.
- Select an owner or practitioner profile from the list of users on the left.
- Only owners and practitioners can have their bios added to the practitioner page.
- The user profile editor shows up on the right.
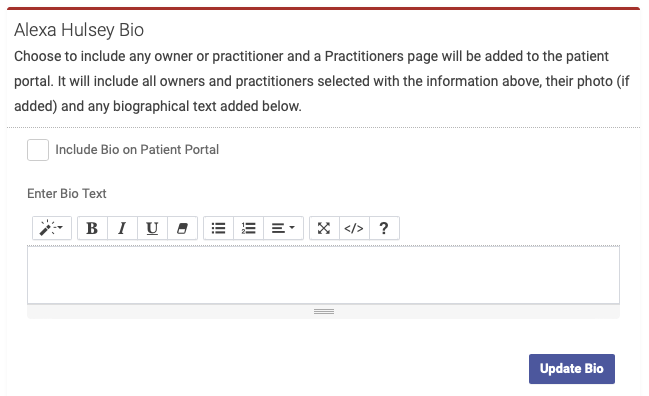
- Scroll to the Bio section for that user.
- Add text for the bio and check Include Bio on Patient Portal.
- Click Update Bio
Once any one owner or practitioner is included the patient portal will add a link to a page named "Our Practitioners". The link will appear in the header banner at the very top of the page and the footer.
Our Practitioners Page on the Patient Portal
The owners will be listed first in alphabetic order, the practitioners next and in alpha order. Depending on what's been entered for each listing they will include the profile image, the name, the license and designation, contact information and the text bio. It will look something like this:
