Intake Forms
Setup and send intake forms to your patients
- Intake Form Settings
- Editing Your Intake Questionnaires
- Sending Intake Form Links
- Viewing Intake Forms
Intake Form Settings
Open ACU allows you to create multiple intake policies and questionnaires. You’ll designate which forms automatically get sent to new patients, and which are sent manually.
Pro tip: If you offer multiple services, we recommend designating a standard questionnaire and set of policies to be automatically sent to all new patients, then manually sending service-specific questionnaires, based on which service(s) the patient will be receiving.
You’ll setup your intake forms from the Intake Settings page. There are three sections to complete when setting up your forms:
- Sending Intakes to New Patients
- Intake Policies
- Intake Questionnaires
Sending Intakes to New Patients
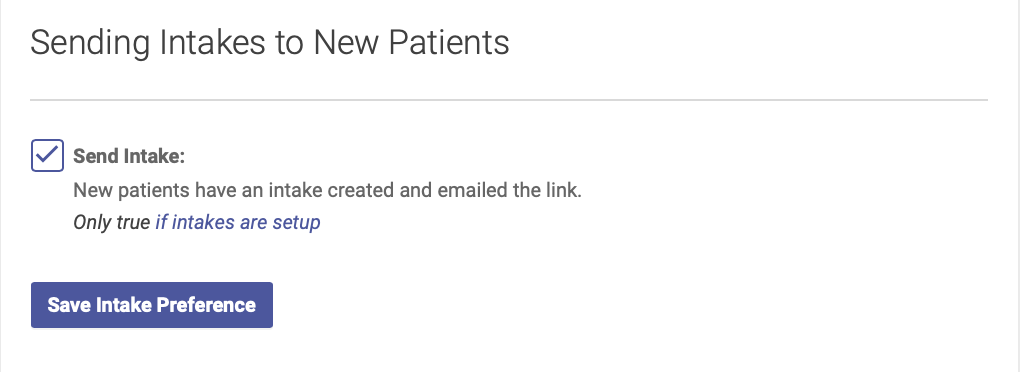
Check the “Send Intake” box if you want to automatically send an intake form to a new patient when they create an account. You’ll also enter verbiage for the text of the email that will be sent with the intake. Be sure to click Save Intake Preferences when you’re finished.
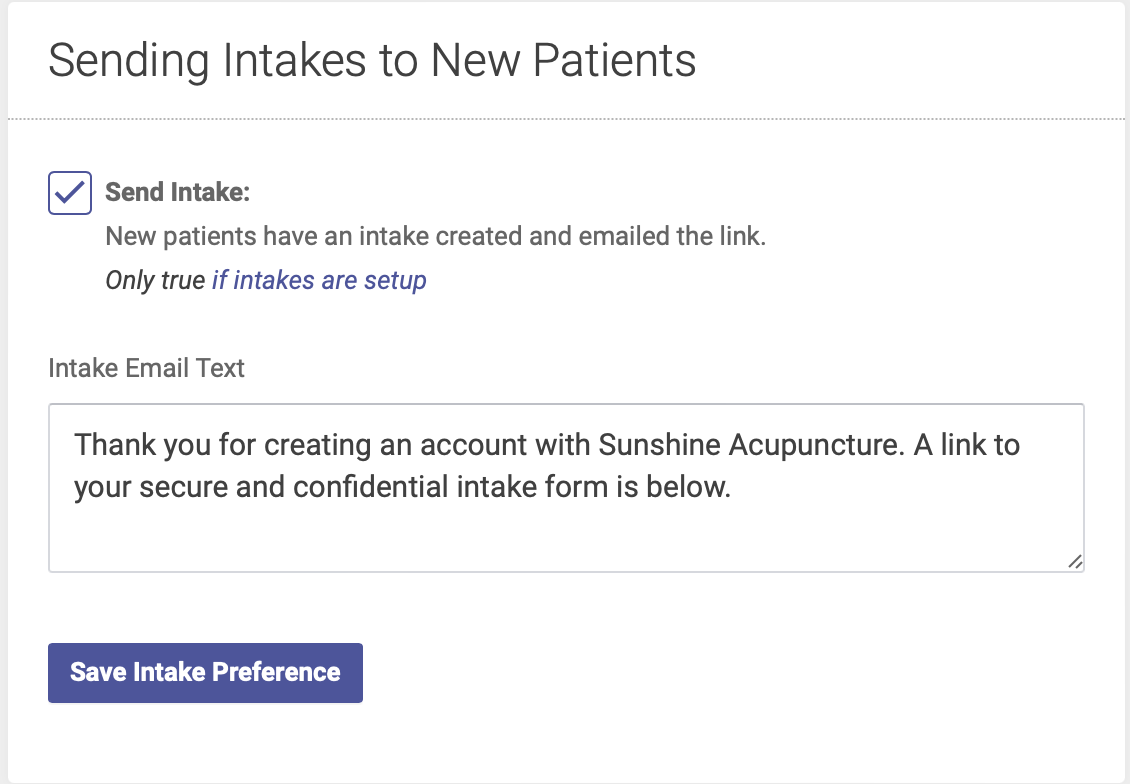
If you leave the box unchecked, you can manually send an intake form from the Patient Profile page.
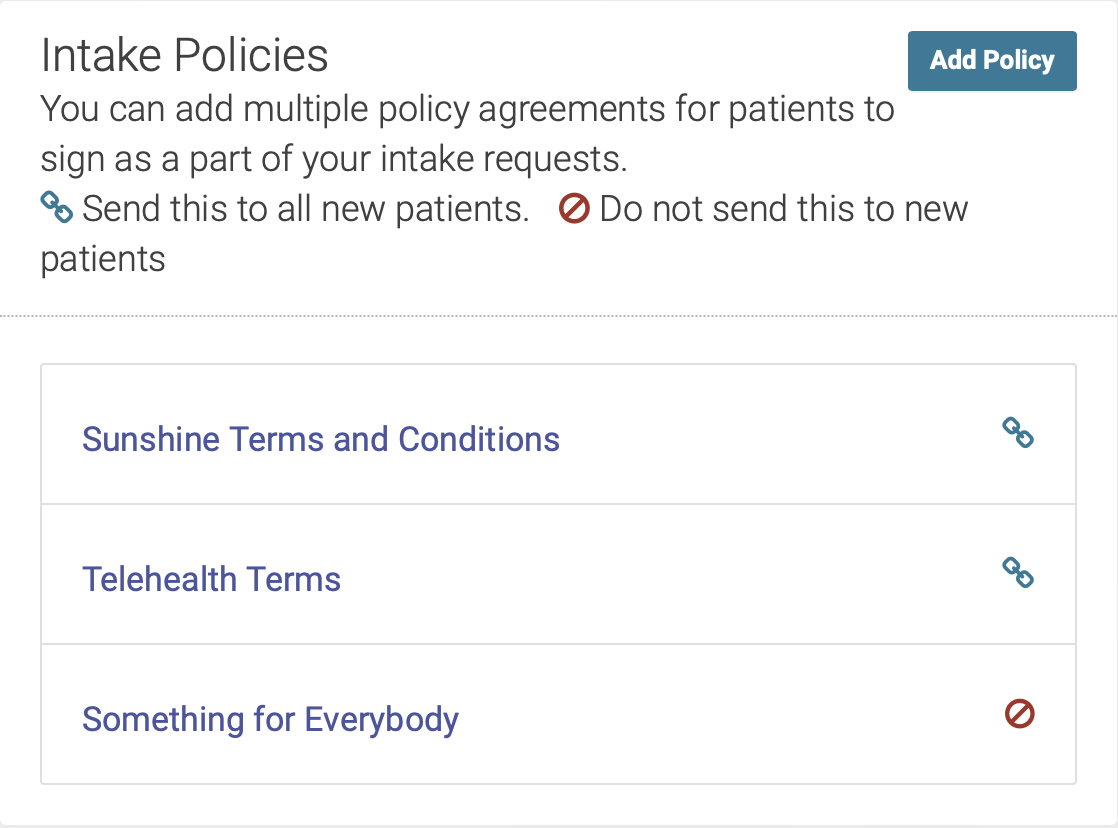
Intake Policies
In the Intake Policies section, you’ll enter any information you want the patient to read and agree to before they complete their intake form. This can include financial policies, informed consent, privacy practices, etc.
You can create as many Intake Policies as you like. This section will display a list of your current policies, and is where you can add, edit or delete policies.
Policies with a link icon will automatically be sent to new patients (if this feature is set up). Policies with a crossed-out circle icon will NOT automatically be sent to new patients, and can be sent manually from the Patient Profile page.
Adding an Intake Policy
To add a new Intake Policy, click the Add Policy button. Enter your title, text, and check the Send This Intake to New Patients box if you want this policy to automatically be sent to new patients (if you leave the box unchecked, you can still manually send a policy form from the Patient Profile page). Be sure to click Save Terms when finished.
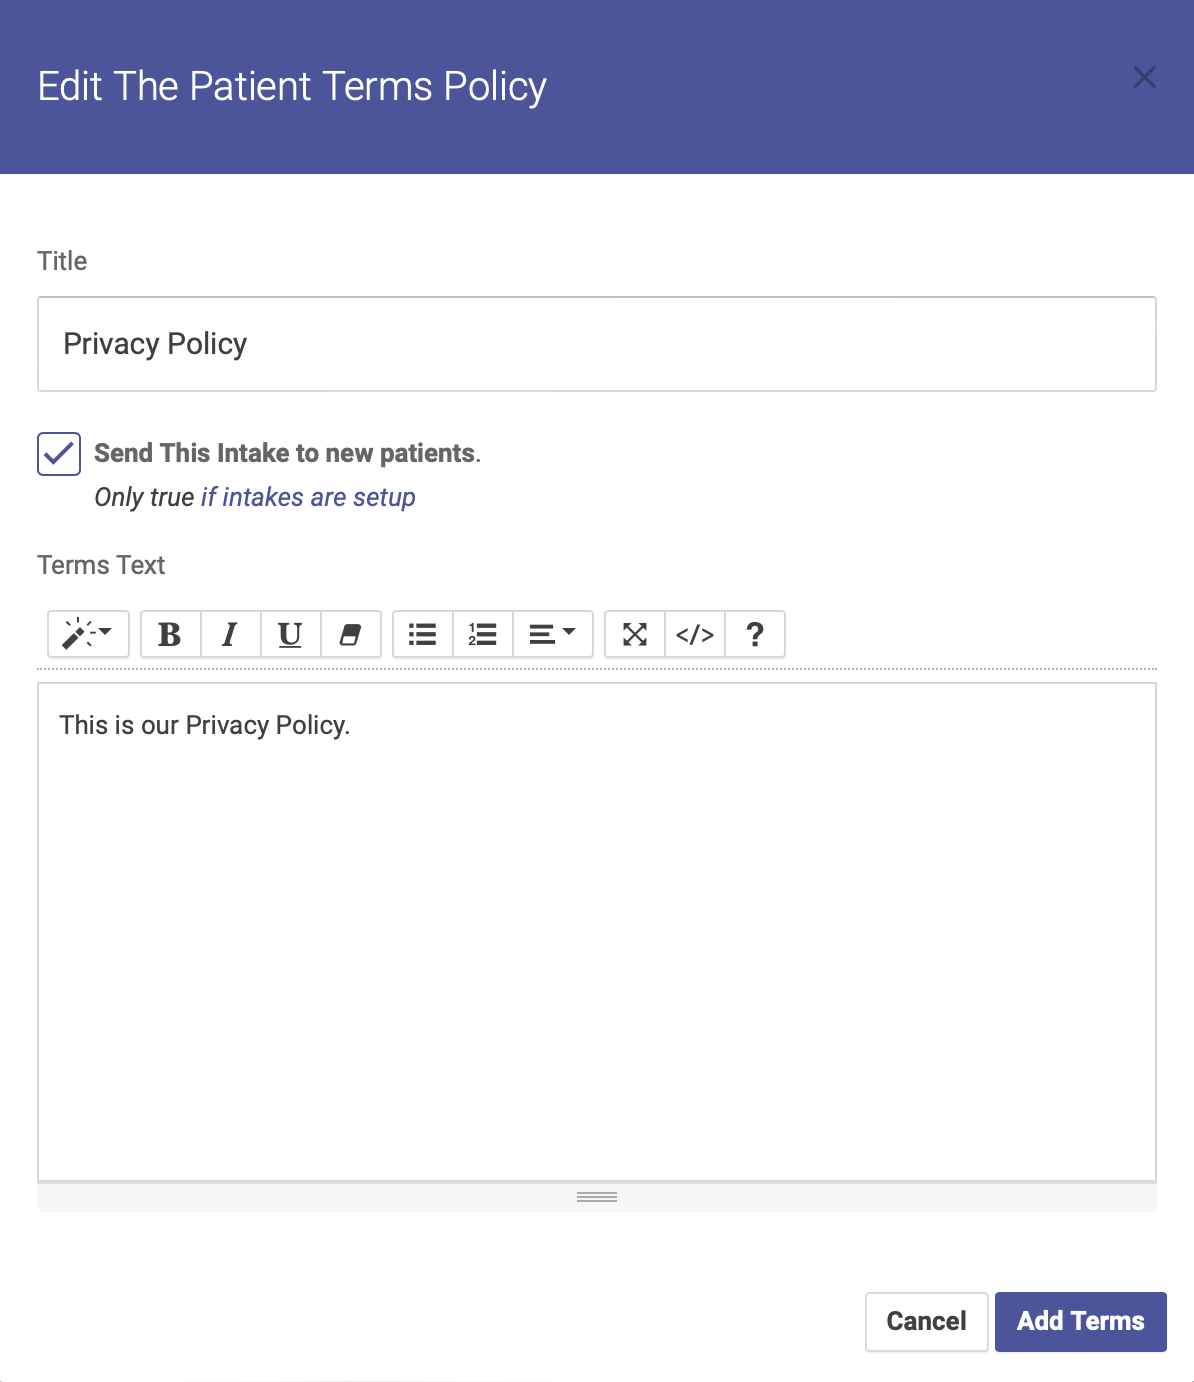
Editing or Deleting an Intake Policy
To edit an existing Intake Policy, click the policy title on your list of policies. You will then be able to edit your policy’s title and terms, and whether or not this policy will automatically be sent to new patients. You can also delete a policy but clicking on the title. Be sure to click Save Terms when finished.
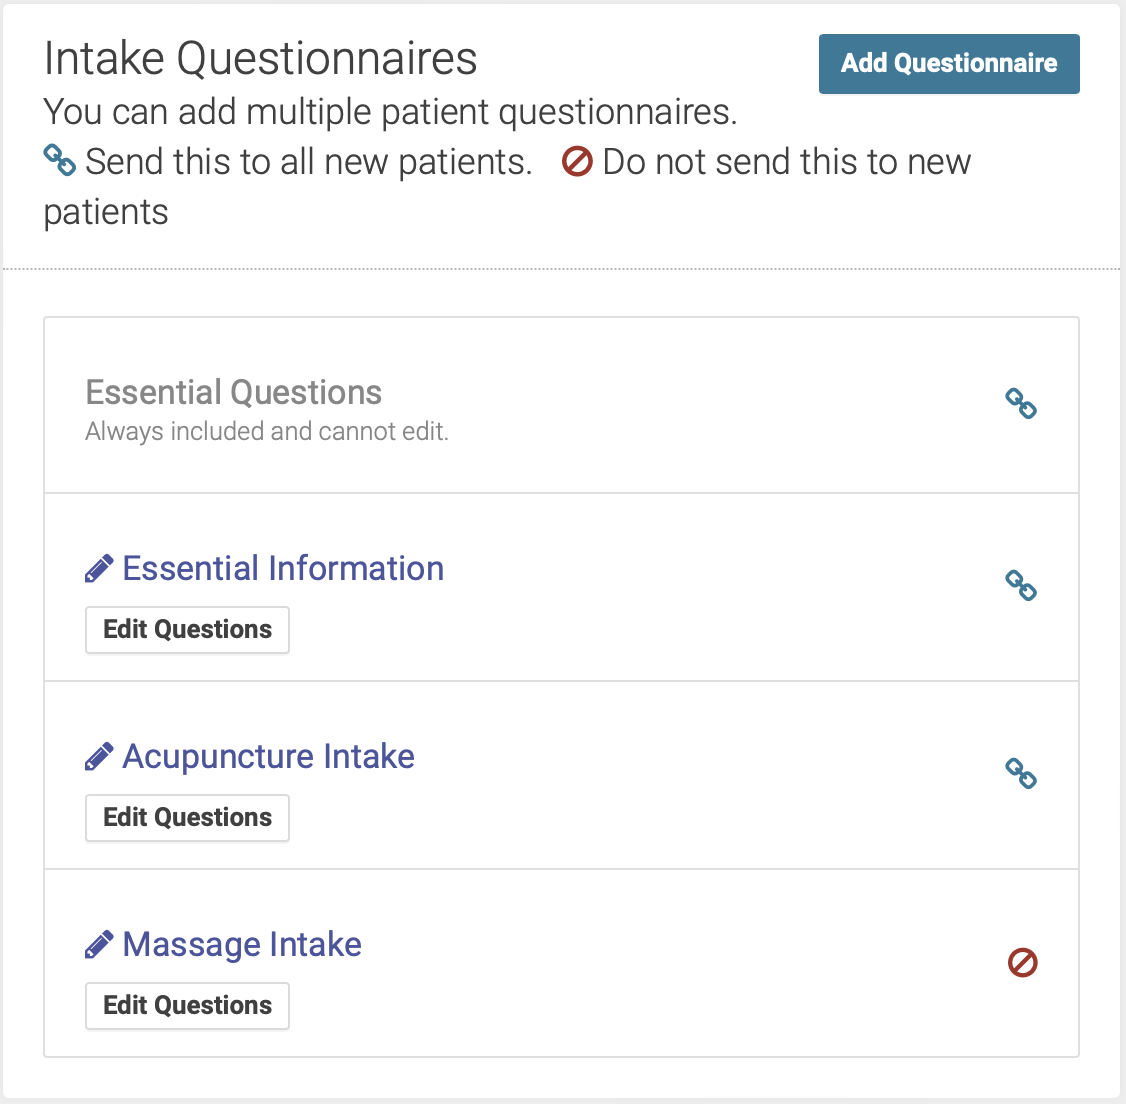
Intake Questionnaires
In the Intake Questionnaires section, you’ll create your questionnaire forms for health history, review of symptoms, and any other information you want to gather for a patient’s first appointment.
You can create as many Intake Questionnaires as you like. This section will display a list of your current questionnaires, and is where you can add, edit or delete policies.
Questionnaires with a link icon will automatically be sent to new patients (if this feature is set up). Questionnaires with a crossed-out circle icon will NOT automatically be sent to new patients, and can be sent manually from the Patient Profile page.
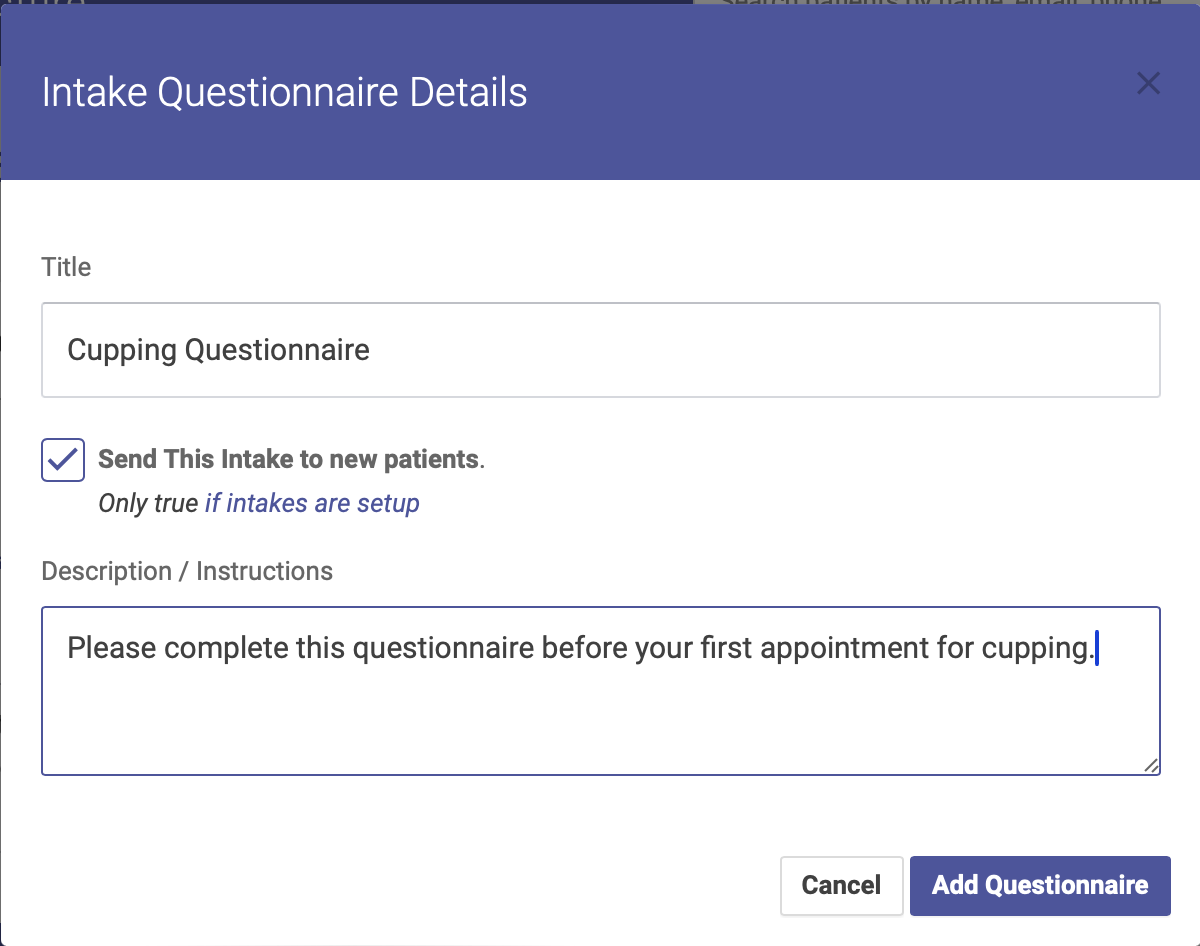
Adding a Questionnaire
To add a new Questionnaire, click the Add Questionnaire button. Enter your title, description / instructions, and check the Send This Intake to New Patients box if you want this policy to automatically be sent to new patients (if you leave the box unchecked, you can still manually send a policy form from the Patient Profile page). Be sure to click Add Questionnaire when finished.
Once you’ve created a questionnaire, you can add individual questions and groups.
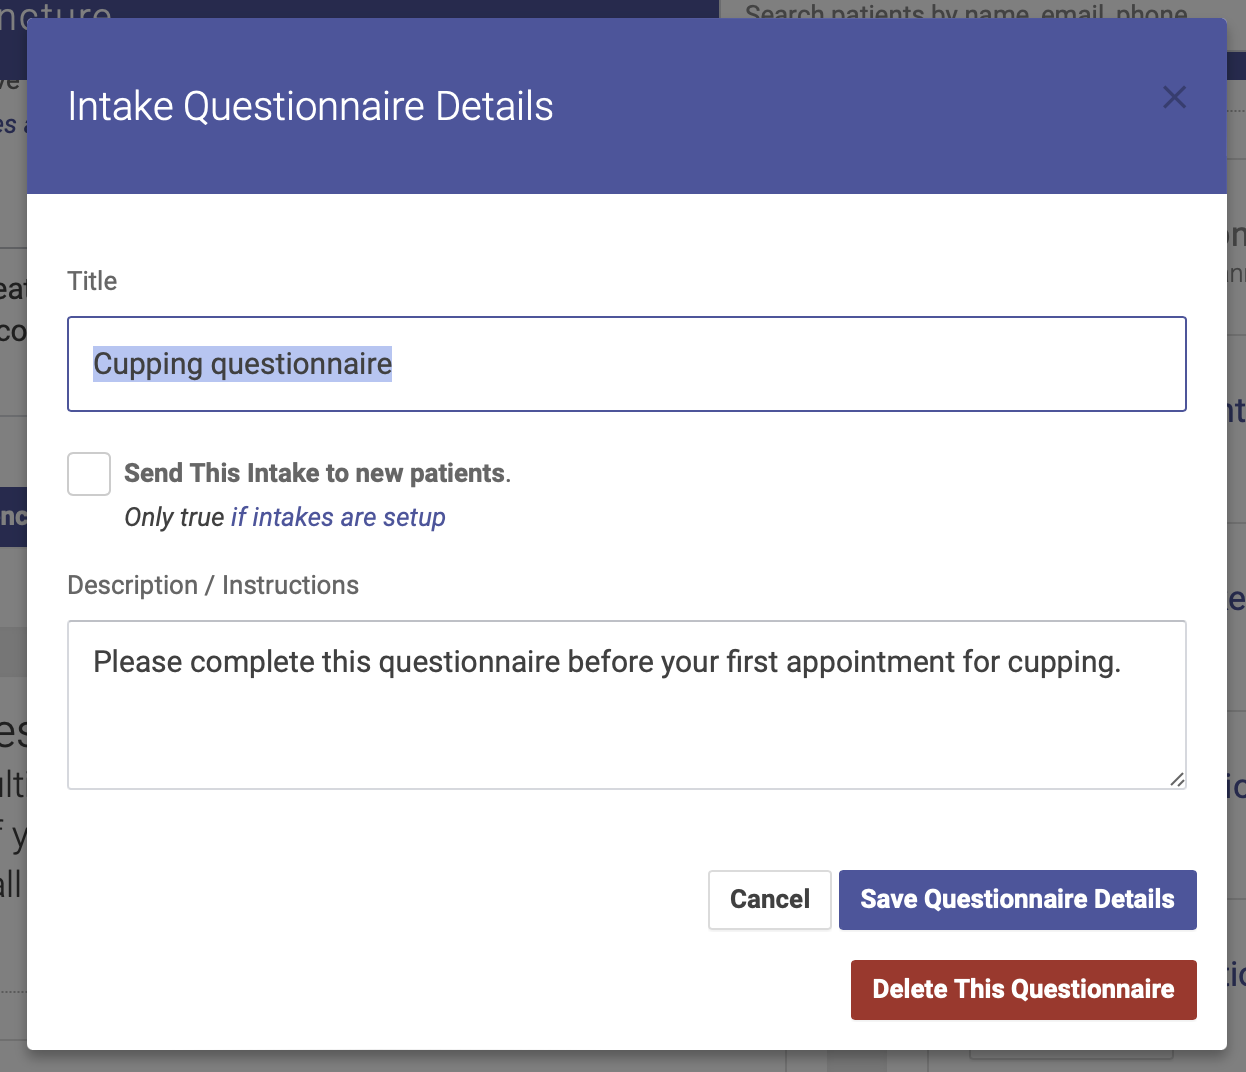
Editing or Deleting a Questionnaire
To edit or delete a questionnaire, click the pencil icon next to the name of the questionnaire. To edit, enter your changes and click Save Questionnaire Details. To delete, click Delete This Questionnaire.
Once you have created your questionnaire(s), you can add, edit and delete groups and individual questions for each questionnaire.
Editing Your Intake Questionnaires
Once you've created your intake questionnaire(s), you can add, edit and delete groups and individual questions for each questionnaire from the Intake Settings page.
Adding Individual Questions and Groups
To add and edit Questions and Groups for a questionnaire, click the Edit Questions button:

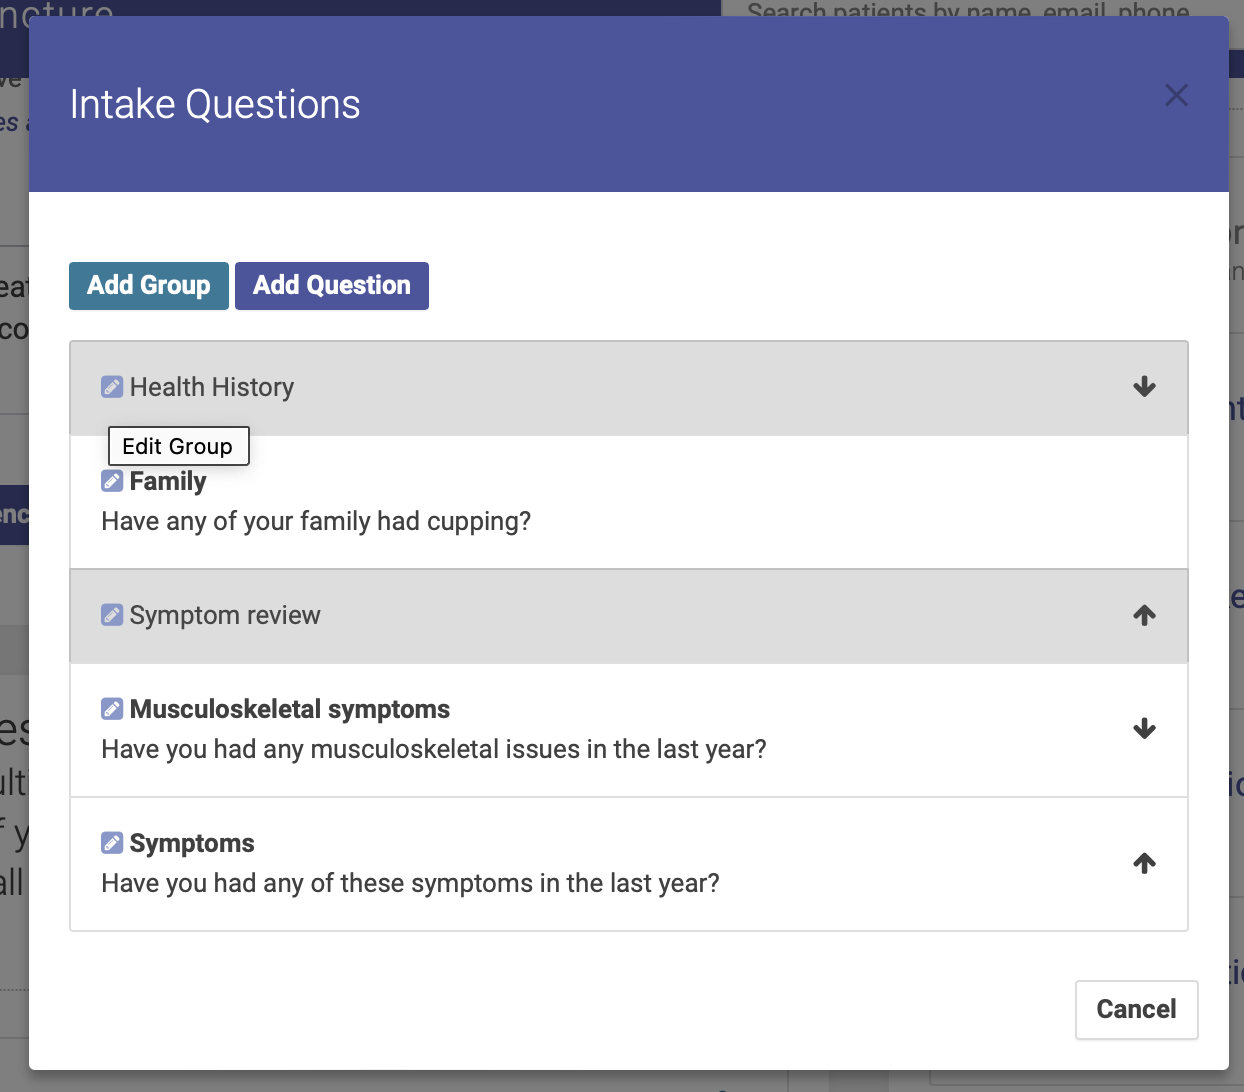
You can then use the Add Group and Add Question buttons to add question groups and individual question. You must add at least one group, and each question must be assigned to a group.
Question Groups
You must have at least one question group on your questionnaire. To add a group, click the Add Group button and a popup modal will appear. Enter your Group name and click Save Group. Your group is now saved.

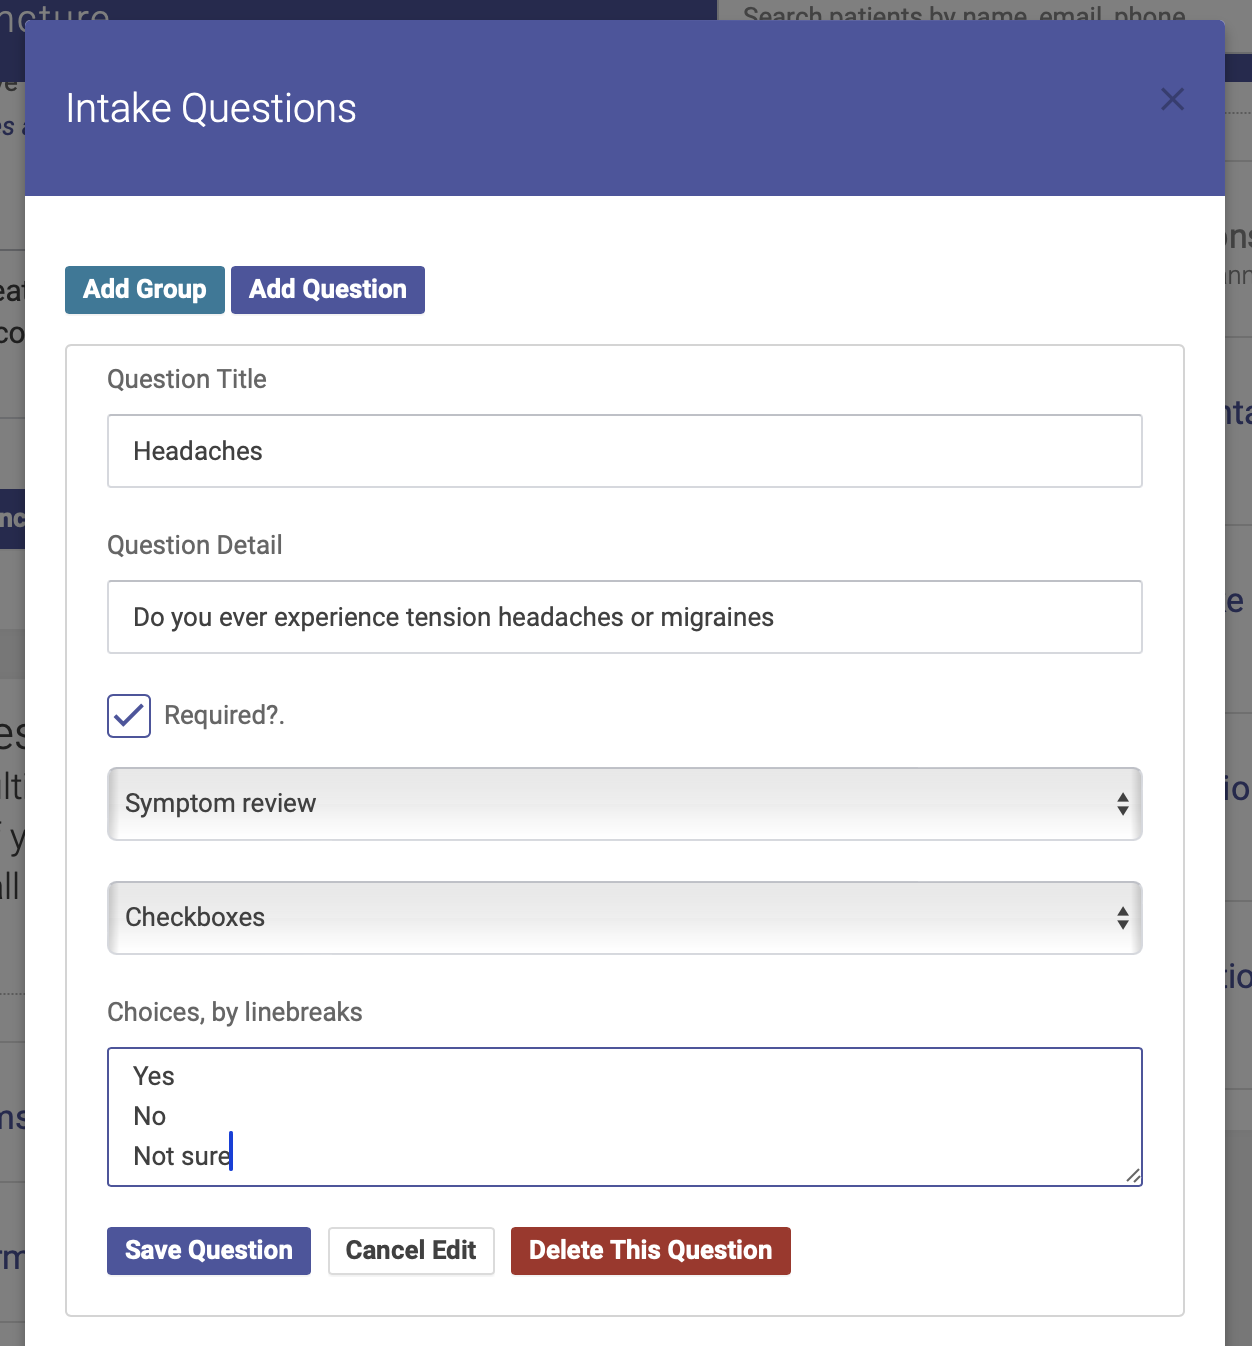
Add a Question
To add an individual question, click Add Question and a popup modal will appear. Enter your question title and detail, choose your answer field type, assign your question to a group, and check the “Required?” box to make this a question that requires an answer. Click Save Question to save your question.
Editing and reordering questions and groups
To edit a question or group, click on the pencil icon next to the question or group name. Be sure to click Save Question or Save Group when finished.
To reorder your questions or groups, use the arrows on the right hand side of your question and group list.
Sending Intake Form Links
Intake form links can be sent to new patients both automatically and manually.
Automatic
To automatically send an intake form link when a new patient creates an account, go to your Settings and Templates page. Under Basics, check the Send Intake box. You can also do this from your Intake Form Settings page. When this box is checked, patients will automatically receive their intake form link:
Manual
You can also manually sent an intake form link from the Patient Profile page. Just click the Resend button in the Intake section:
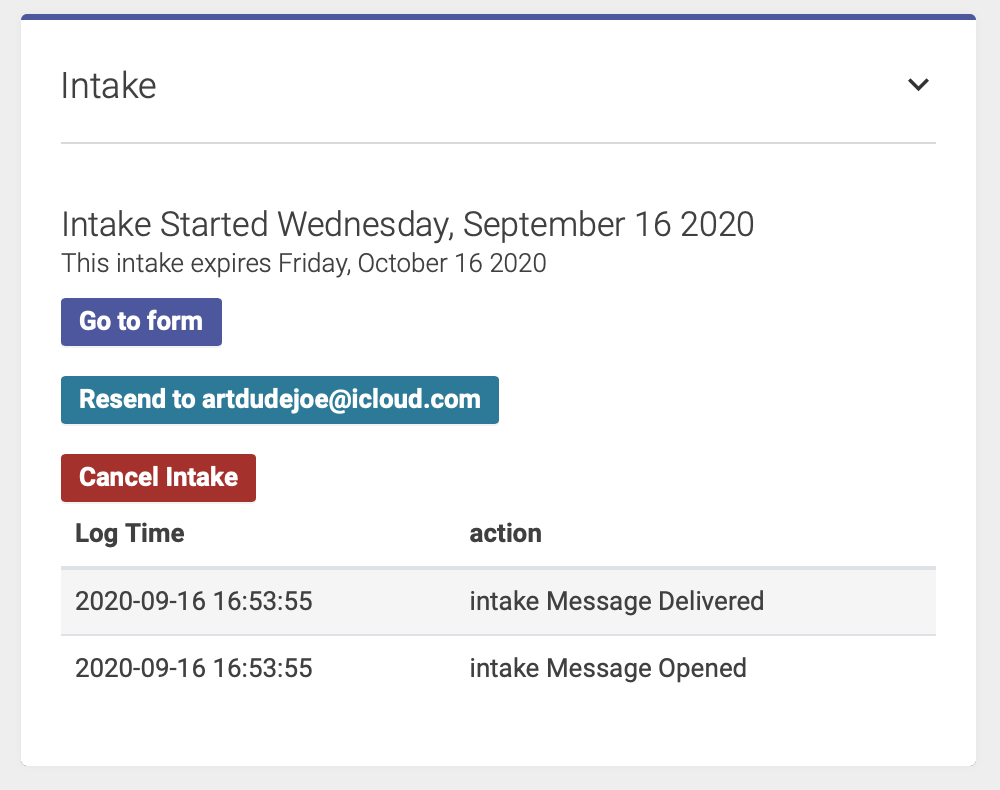
The Intake section on the Patient Profile page also shows a log of when intake form links were delivered and opened.
Click Go to Form to open the intake form directly from the Patient Profile page.
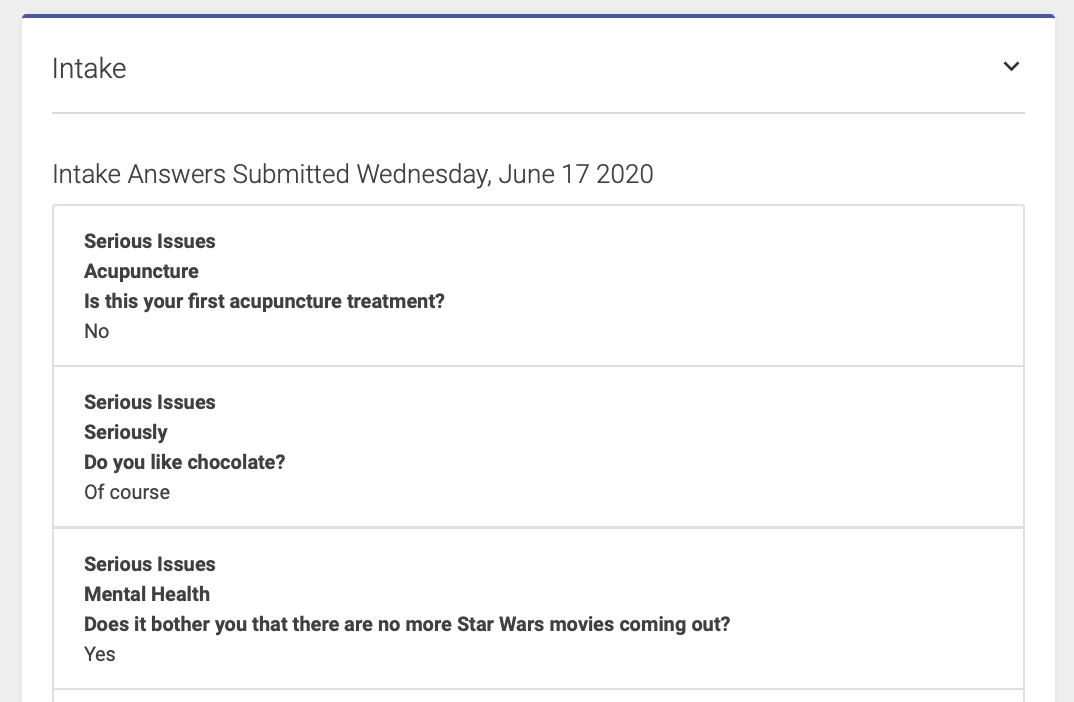
Once a patient has completed their Intake Form, their answers will appear in the Intake section on their Patient Profile page:
New or Updated Intake
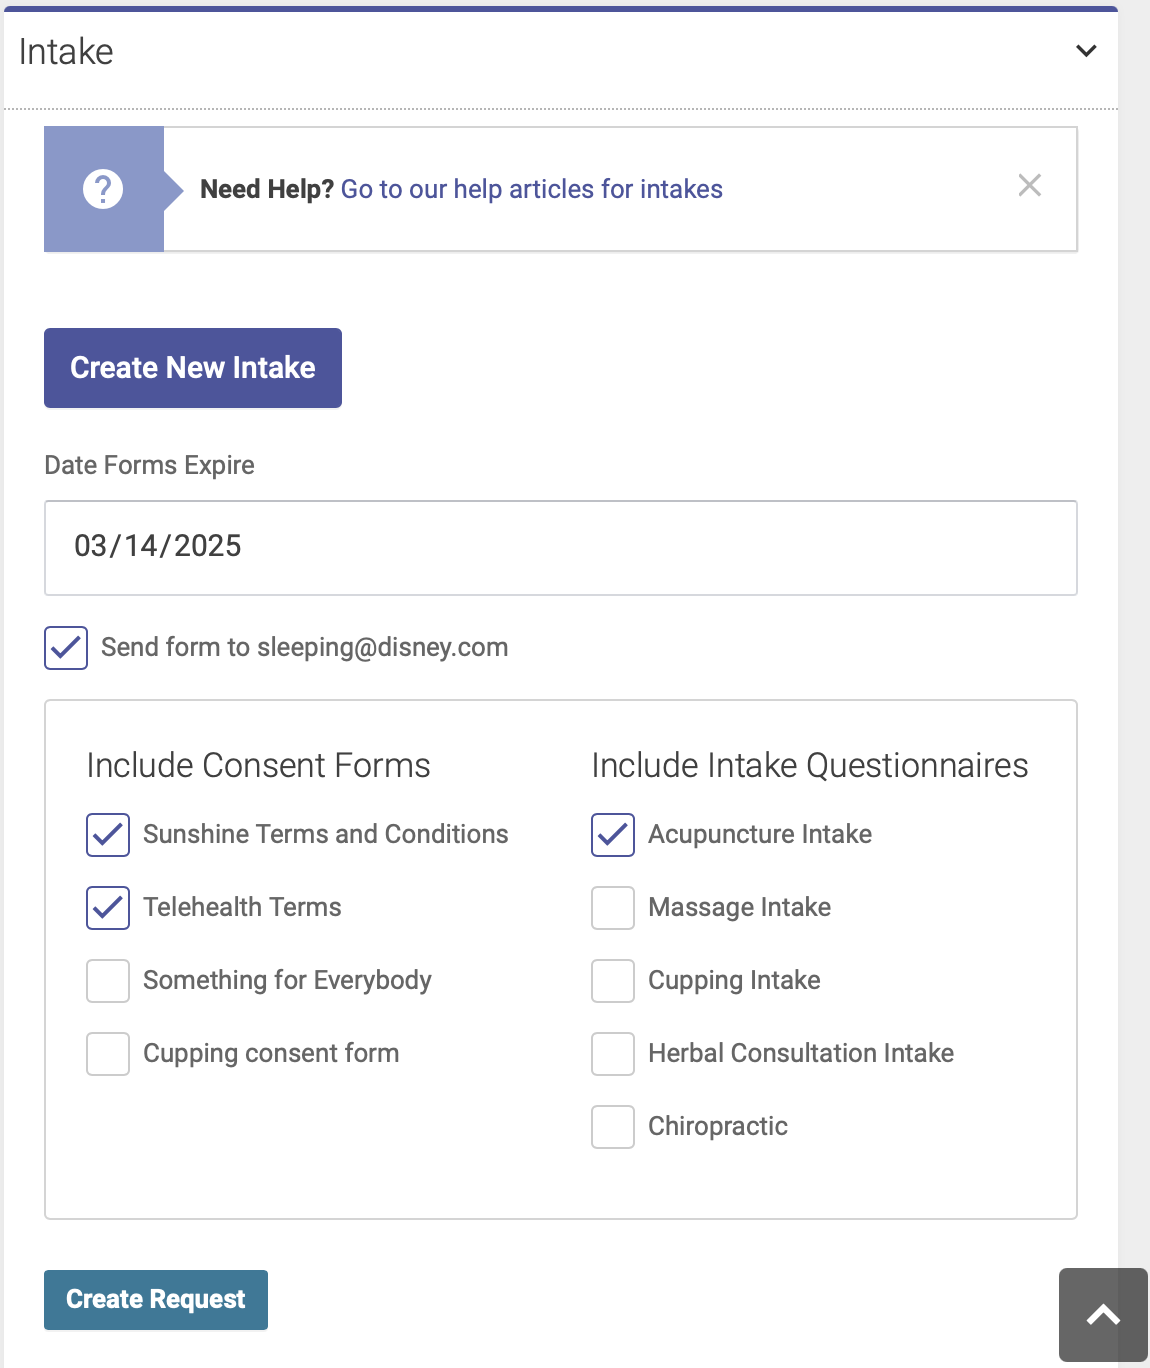
You can create a new or updated intake form for a patient who has a previously completed a form. To do this, click the Create New Intake button at the top of the Intake field on the Patient Profile page. Then select which form(s) you would like to send, and click Create Request to email the form(s) to the patient:
Viewing Intake Forms
Note: Intake Form responses can only be viewed by Users with Practitioner level permission.
On the Intake Forms page, you’ll see a list of all intake forms, including when the form was completed, and when it expires (if applicable).
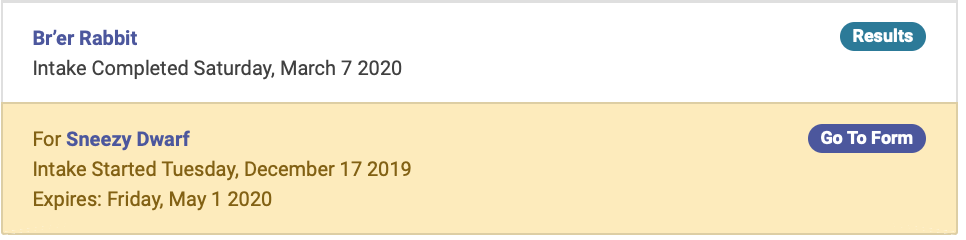
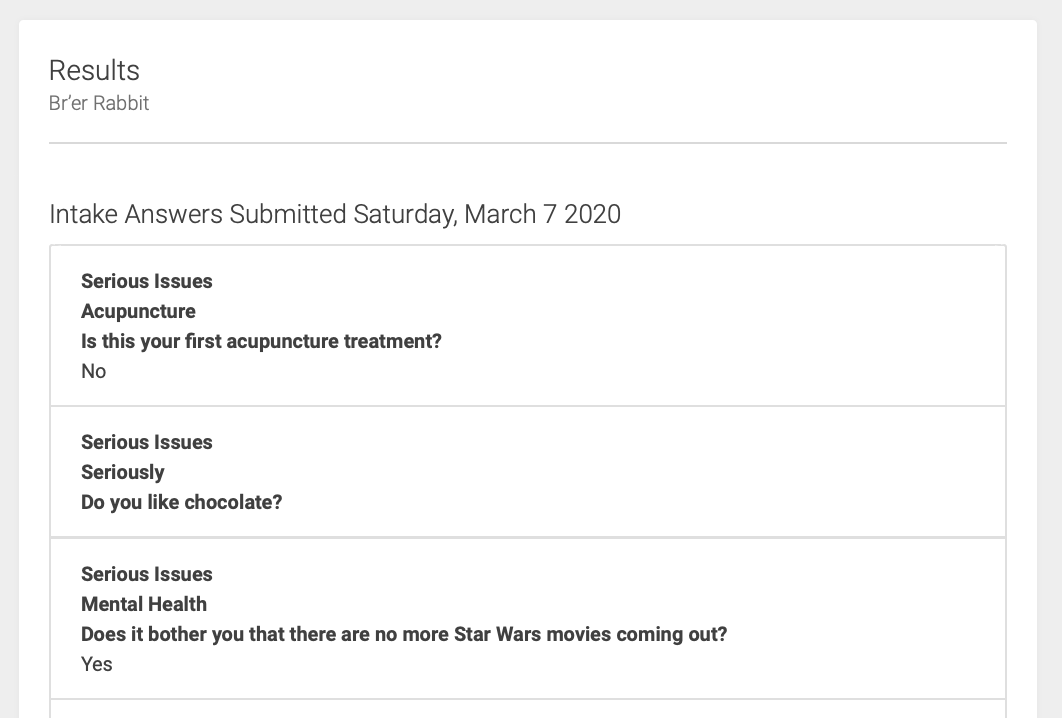
To view a patient’s completed intake form, click the Results button next to their name. Their completed form will then appear on the right side of the page:
If a form has not yet been completed, click Go To Form next to the patient’s name. This will open their form in another window so that it can be completed.
You can also view a patient’s intake form from their Patient Profile page.
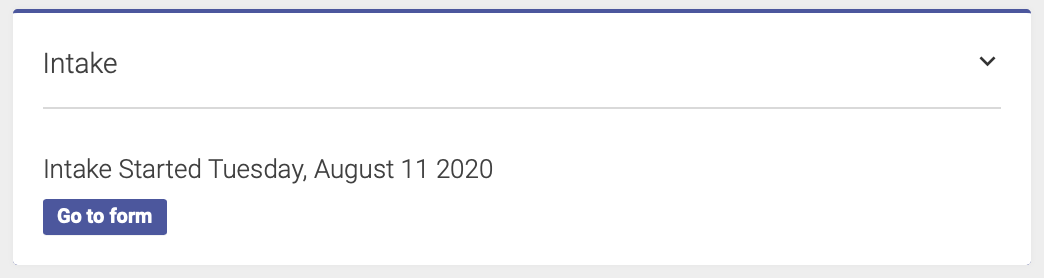
If a form has not yet been created, you’ll see a button to Create Form:

Once the form is created, click Go To Form to open their form in a new window:
Once a form has been completed, you can view the patient’s responses from their Patient Profile page. Intake form responses are only viewable by users with Practitioner level permissions.
