EHR Help
For practitioners in the Open ACU system.
- Electronic Health Records
- Treatment Codes
- Treatment Groups
- EHR Preferences
- Private EHR Note
- EHR By Block Page
- Entering EHR Notes
- EHR Appointments Page
- Viewing Treatment History
- Viewing Unlocked Records
- Printing Health Records
- Users Who Can Enter Records
- Intake Forms
- Intake Form Settings
- Editing Your Intake Questionnaires
- Sending Intake Form Links
- Viewing Intake Forms
- Downloading Health Records
Electronic Health Records
Use Open ACU to record secure health records.
Treatment Codes
Treatment codes are shorthand for the points that a practitioner uses most frequently. Each practitioner can create their own list of treatment codes. To do so, go to EHR -> Preferences.
Any time you add or remove codes, you must click Save Treatment Codes before navigating away from the page in order to save your changes.
Here's a quick video look:
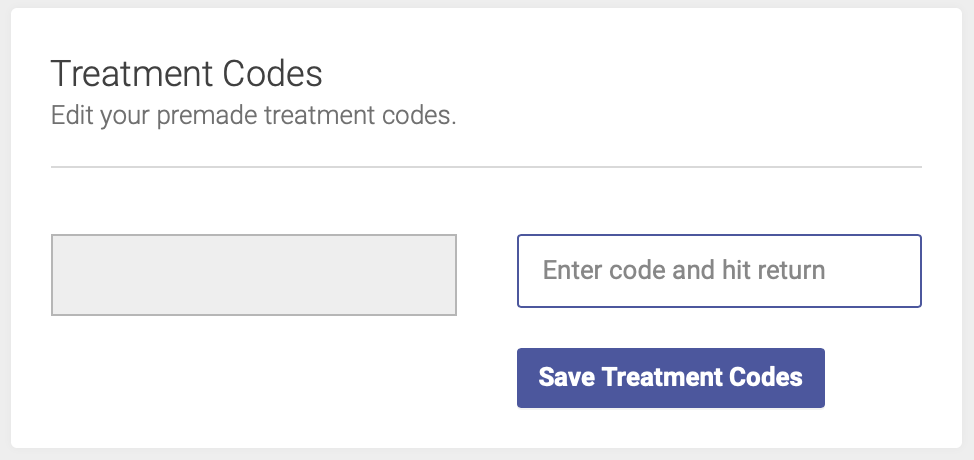
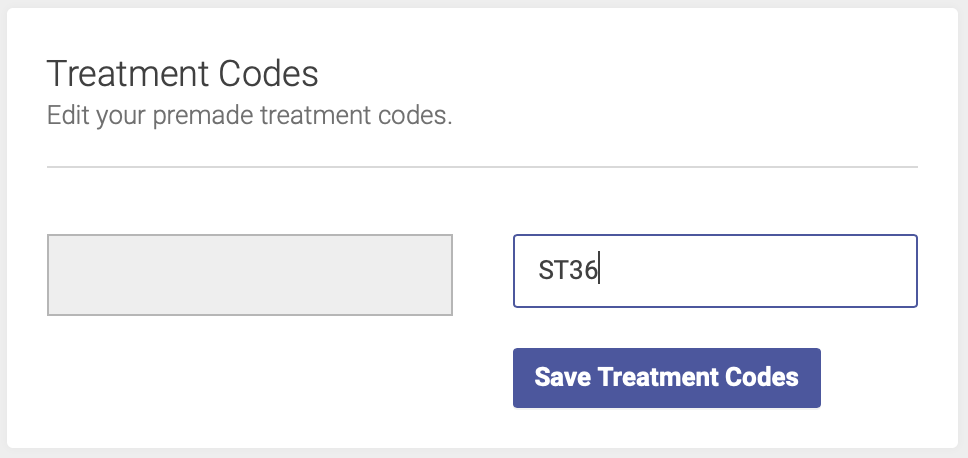
To add a code, enter the point name/abbreviation in the empty Treatment Codes box:
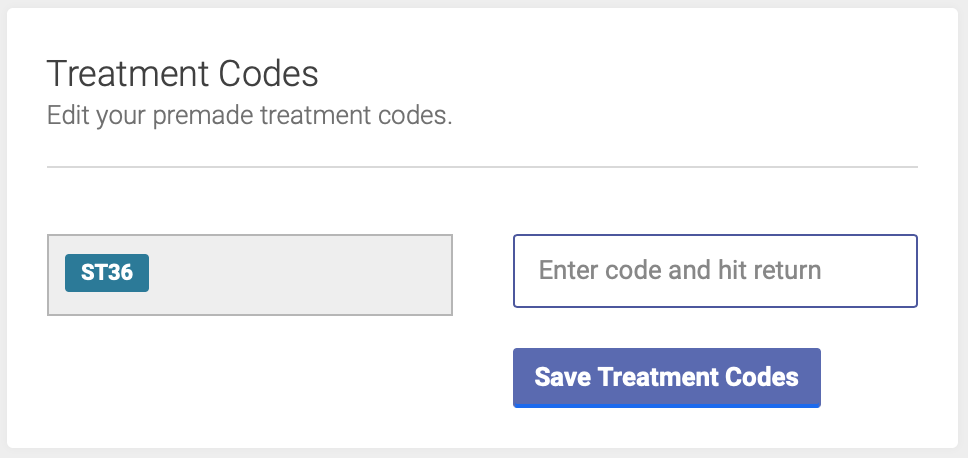
Once you hit Return, the code will be saved in your list:
Note: You can enter up to 20 alphanumeric characters for your Treatment Codes. Underscore (_) is the only punctuation allowed. If you enter a space, it will automatically correct to an underscore, i.e. "ST 36" will change to "ST_36"
To delete a code, simply click on the code abbreviation - this will remove it from your list of codes.
Remember, any time you add or remove codes, you must click Save Treatment Codes before navigating away from the page in order to save your changes.
Treatment Groups
Treatment groups are your point combinations. Each practitioner can create their own list of treatment groups, based on the point combinations they use most frequently. To do so, go to EHR -> Preferences.
Any time you make changes to a Treatment Group, click Save Group to save your changes.
Here's a quick video look:
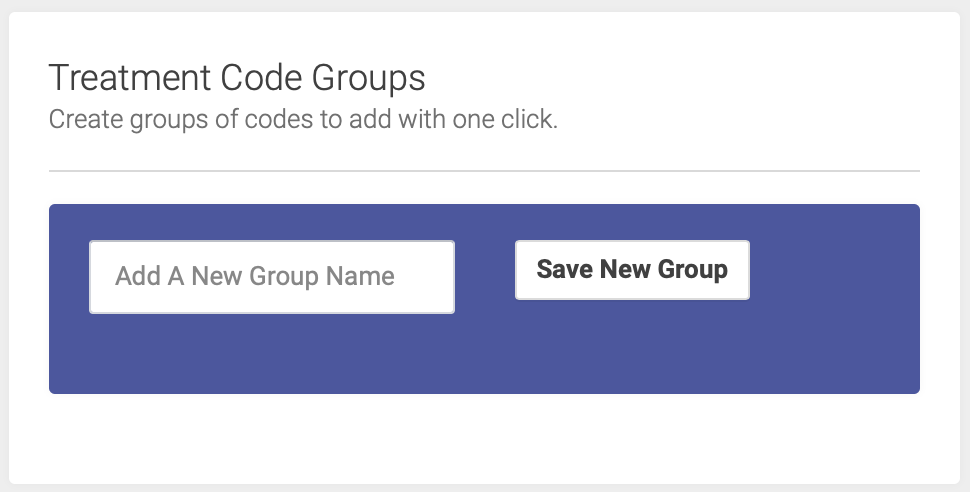
To create a group, enter the group name in the Add a New Group Name box and click Save New Group:
Once you've created some groups, you'll see a list of your groups with options to make changes to the group:
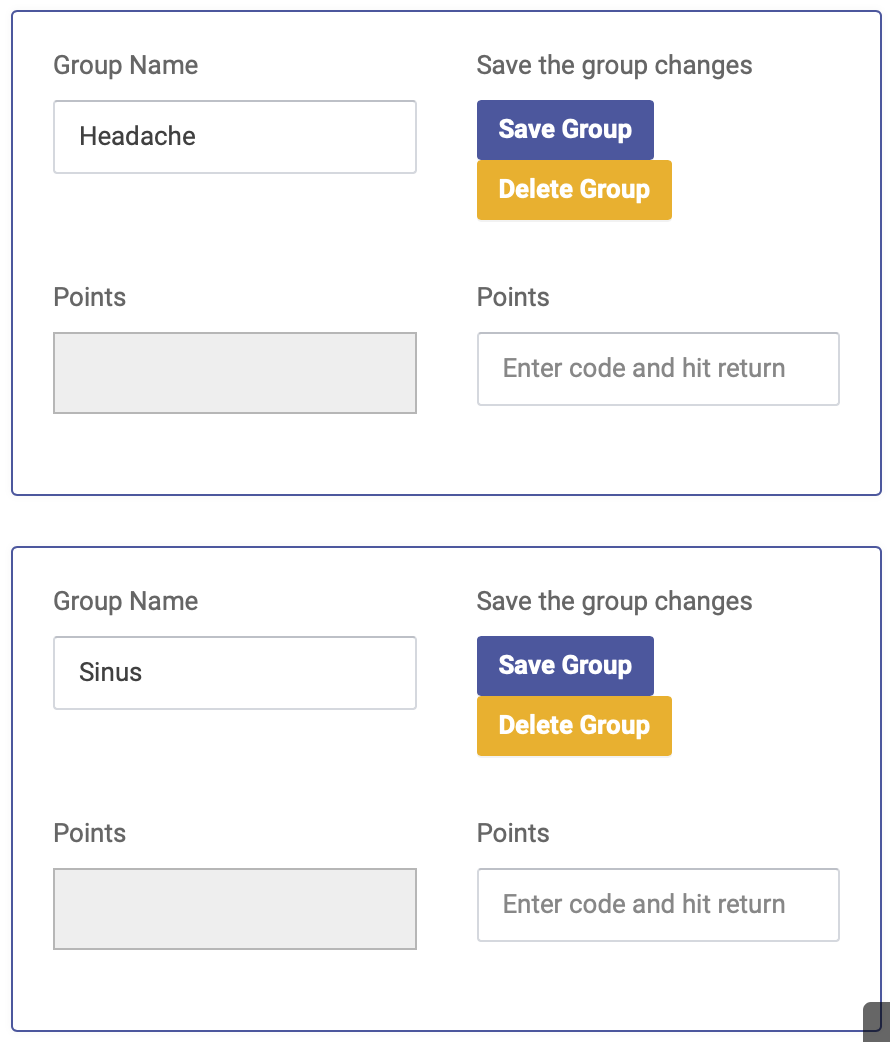
To add points to a group, enter the code for each point and hit Return. You'll see the points for each group under the group name:
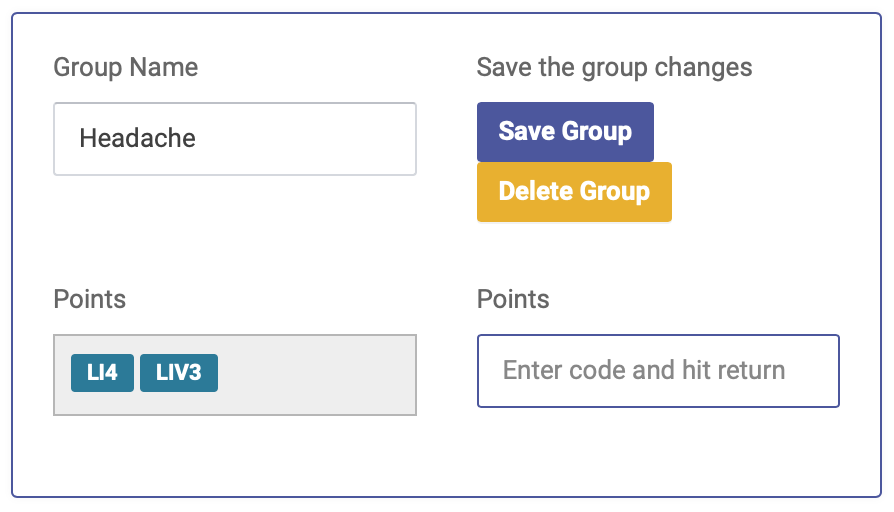
To remove a point from a group, simply click on the treatment code for that point.
Remember that any time you make changes to a Treatment Group, click Save Group to save your changes.
To delete a group, simply click the Delete group button.
EHR Preferences
Note Labels
By default, your EHR notes will contain two fields: Note and Plan. If you want to add more fields, you can do that on your EHR Preferences page.
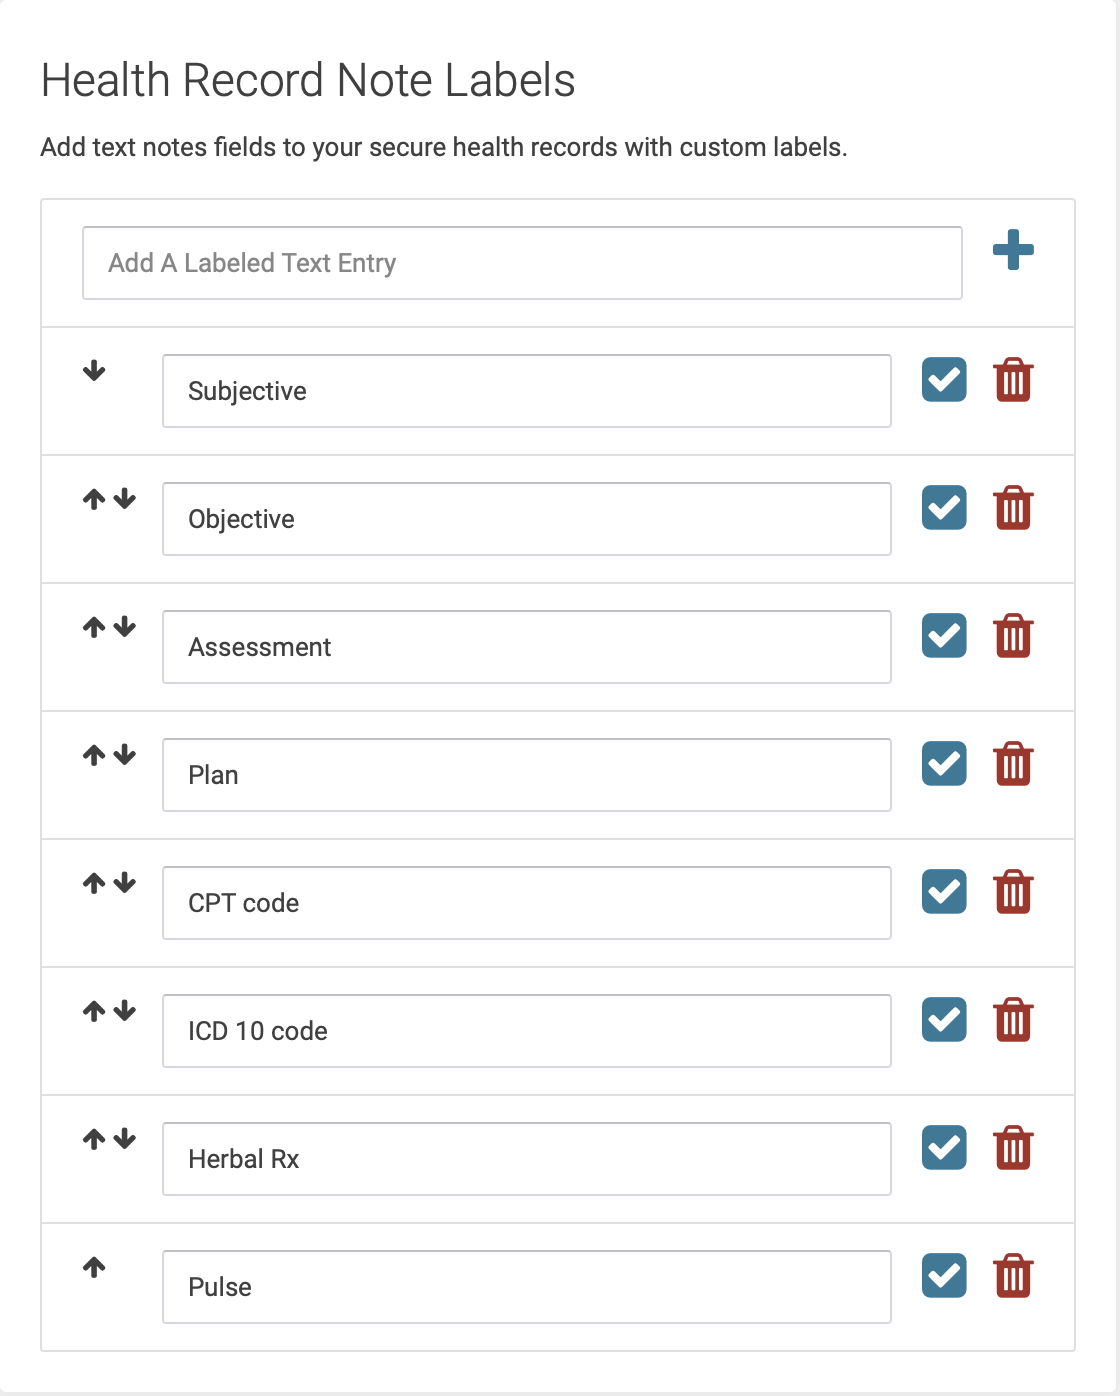
You can create up to 12 fields, and each of the fields you create will appear when you enter your EHR notes for each treatment.
You can add or delete fields, and use the arrows to change the order in which your fields appear in your EHR notes.
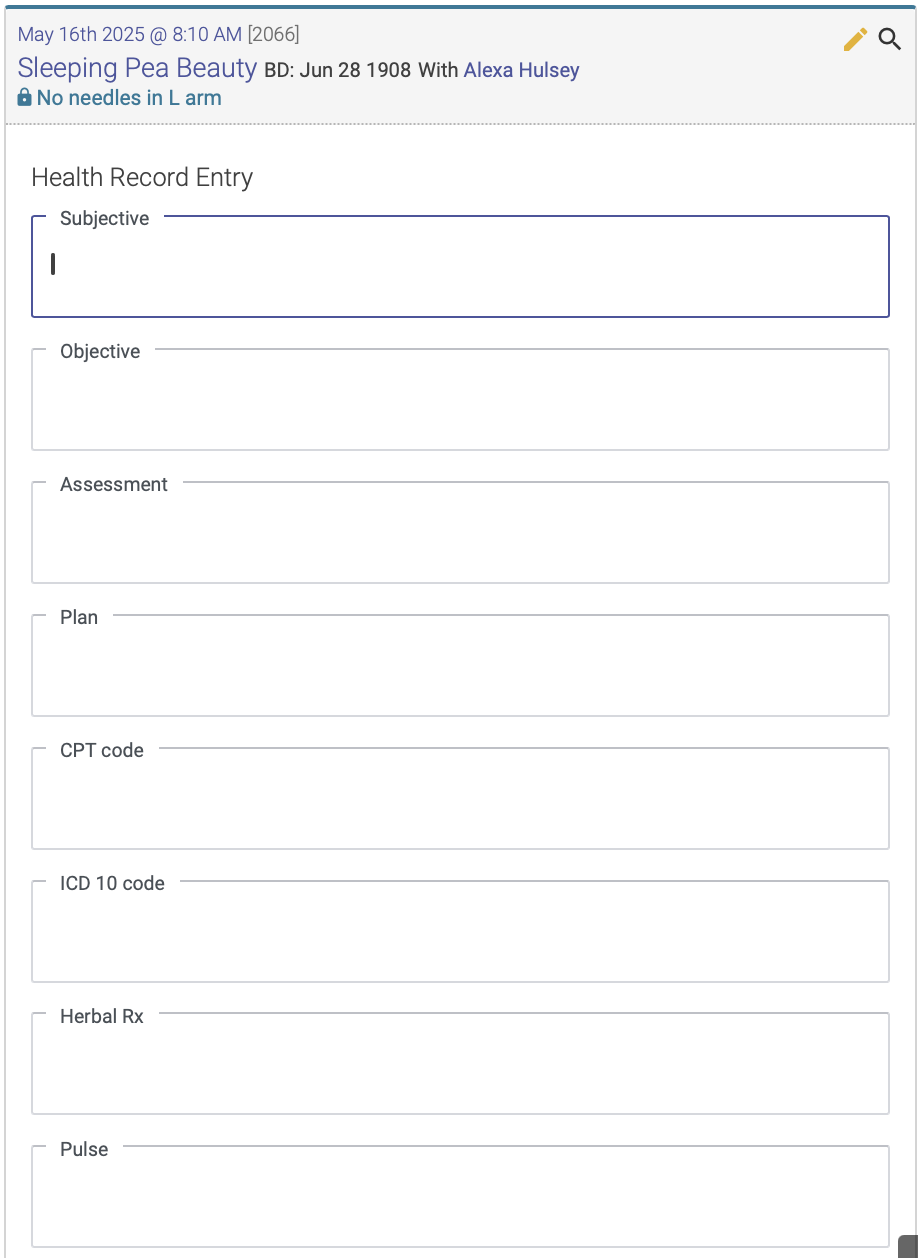
This is what you'll see on the EHR Preferences page, where you create your Note Labels:
This is how it will appear when you enter a chart note:
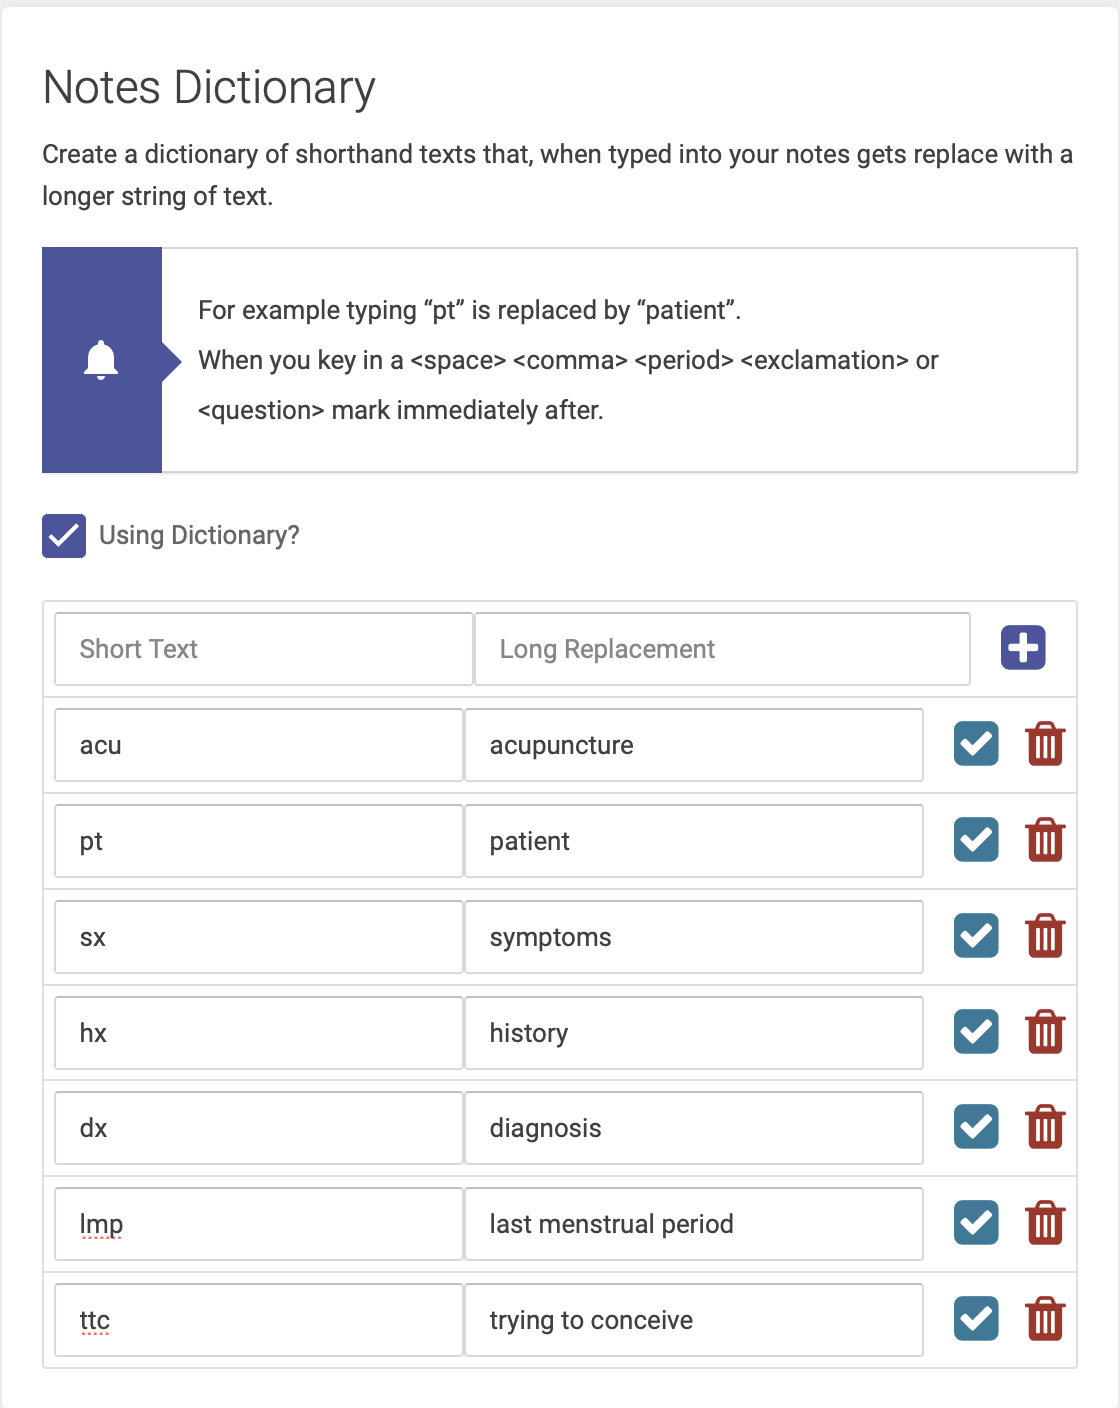
Notes Dictionary
The Notes Dictionary gives you the ability to create text shortcuts for faster charting. For example, you can type "pt", and it will automatically convert to "patient" in your EHR note.
To enable the Notes Dictionary, check the "Using Dictionary" checkbox. Then create your list of text shortcuts in the table, by entering the short text and long replacement:
Private EHR Note
Private EHR notes can be viewed by users with Practitioner permissions by not by Admin users. The private EHR note should be used to document medical or treatment-related information that needs to be viewed on an ongoing basis.
For example, let’s say a patient has a strong adverse reaction anytime needles are placed in his head, so you want practitioners to avoid needling the head. You’d want every Practitioner to be aware of this, but it’s not something relevant for Admin users. So you’d document this as a Private EHR note.
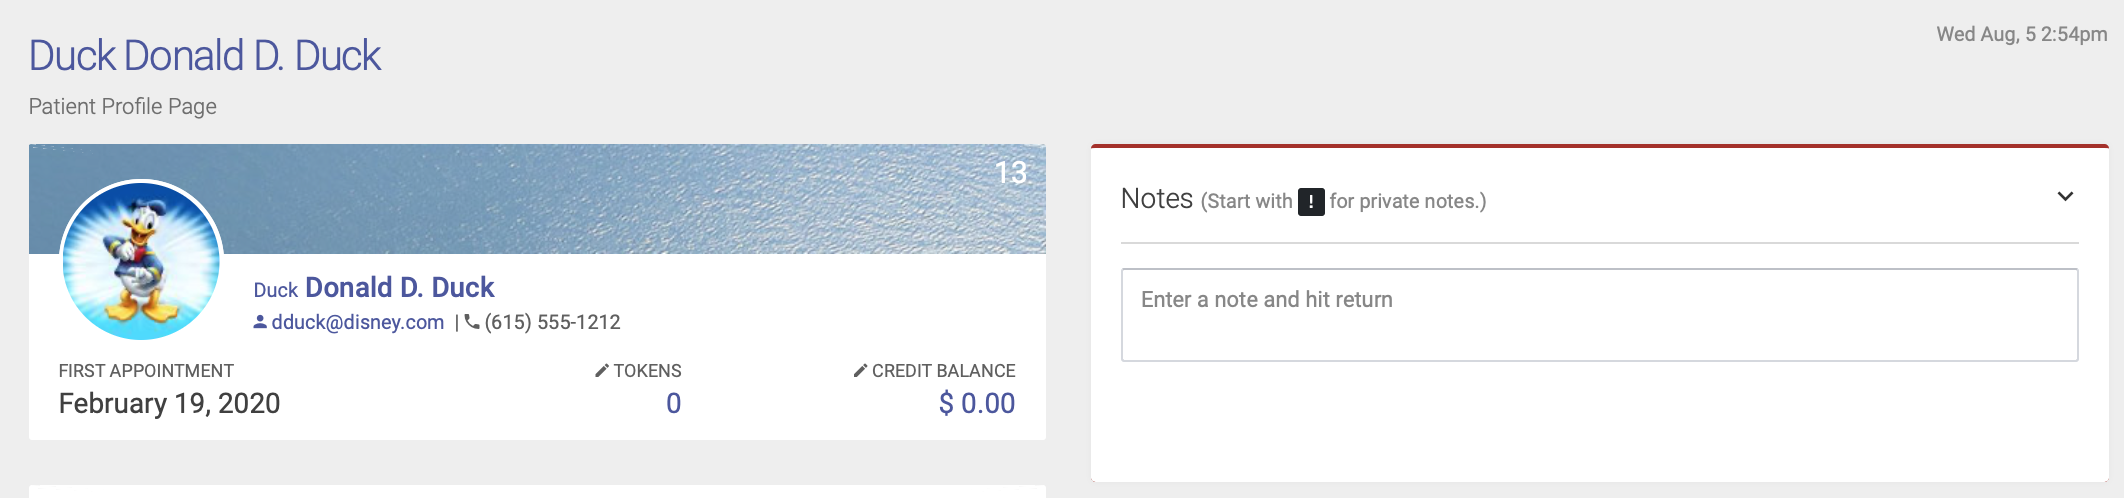
To record a Private EHR note, click on the patient’s name from either the schedule or the EHR. This will take you to their patient profile page, where you’ll use the Notes section in the upper right corner:
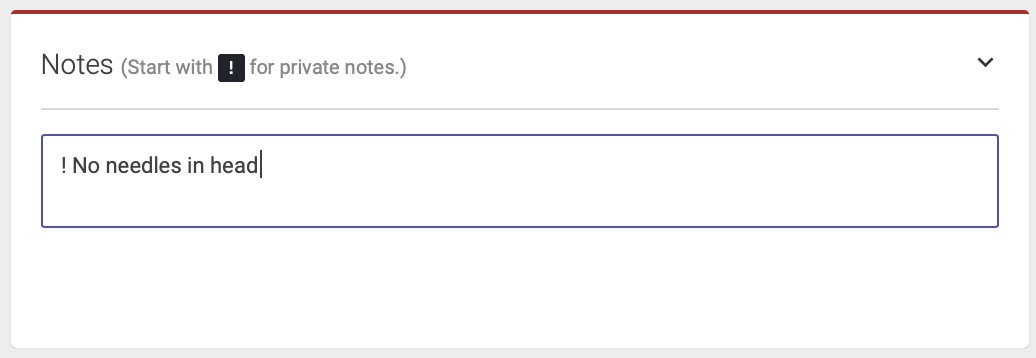
Type an exclamation point (!) first, and then enter the note. Enter return to save your note:
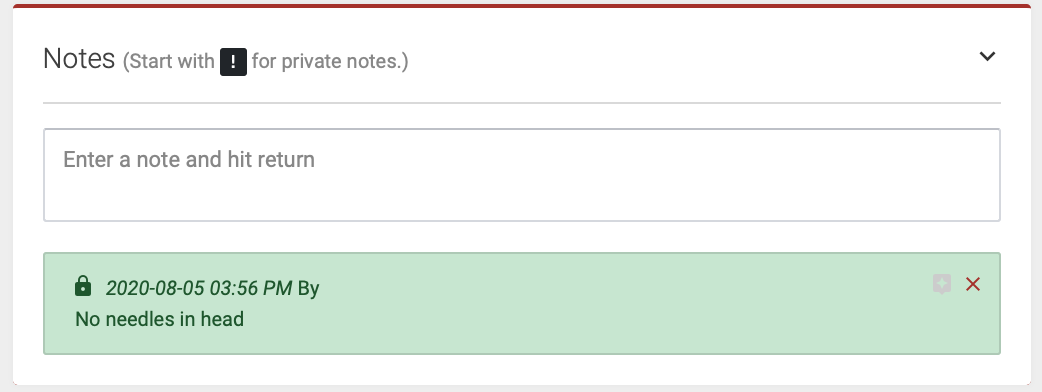
The Private EHR Note will now appear on the patient profile page, but only users with Practitioner permission will be able to see it:
The Private EHR Note will also appear under the patient’s name on the EHR:

To delete a Private EHR Note, simply click the red X next to the note entry on the patient profile page.
EHR By Block Page
The EHR By Block page is where practitioners can enter their EHR notes. Notes can also be entered on the EHR Appointments page. Select the practitioner and click Search to show a list of blocks:
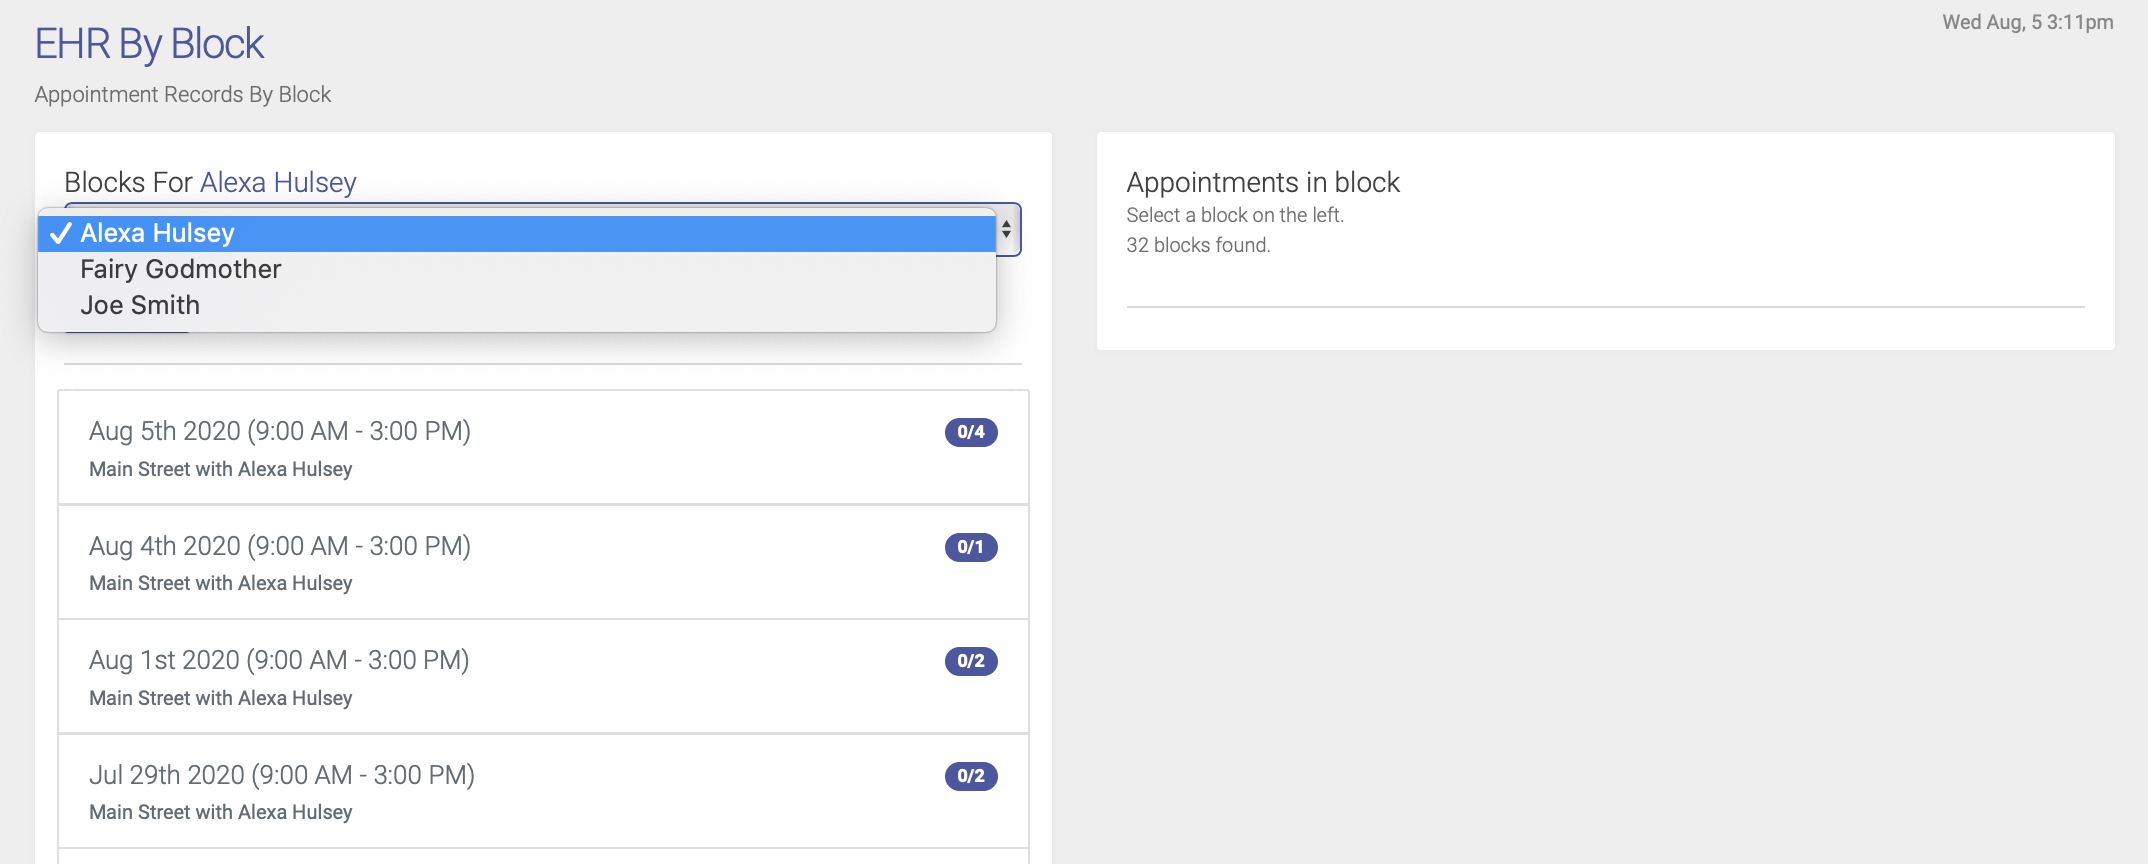
The counter next to each block date shows the number of records that have/have not been completed for each block.
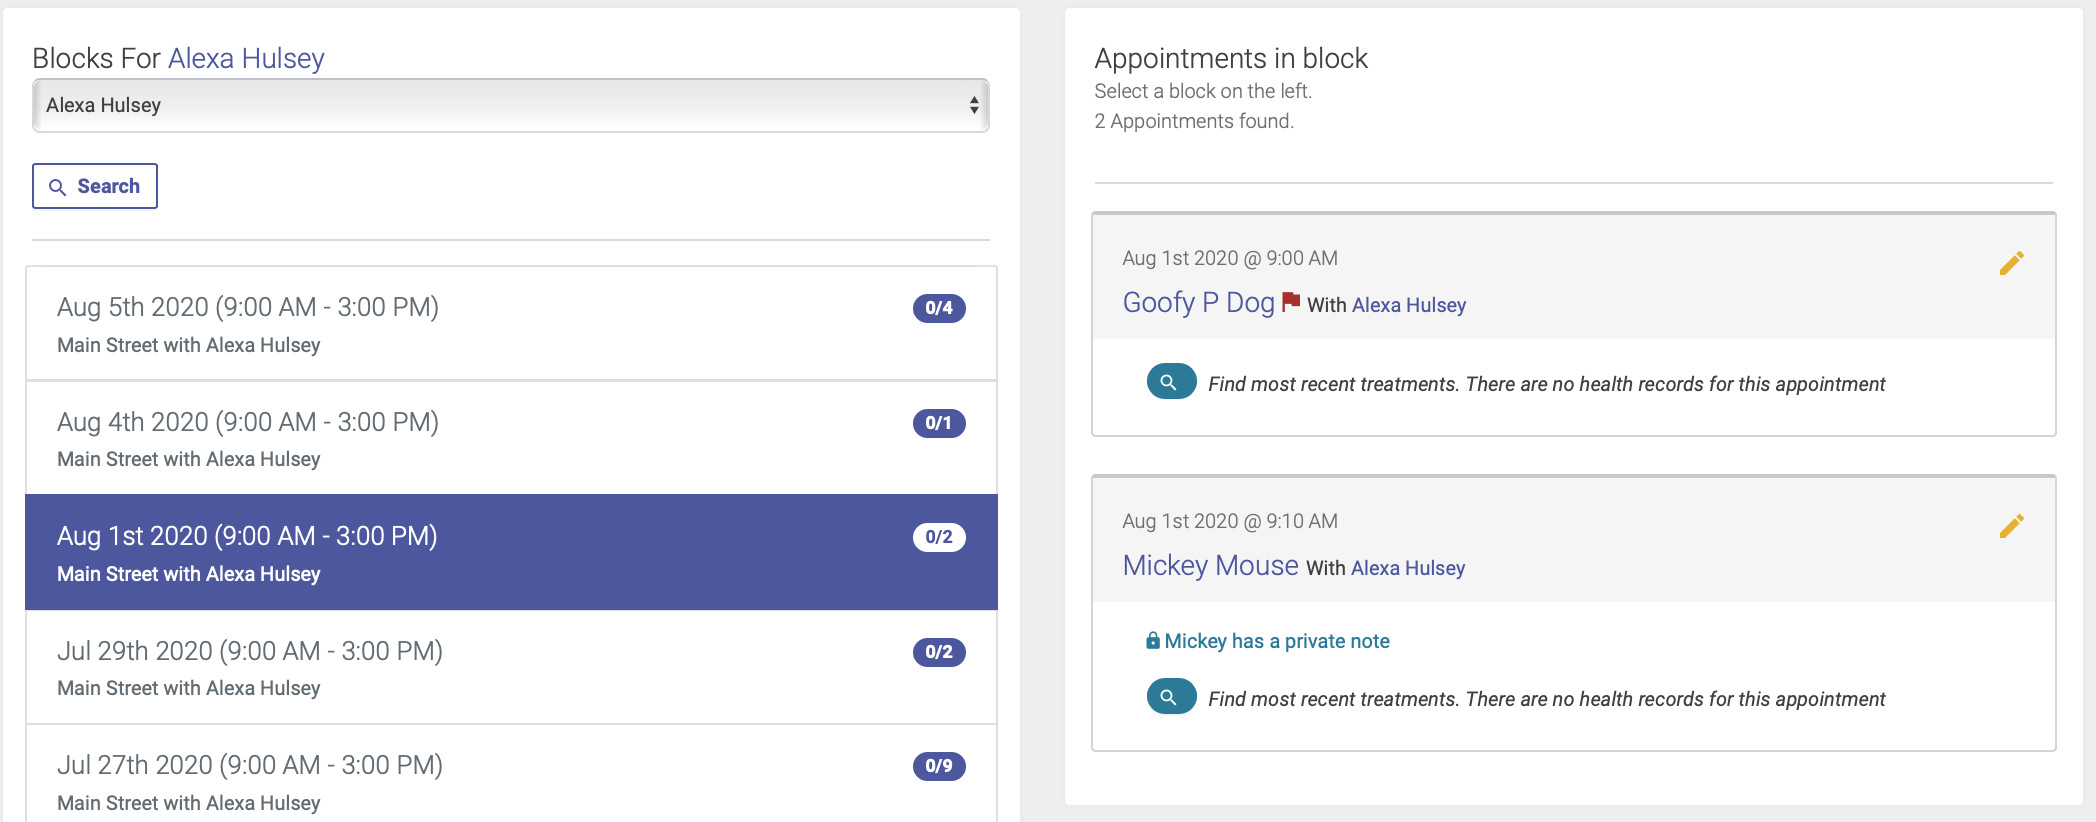
Click on a block to view the appointments for each block page and enter your notes:
Entering EHR Notes
You'll enter your EHR notes from the EHR By Block page or the EHR Appointments page.
Here's a quick video look at how it works:
Entering a New Note
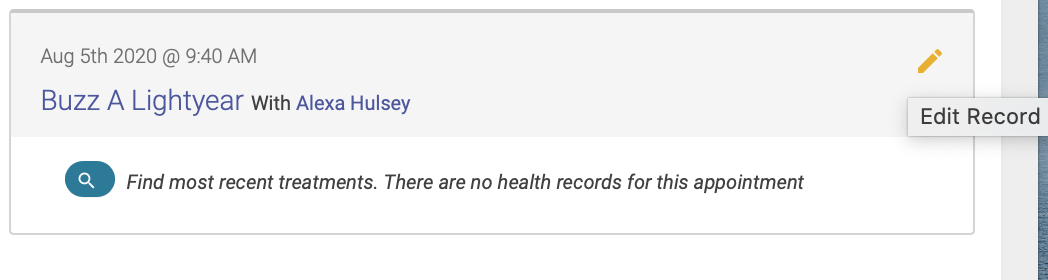
To enter an EHR note, click on the pencil icon next to the patient’s name:
The Health Record Entry fields will appear. The format for the fields is based on your clinic’s EHR preferences, and will appear in either in plain field format:

Or in SOAP format:
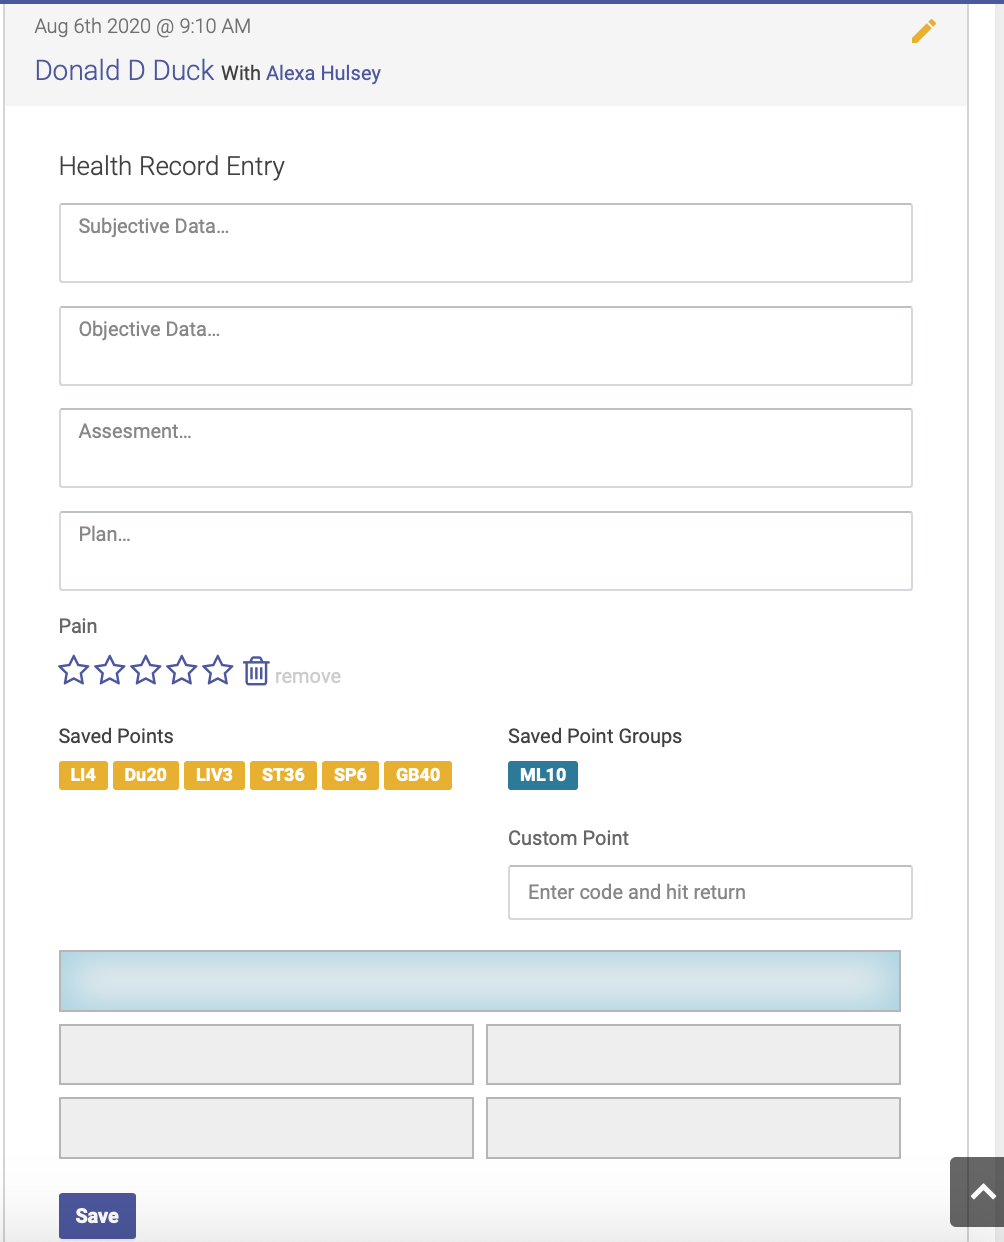
Complete each field, and add your points. First highlight the field for the area of the body: use the top box for head points or bilateral points, and the four quadrant fields for distal or unilateral points. Then click on your saved points or saved point groups to populate each field with points. You can also add points that aren’t saved in your list of treatment codes by using the custom point box.
Make sure you click Save after you've added or changed points. The points will not be saved in the record without doing so. Even if you Lock the records.
Repeating Past Treatments
You can repeat a prior treatment from either the EHR Blocks or EHR Appointments page.
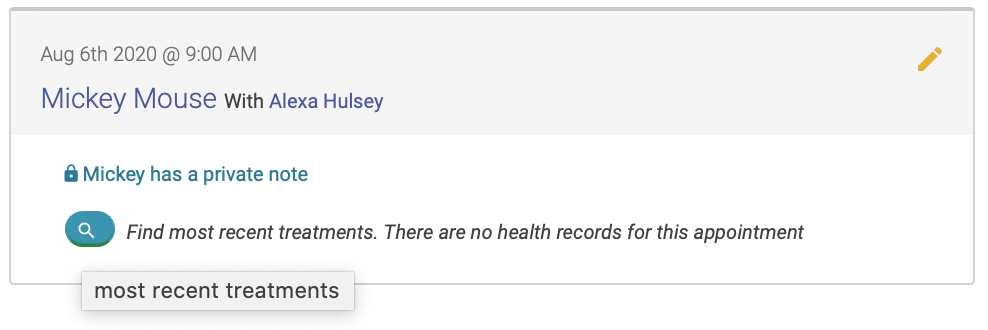
To repeat a past appointment, first you'll need to click on the magnifying class by the patient's name to view their treatment history:
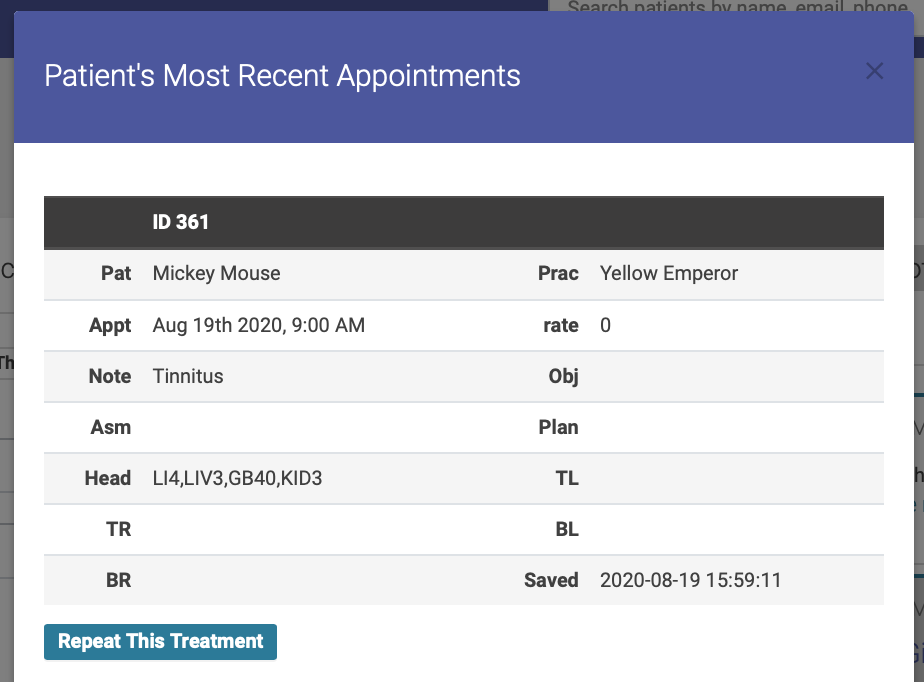
Their treatment history will appear in a popup modal. Simply click "Repeat This Treatment" below the treatment you'd like to repeat:
You can then modify your treatment notes and point selections before saving and locking.
Locking Notes
Once you've entered a complete treatment note, you should finalize your entry by locking the note.
Once you've locked a note, you will be unable to make any further modifications to the note. This ensures the security of your EHR records.
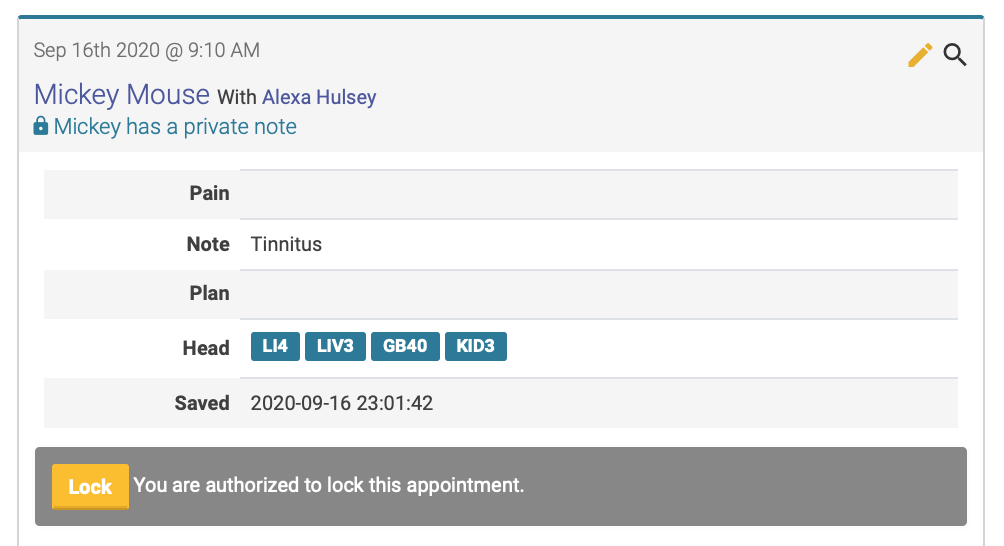
Before you lock a note, you'll see a yellow Lock button below your note entry for that treatment:
Once you've locked a note, the locked record will be date and time stamped:

Adding a Note Addendum
To add an addendum to a locked Note, enter your text in the field below the locked time and date stamp, then hit return. This will save your addendum, and add a time and date stamp:

EHR Appointments Page
The EHR Appointments page is where practitioners can enter their EHR notes. Notes can also be entered on the EHR By Block page.
Select your date range, location and practitioner and click Search to show a list of appointments:

Simply click the pencil icon next to a patient's name to enter your notes.
Viewing Treatment History
You can view a patient’s treatment history, including notes entered by any practitioner for all past appointments, from the EHR Blocks page, the EHR Appointments page, or the Patient Profile page.
EHR Blocks page
To view a patient’s EHR history from the EHR Blocks page, click on the magnifying glass icon below the patient’s name to view their most recent treatments:

Once you click the icon, a modal will appear showing their most recent treatments:

You can also repeat the notes from a previous from this popup modal.
EHR Appointments page
You can view a patient’s EHR history from the EHR Appointments page in the same way as you would from the EHR Blocks page. Click on the magnifying glass icon below the patient’s name to view their most recent treatments.
Patient Profile page
To view a patient’s EHR history from the Patient Profile page, click on the Health Records icon below their name and details:
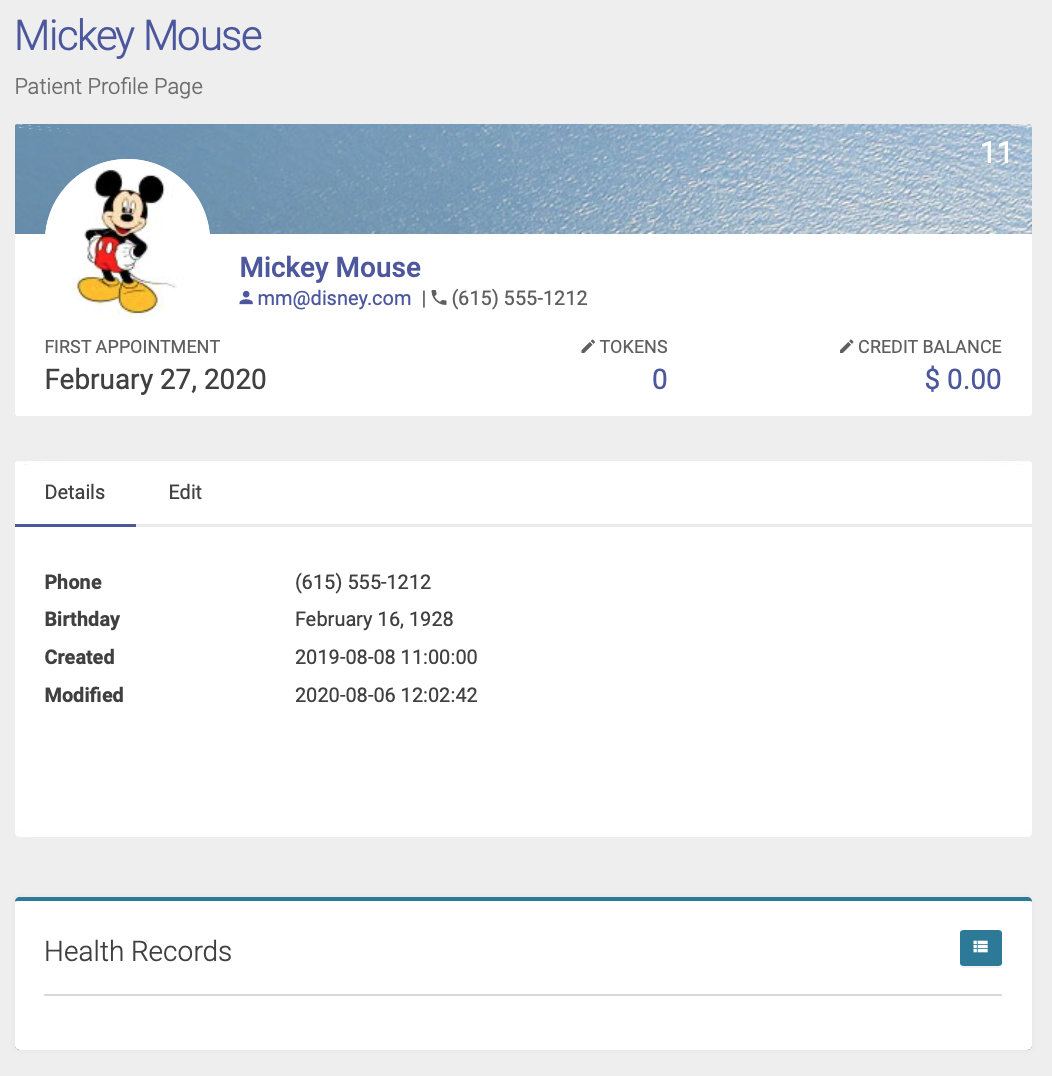
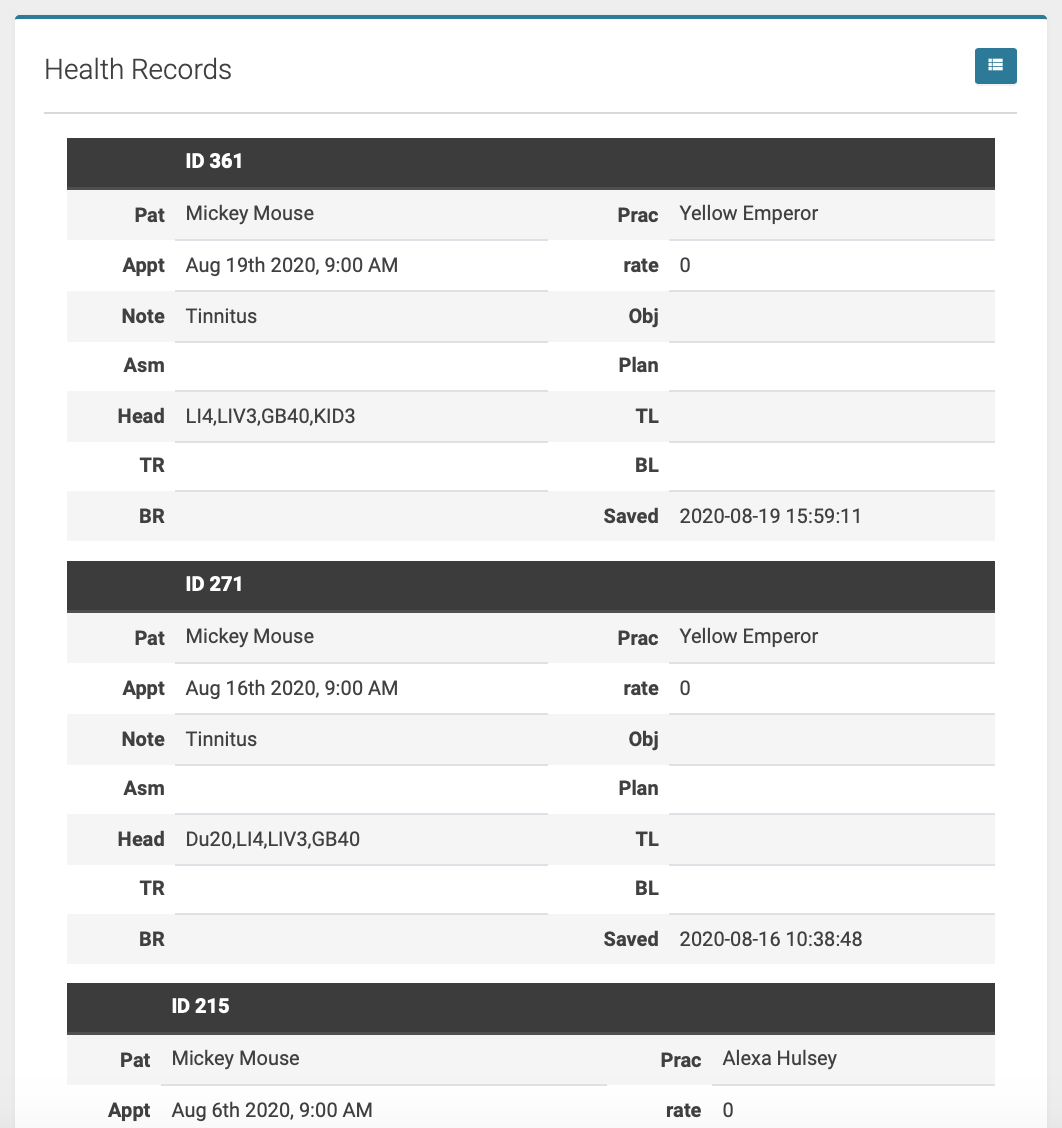
You’ll then see their most recent appointment records with EHR records:
Viewing Unlocked Records
To view a list of health records that have not yet been approved and locked, go to the EHR Appointments page.
Enter your date range and check the box that says Unlocked Records Only: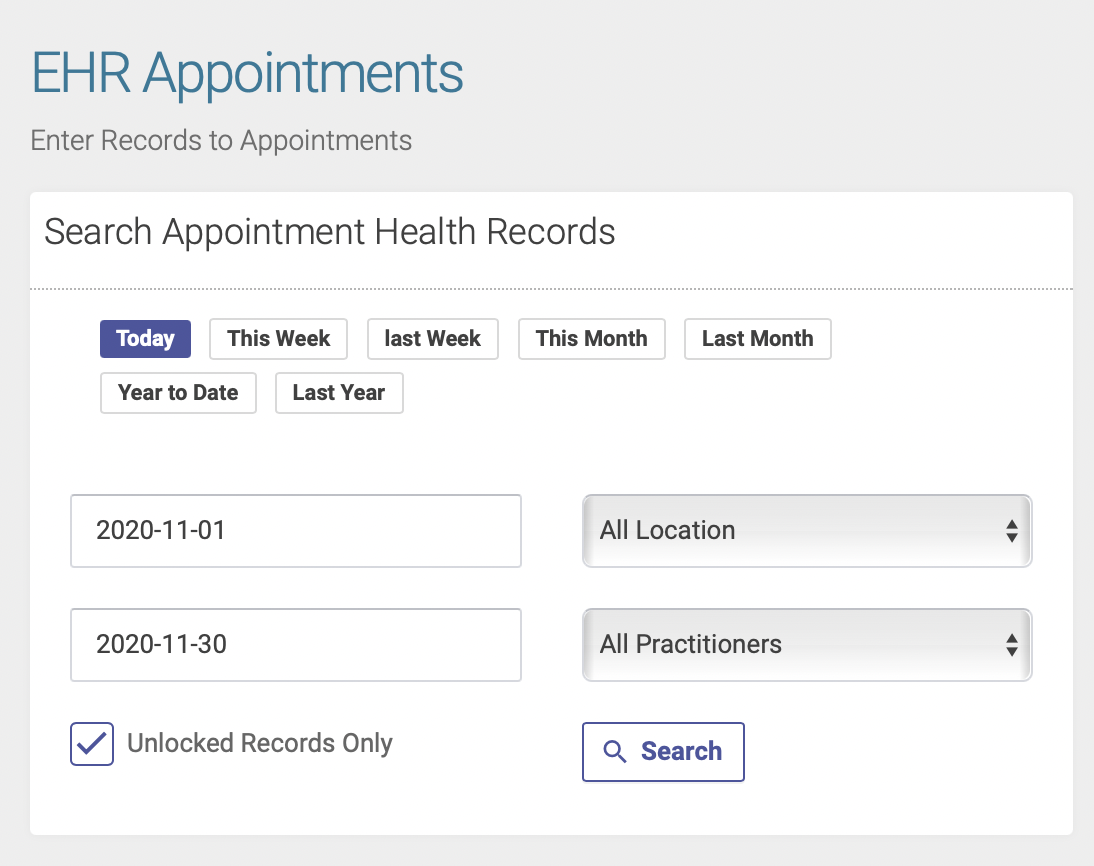
The list of records that need to be approved and locked will appear to the right.
Printing Health Records
If you need to print a patient's health records, you'll do so from the Patient Profile page.
Once you're on a patient's profile page, click the printer icon next to the patient's name at the top of the page:
![]()
A date range search box will appear. Enter your date range and click the magnifying glass to see your search results:
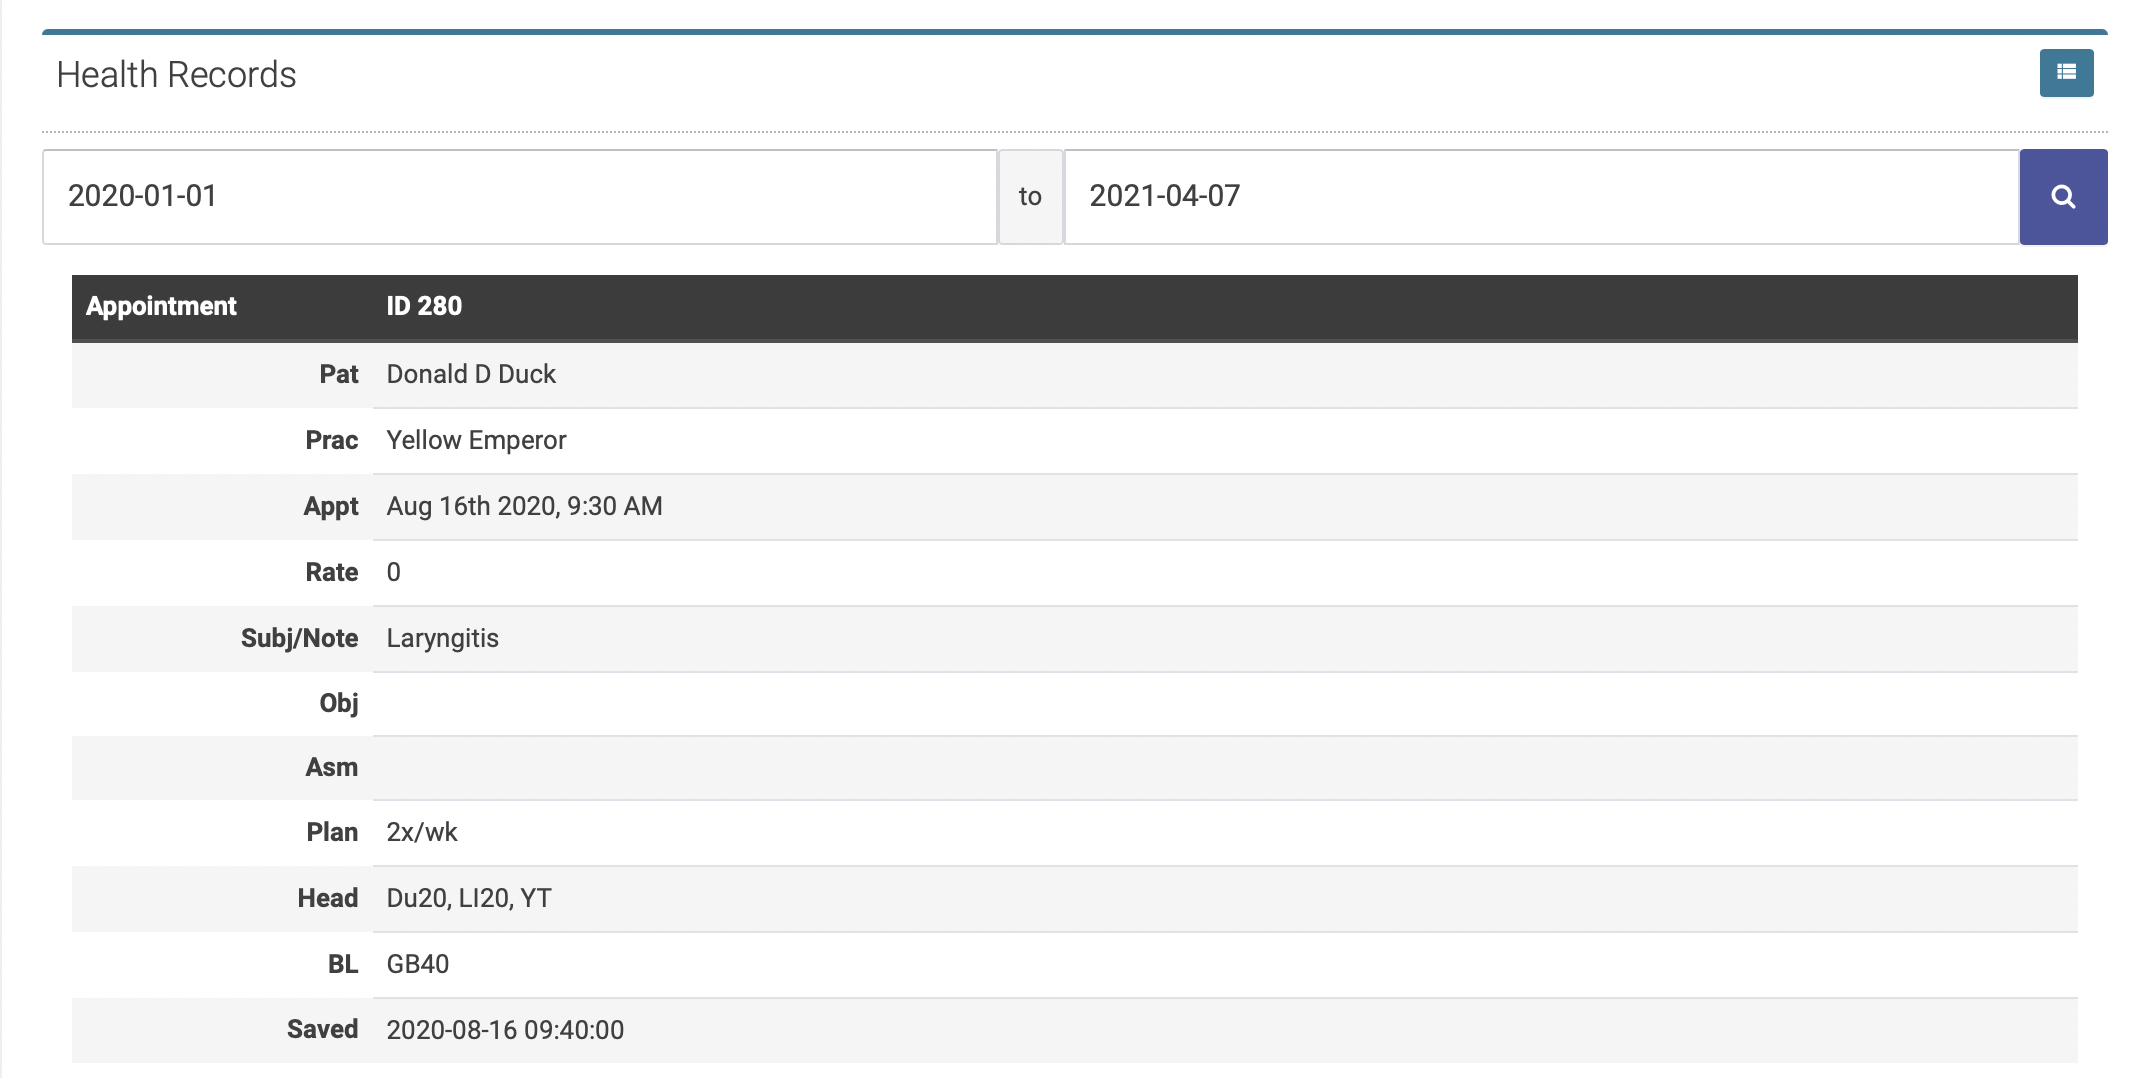
The health records for your selected date range will appear below the search fields in reverse chronological order.
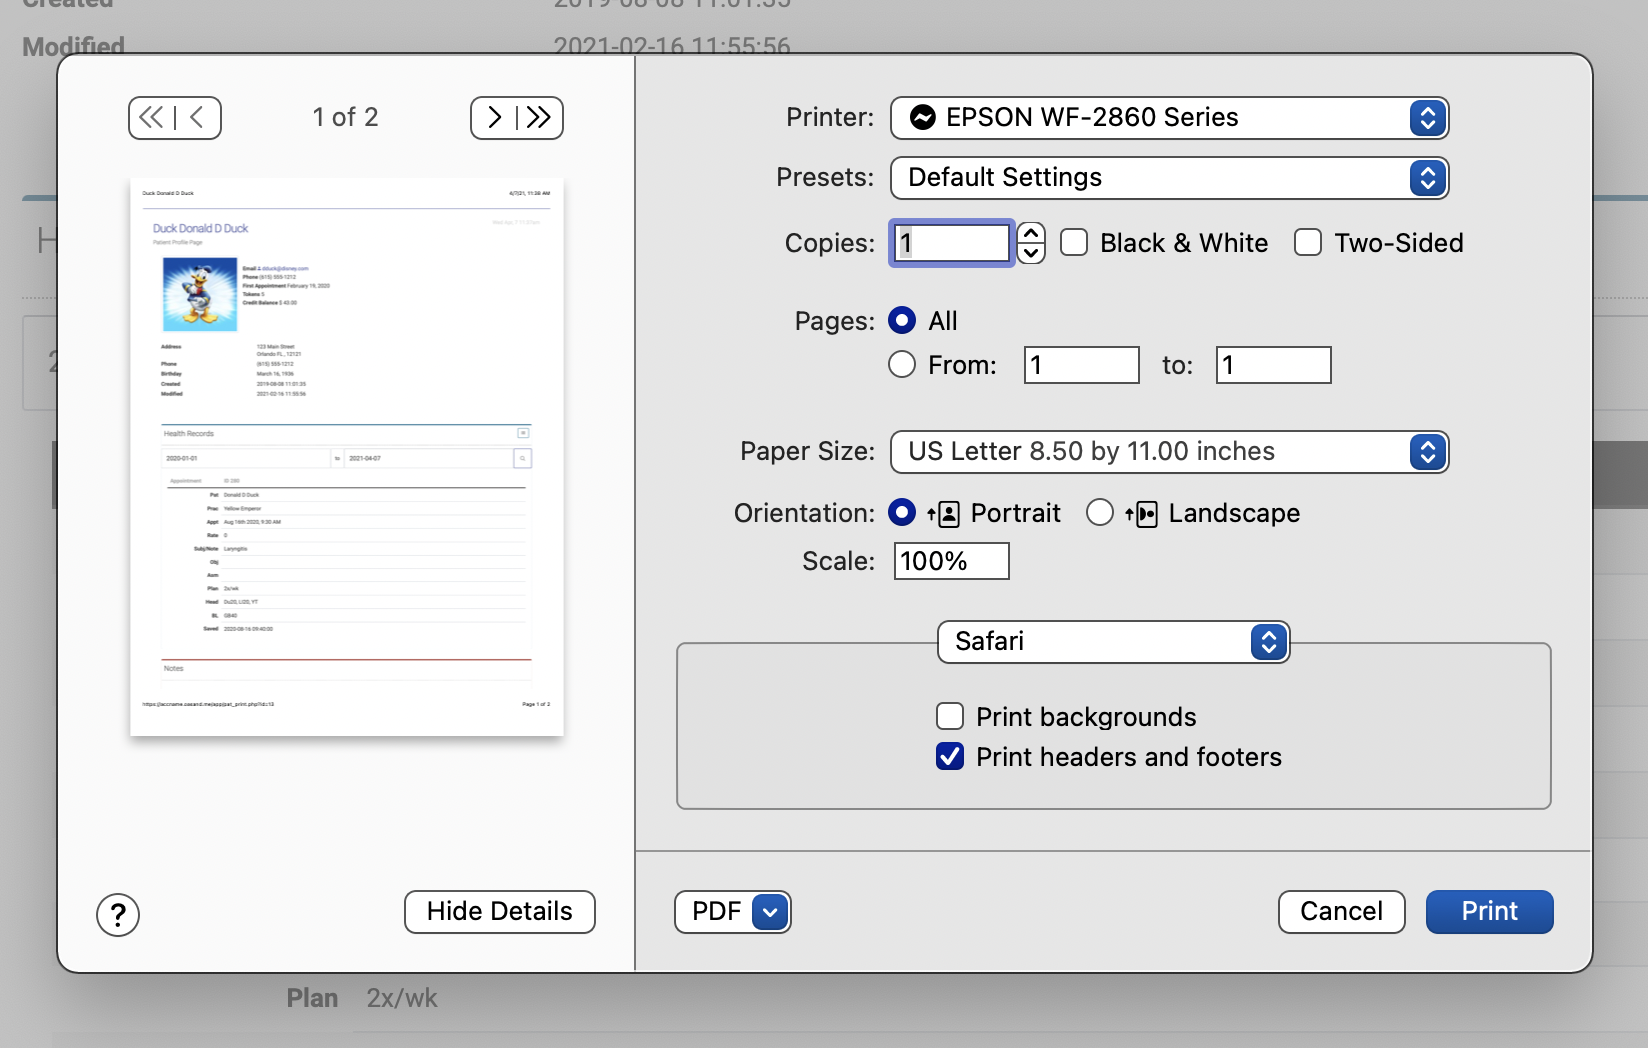
Click Control P to print your records:
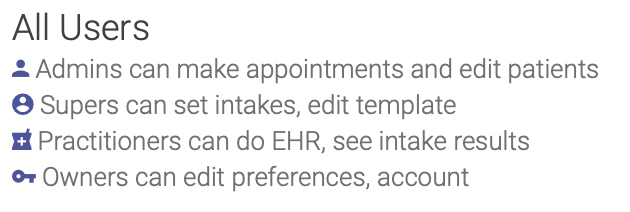
Users Who Can Enter Records
In Open ACU only owners and practitioners can enter health records.
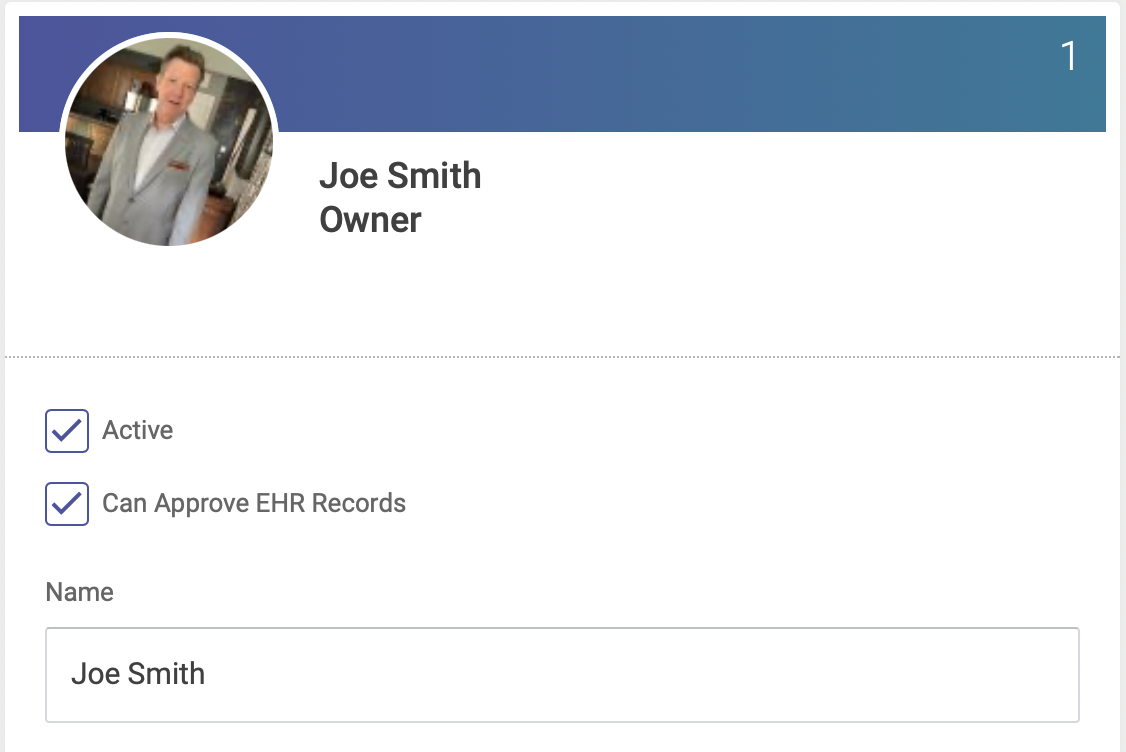
To allow a practitioner or owner to approve and lock appointment health records
- Go to the Users page
- Select the user you wish to edit (if you are a practitioner or owner)
- Check the Can Approve EHR Records checkbox
- Click Save
To change a user's permission level
Only owners and practitioners can edit other users, all others can only edit their own profile.
- Go to the User's Page
- Select the user you wish to edit (if you are a practitioner or owner)
- Change the user level
- Make any other changes you wish to make
- Click save
- Owners cannot change their user level.
Intake Forms
Setup and send intake forms to your patients
Intake Form Settings
Open ACU allows you to create multiple intake policies and questionnaires. You’ll designate which forms automatically get sent to new patients, and which are sent manually.
Pro tip: If you offer multiple services, we recommend designating a standard questionnaire and set of policies to be automatically sent to all new patients, then manually sending service-specific questionnaires, based on which service(s) the patient will be receiving.
You’ll setup your intake forms from the Intake Settings page. There are three sections to complete when setting up your forms:
- Sending Intakes to New Patients
- Intake Policies
- Intake Questionnaires
Sending Intakes to New Patients
Check the “Send Intake” box if you want to automatically send an intake form to a new patient when they create an account. You’ll also enter verbiage for the text of the email that will be sent with the intake. Be sure to click Save Intake Preferences when you’re finished.
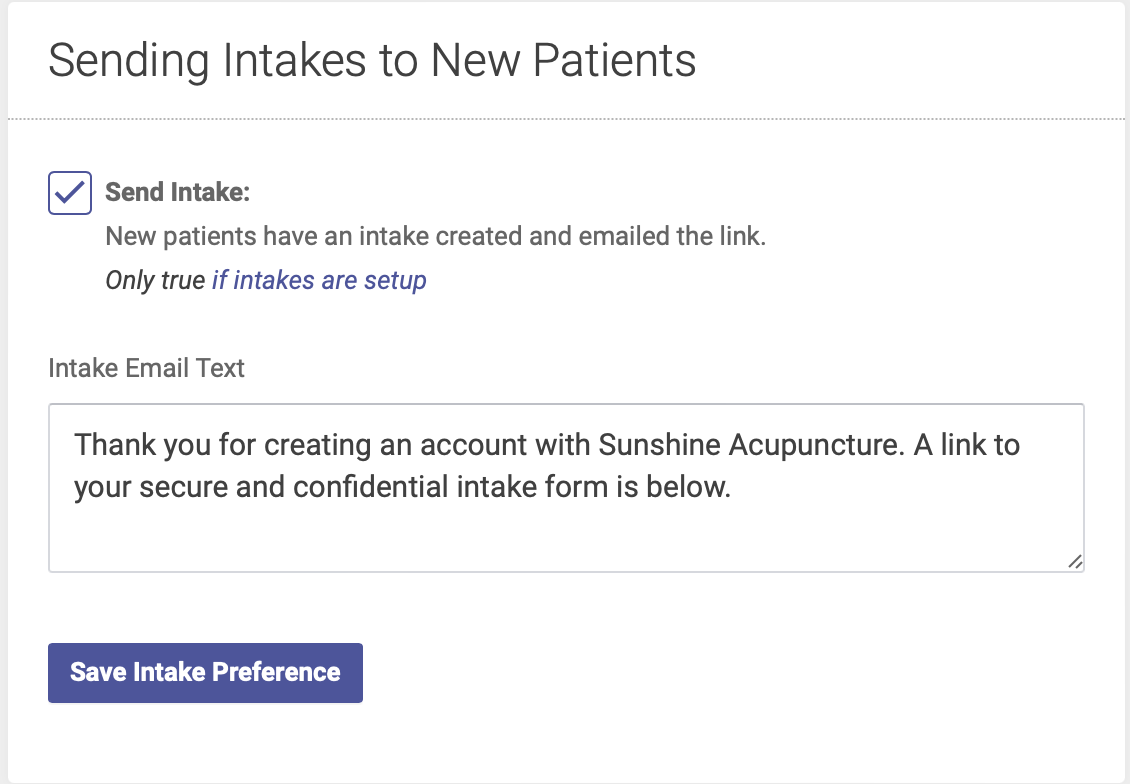
If you leave the box unchecked, you can manually send an intake form from the Patient Profile page.
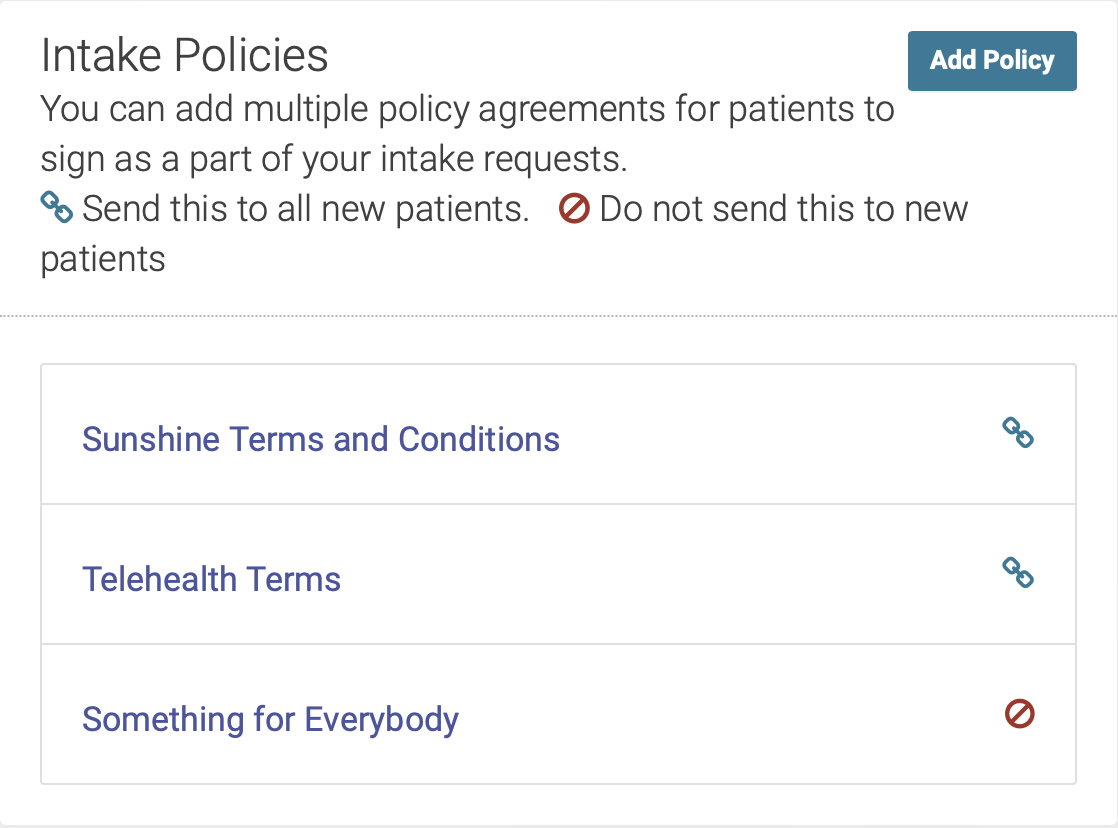
Intake Policies
In the Intake Policies section, you’ll enter any information you want the patient to read and agree to before they complete their intake form. This can include financial policies, informed consent, privacy practices, etc.
You can create as many Intake Policies as you like. This section will display a list of your current policies, and is where you can add, edit or delete policies.
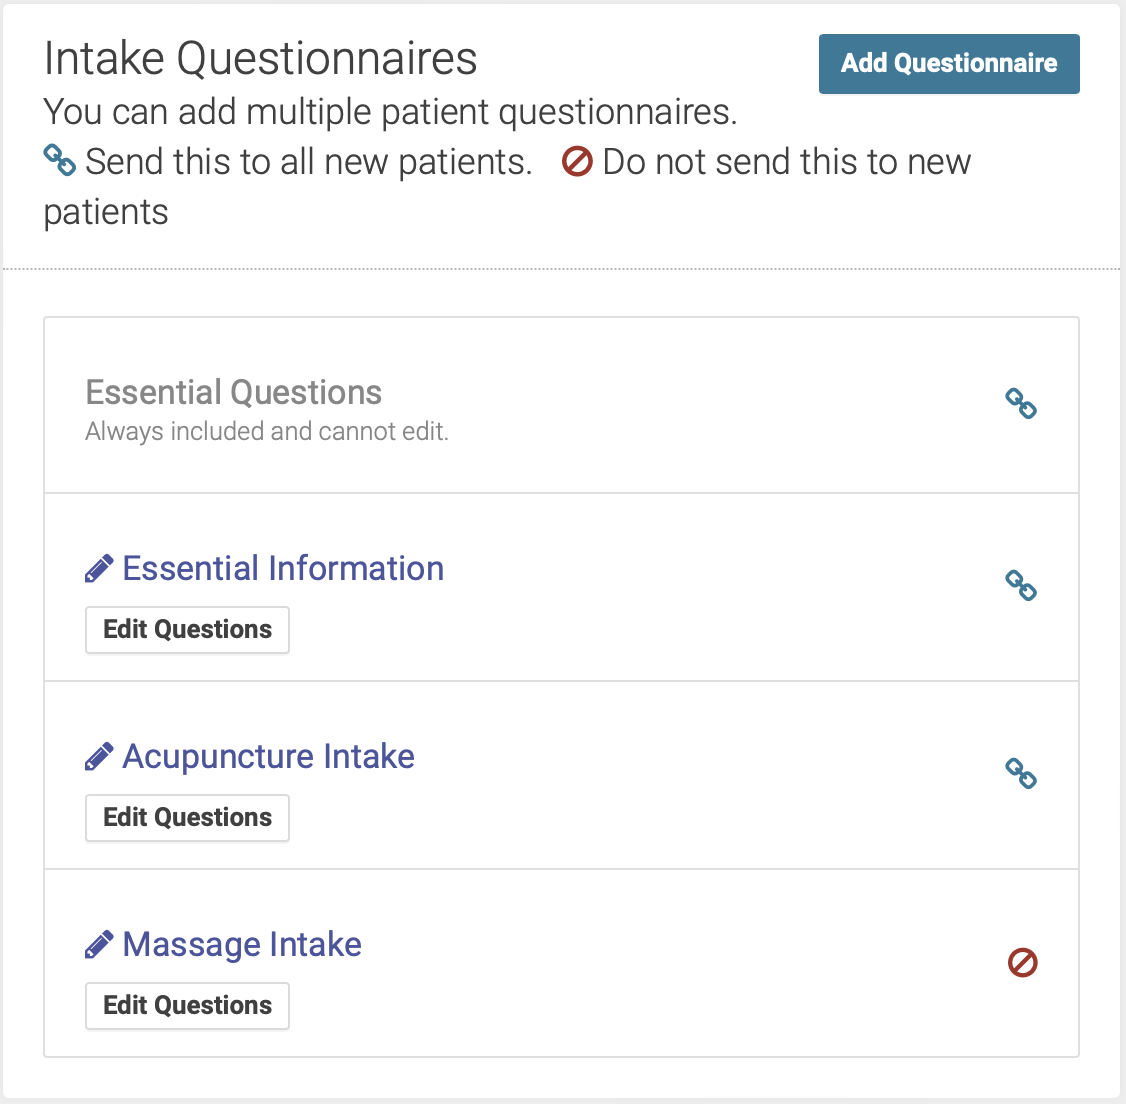
Policies with a link icon will automatically be sent to new patients (if this feature is set up). Policies with a crossed-out circle icon will NOT automatically be sent to new patients, and can be sent manually from the Patient Profile page.
Adding an Intake Policy
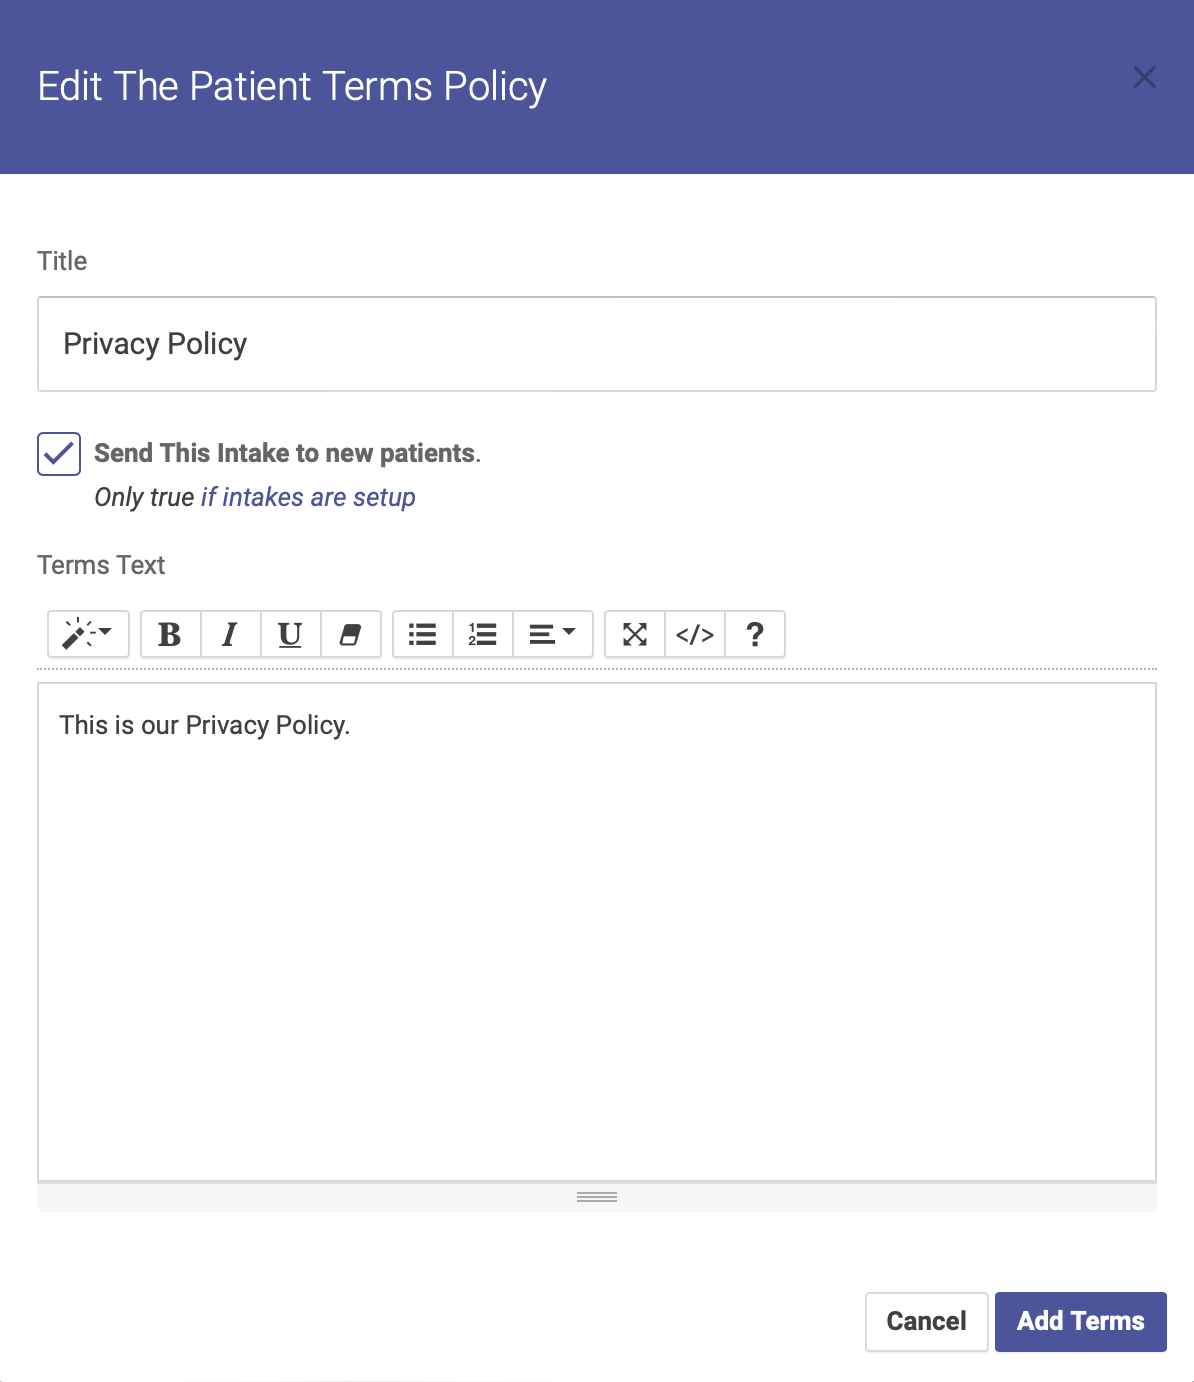
To add a new Intake Policy, click the Add Policy button. Enter your title, text, and check the Send This Intake to New Patients box if you want this policy to automatically be sent to new patients (if you leave the box unchecked, you can still manually send a policy form from the Patient Profile page). Be sure to click Save Terms when finished.
Editing or Deleting an Intake Policy
To edit an existing Intake Policy, click the policy title on your list of policies. You will then be able to edit your policy’s title and terms, and whether or not this policy will automatically be sent to new patients. You can also delete a policy but clicking on the title. Be sure to click Save Terms when finished.
Intake Questionnaires
In the Intake Questionnaires section, you’ll create your questionnaire forms for health history, review of symptoms, and any other information you want to gather for a patient’s first appointment.
You can create as many Intake Questionnaires as you like. This section will display a list of your current questionnaires, and is where you can add, edit or delete policies.
Questionnaires with a link icon will automatically be sent to new patients (if this feature is set up). Questionnaires with a crossed-out circle icon will NOT automatically be sent to new patients, and can be sent manually from the Patient Profile page.
Adding a Questionnaire
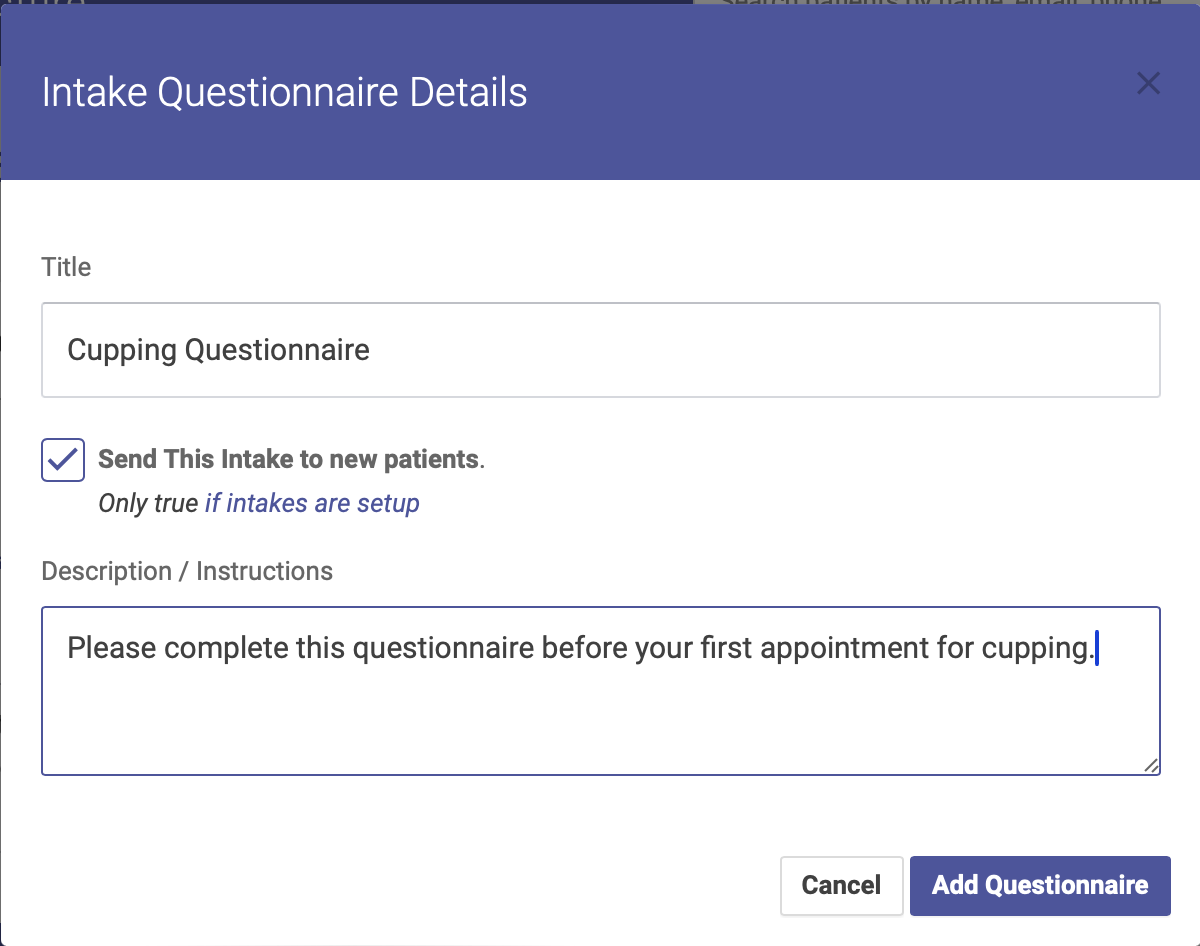
To add a new Questionnaire, click the Add Questionnaire button. Enter your title, description / instructions, and check the Send This Intake to New Patients box if you want this policy to automatically be sent to new patients (if you leave the box unchecked, you can still manually send a policy form from the Patient Profile page). Be sure to click Add Questionnaire when finished.
Once you’ve created a questionnaire, you can add individual questions and groups.
Editing or Deleting a Questionnaire
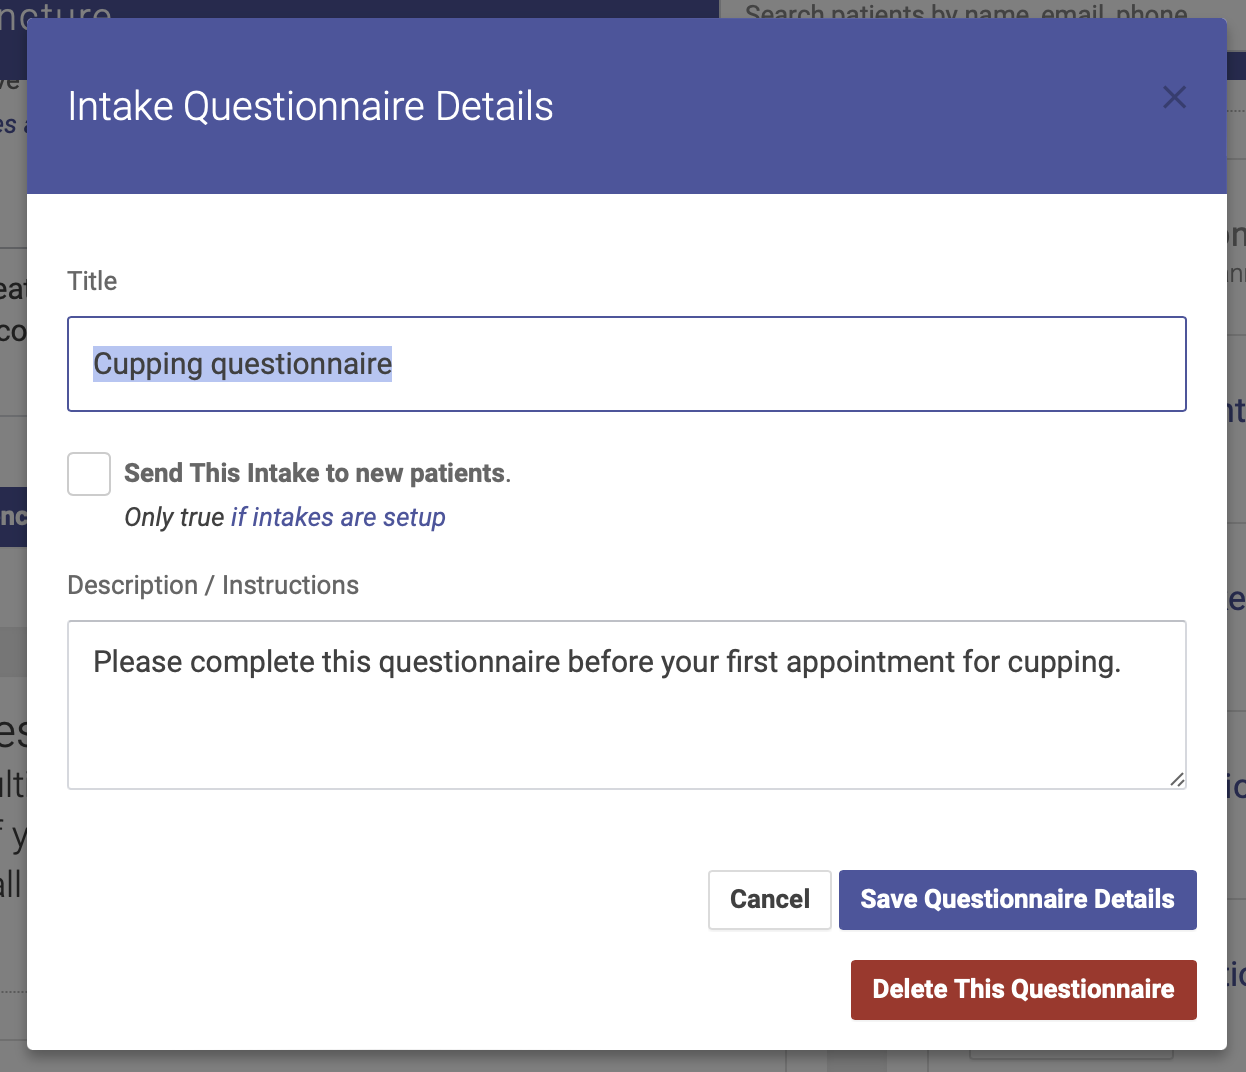
To edit or delete a questionnaire, click the pencil icon next to the name of the questionnaire. To edit, enter your changes and click Save Questionnaire Details. To delete, click Delete This Questionnaire.
Once you have created your questionnaire(s), you can add, edit and delete groups and individual questions for each questionnaire.
Editing Your Intake Questionnaires
Once you've created your intake questionnaire(s), you can add, edit and delete groups and individual questions for each questionnaire from the Intake Settings page.
Adding Individual Questions and Groups
To add and edit Questions and Groups for a questionnaire, click the Edit Questions button:

You can then use the Add Group and Add Question buttons to add question groups and individual question. You must add at least one group, and each question must be assigned to a group.
Question Groups
You must have at least one question group on your questionnaire. To add a group, click the Add Group button and a popup modal will appear. Enter your Group name and click Save Group. Your group is now saved.

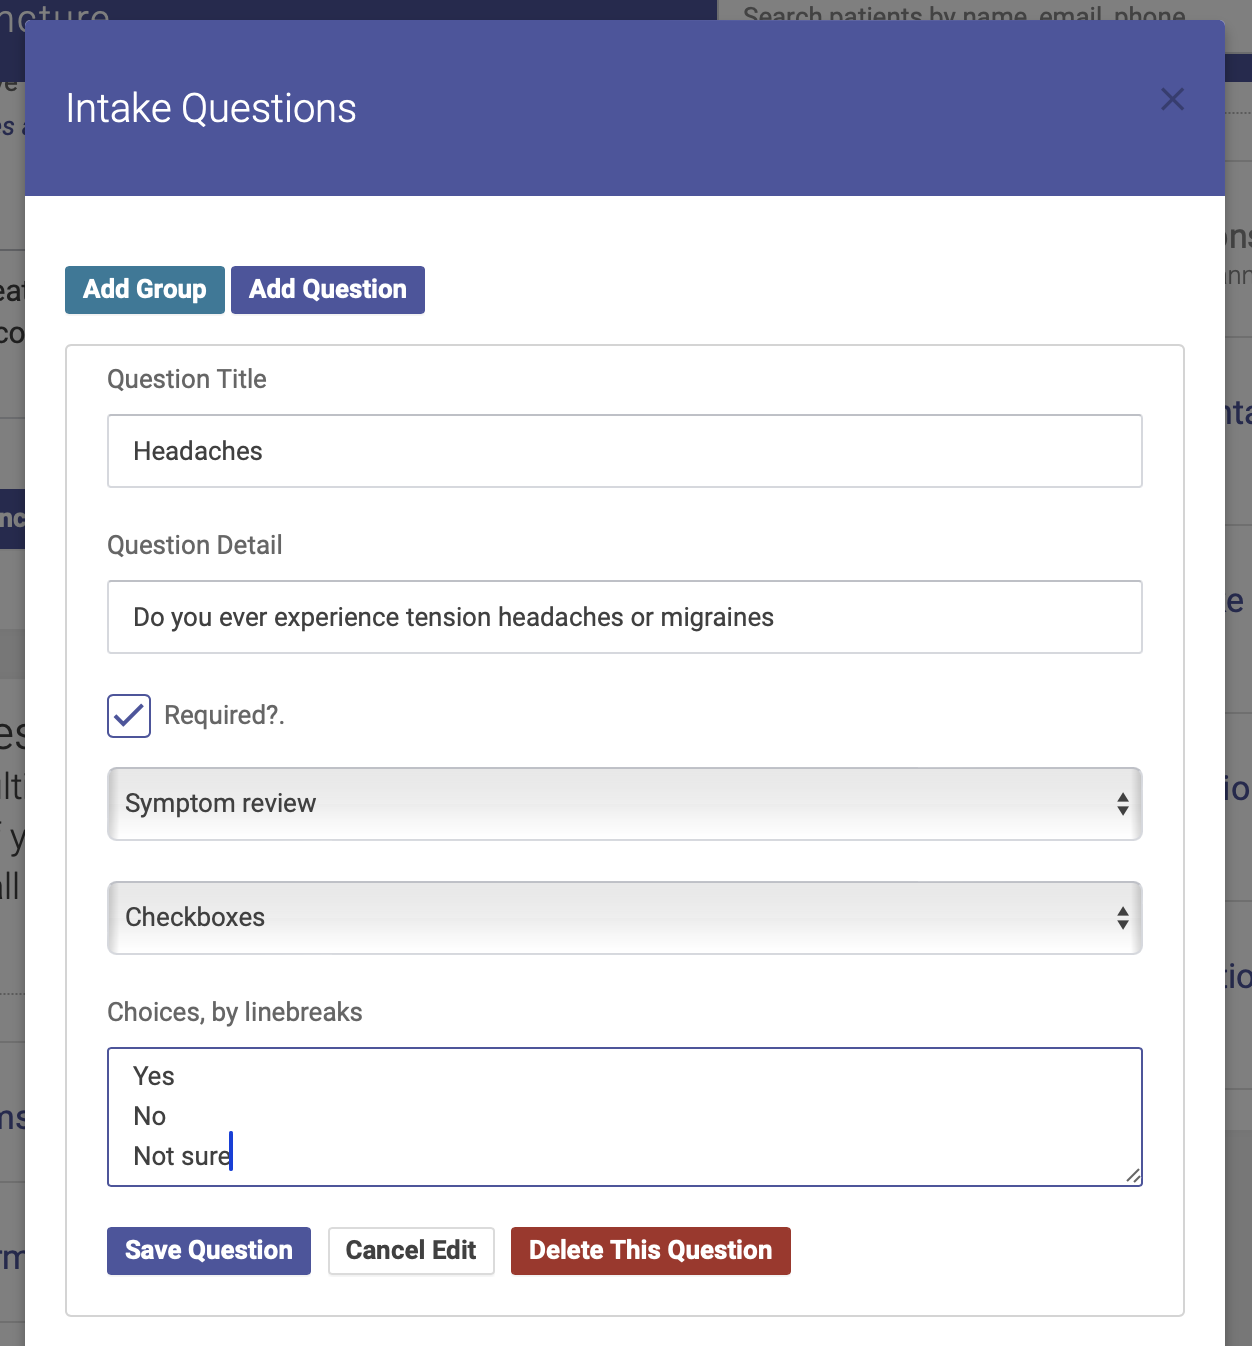
Add a Question
To add an individual question, click Add Question and a popup modal will appear. Enter your question title and detail, choose your answer field type, assign your question to a group, and check the “Required?” box to make this a question that requires an answer. Click Save Question to save your question.
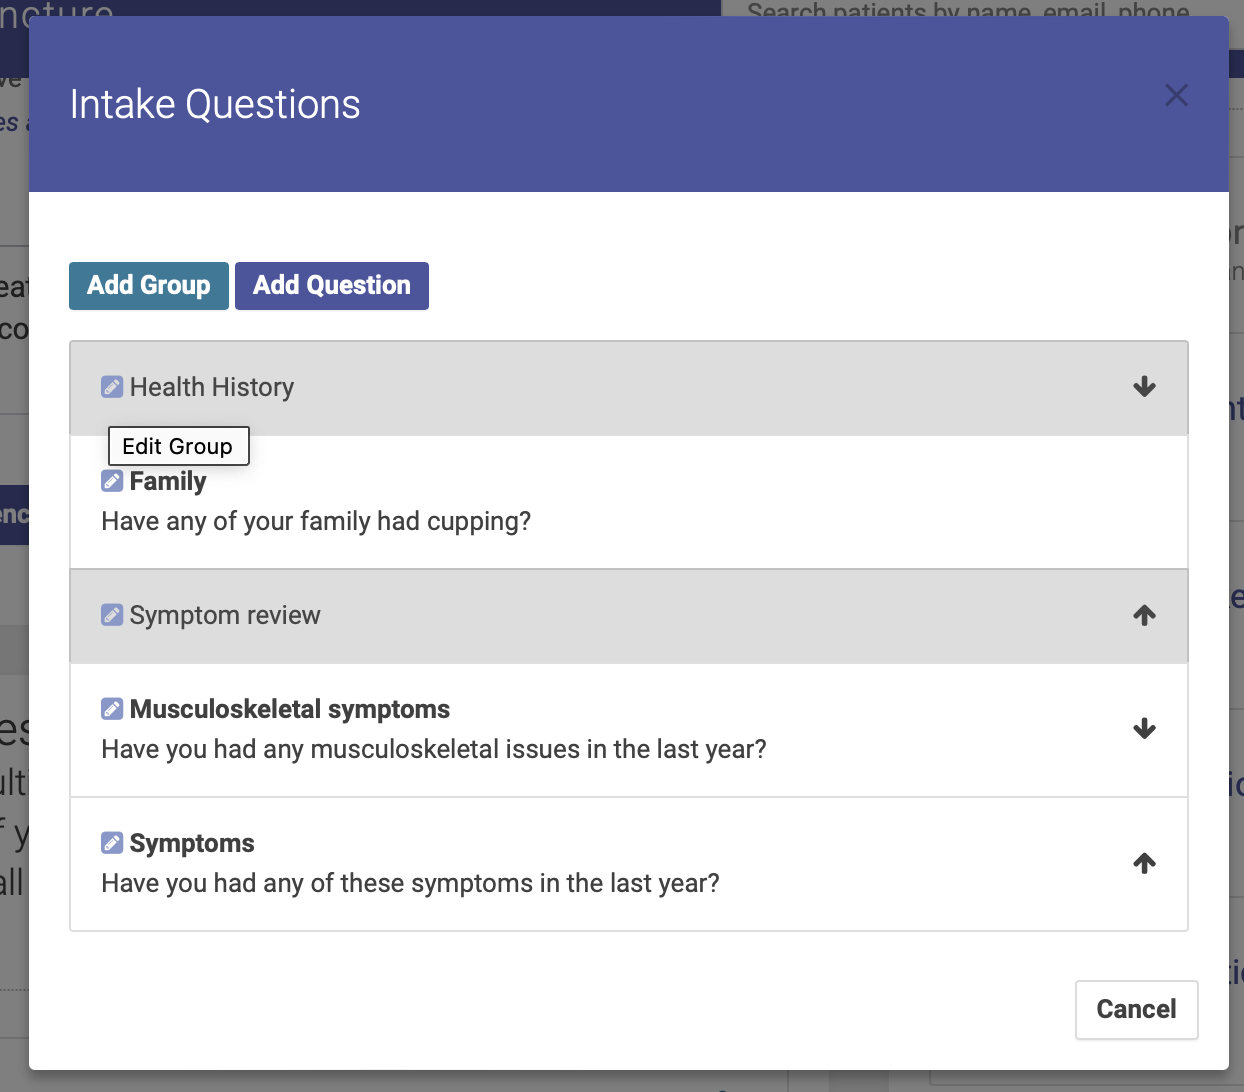
Editing and reordering questions and groups
To edit a question or group, click on the pencil icon next to the question or group name. Be sure to click Save Question or Save Group when finished.
To reorder your questions or groups, use the arrows on the right hand side of your question and group list.
Sending Intake Form Links
Intake form links can be sent to new patients both automatically and manually.
Automatic
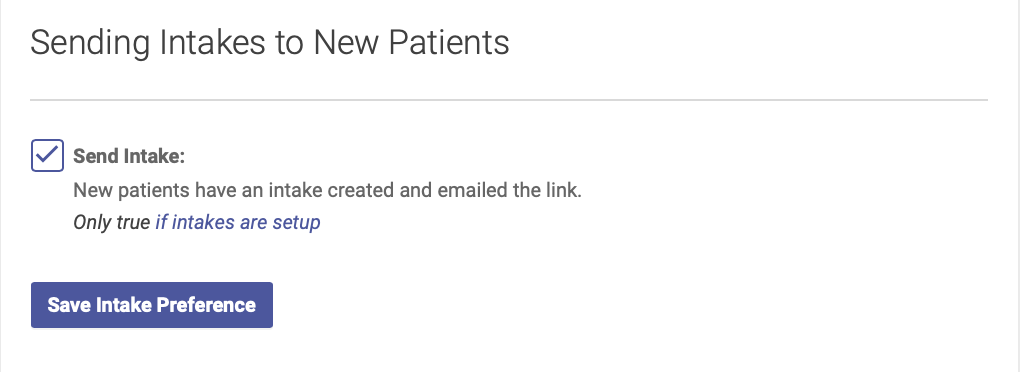
To automatically send an intake form link when a new patient creates an account, go to your Settings and Templates page. Under Basics, check the Send Intake box. You can also do this from your Intake Form Settings page. When this box is checked, patients will automatically receive their intake form link:
Manual
You can also manually sent an intake form link from the Patient Profile page. Just click the Resend button in the Intake section:
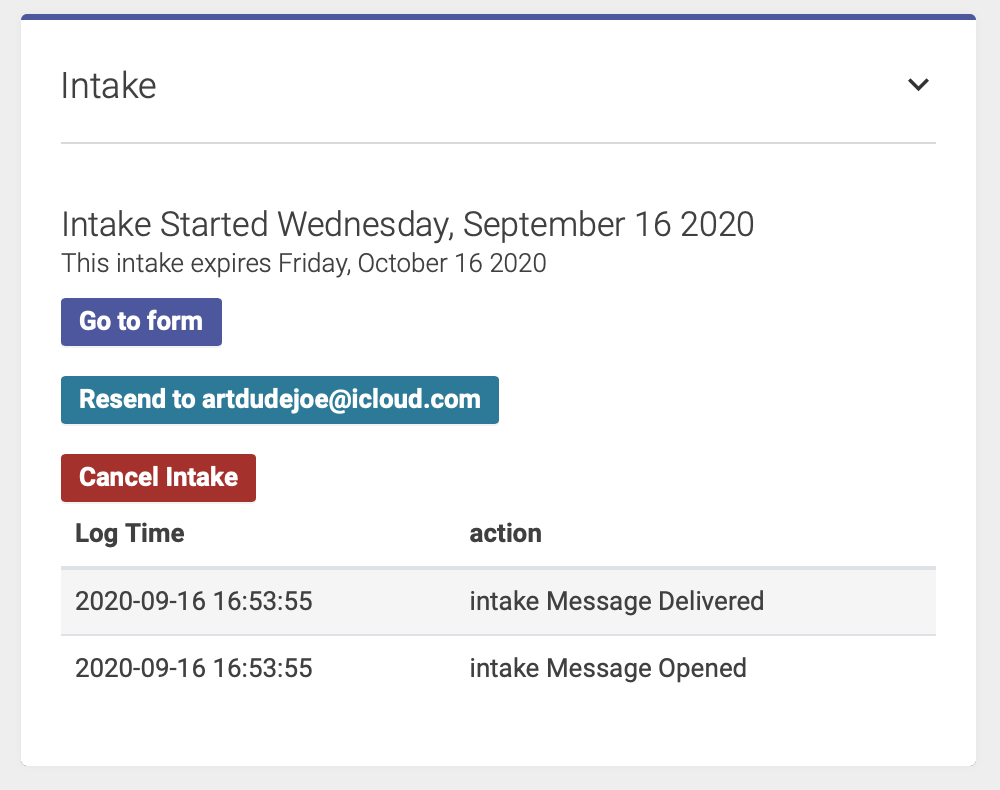
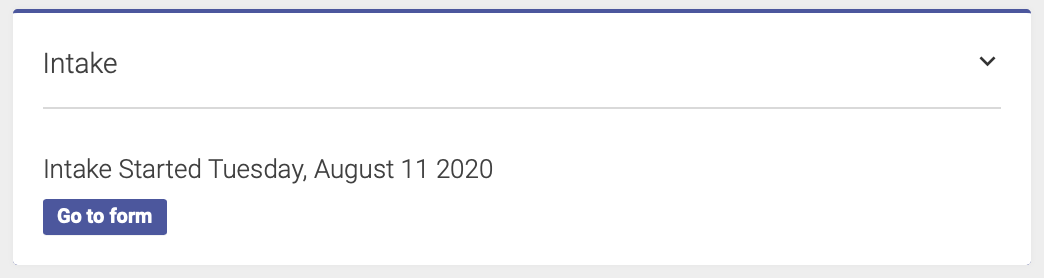
The Intake section on the Patient Profile page also shows a log of when intake form links were delivered and opened.
Click Go to Form to open the intake form directly from the Patient Profile page.
Once a patient has completed their Intake Form, their answers will appear in the Intake section on their Patient Profile page:
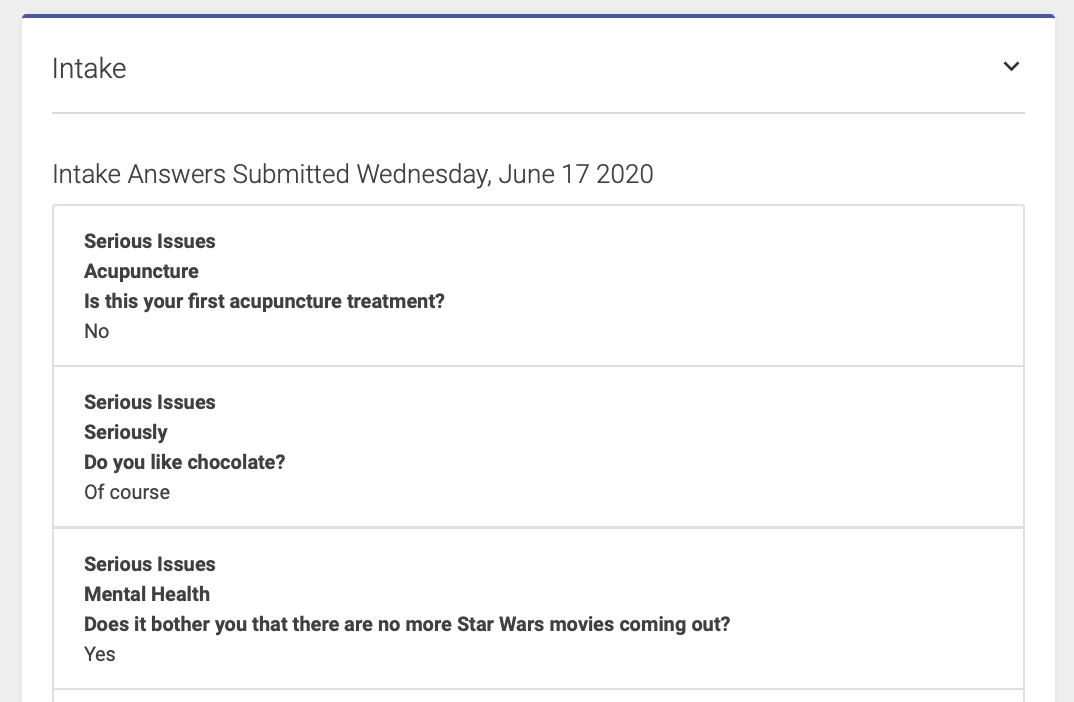
New or Updated Intake
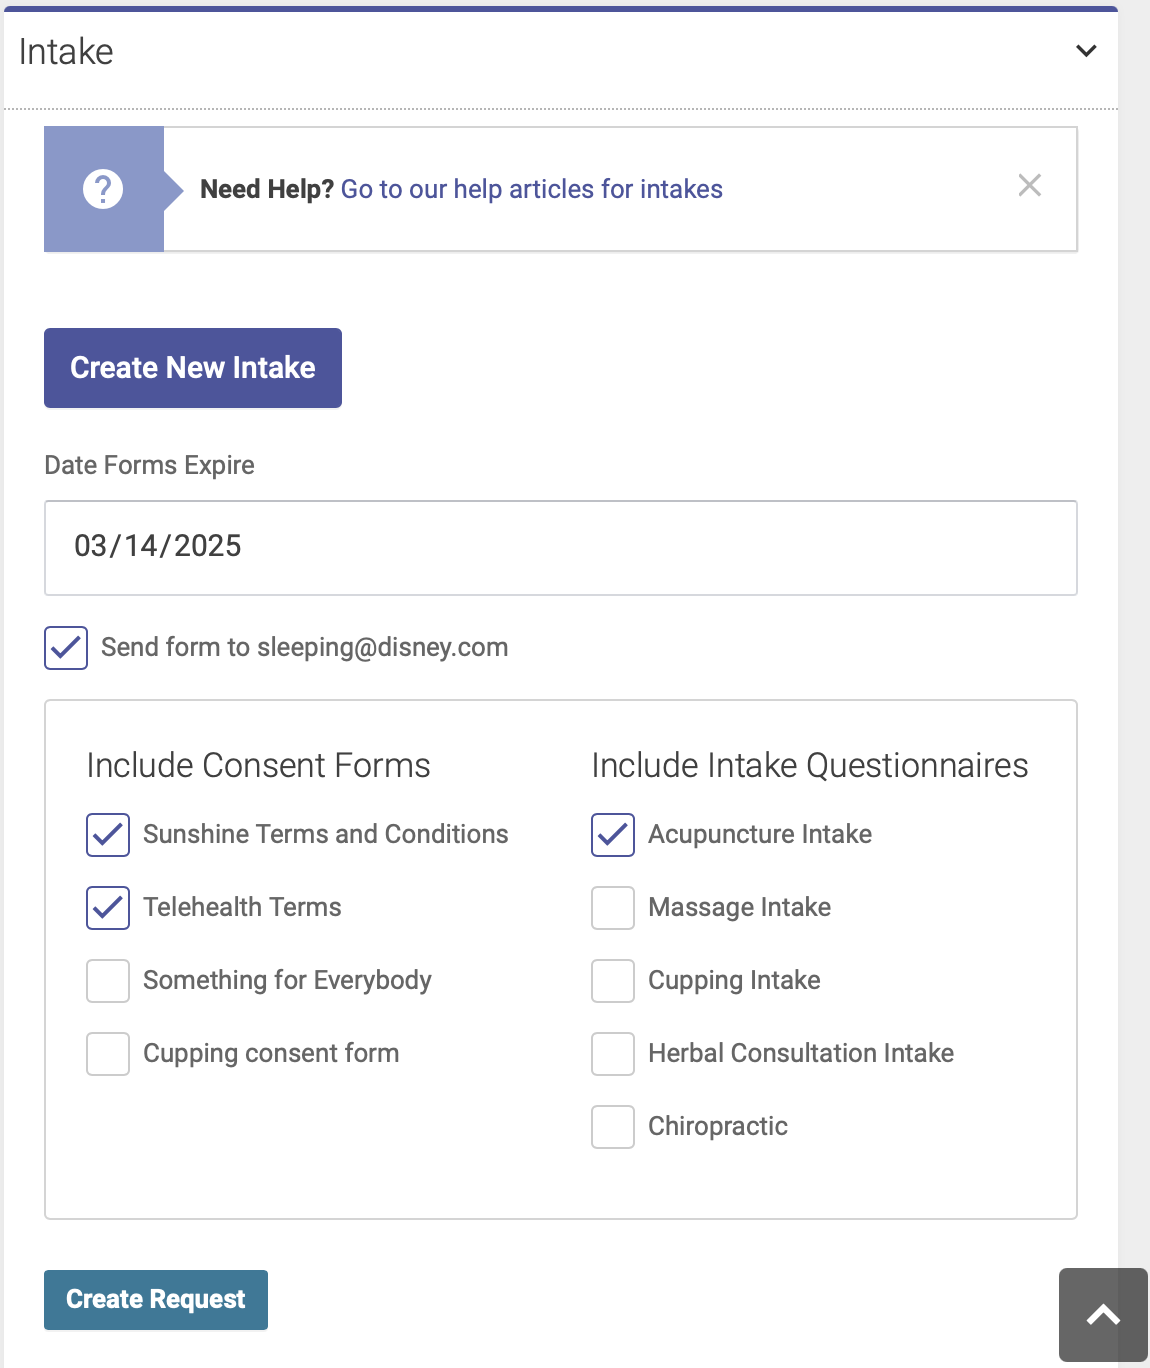
You can create a new or updated intake form for a patient who has a previously completed a form. To do this, click the Create New Intake button at the top of the Intake field on the Patient Profile page. Then select which form(s) you would like to send, and click Create Request to email the form(s) to the patient:
Viewing Intake Forms
Note: Intake Form responses can only be viewed by Users with Practitioner level permission.
On the Intake Forms page, you’ll see a list of all intake forms, including when the form was completed, and when it expires (if applicable).
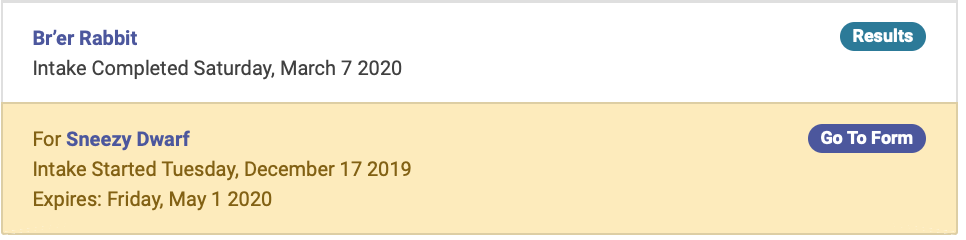
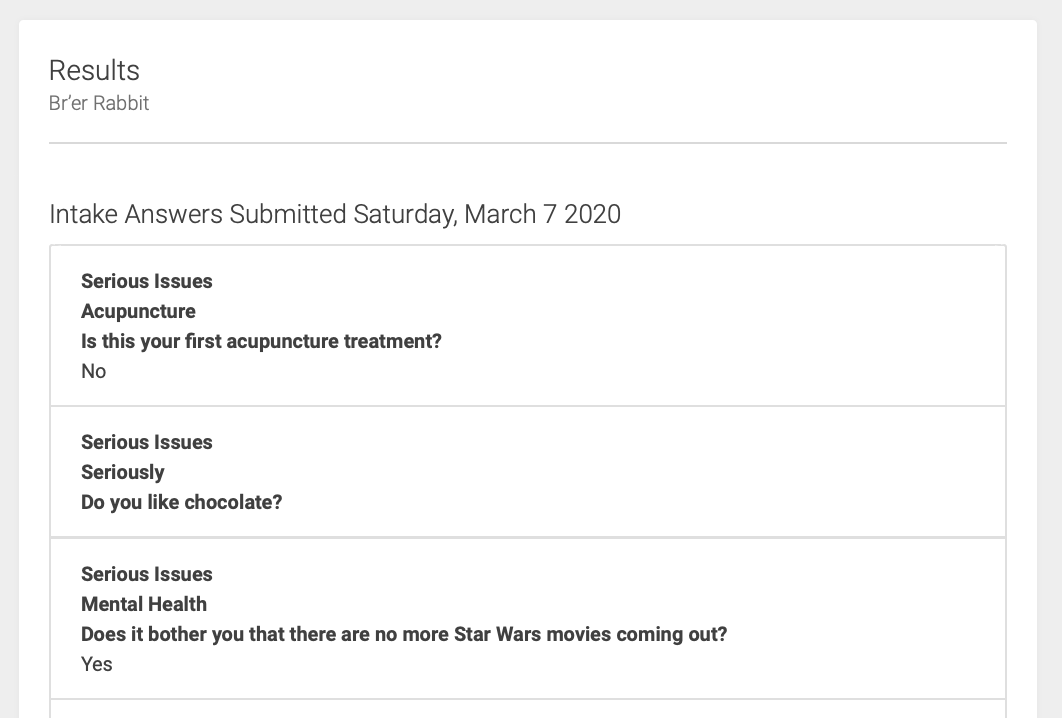
To view a patient’s completed intake form, click the Results button next to their name. Their completed form will then appear on the right side of the page:
If a form has not yet been completed, click Go To Form next to the patient’s name. This will open their form in another window so that it can be completed.
You can also view a patient’s intake form from their Patient Profile page.
If a form has not yet been created, you’ll see a button to Create Form:

Once the form is created, click Go To Form to open their form in a new window:
Once a form has been completed, you can view the patient’s responses from their Patient Profile page. Intake form responses are only viewable by users with Practitioner level permissions.

Downloading Health Records
Open ACU allows you to download a CSV file of all found records in blocks or searches.
Coming: Health records download for each patient by date range.
To download a block of records to CSV
Go to EHR > EHR By Block (if you are an owner you can choose the practitioner first to load their blocks)
Select a block from the column on the left
If there are any appointments you will see a button at the top right of the records loaded in the right column. 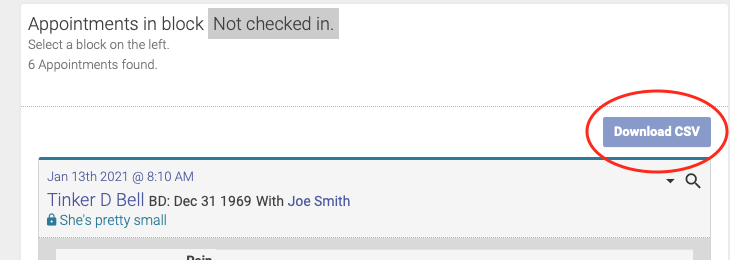
The information columns in the downloaded file
These are the fields in the CSV file downloaded from the EHR.
- id -- a unique id for the appointment
- start_time -- appointment start time
- checked -- Has been checked in
- patient_name
- patientid -- unique id for the patient
- birth_date -- if not entered it will be 0000-00-00
- prac_name
- pracid -- unique id for the practitioner
- locationid -- unique id for the
- made_from -- 1 if made by the patient
- first_appt -- this patient's first appointment date
- flag -- 1 if true
- new -- 1 if true
- credit -- current credit balance
- tokens -- current tokens balance
- caution -- 1 if true
- privatenote -- an old POCA Point private note holder
- zhr_approved -- 1 if this appointment record has been approved and locked
- ehrid -- a reference number to the health record
- typeid -- placeholder, not applicable
- rating -- star rating value
- text0 & text0ta (two exact columns) -- Note or "S" text (two columns)
- text1 & text1ta (two exact columns) -- "O" text
- text2 & text2ta (two exact columns) -- "A" text
- text3 & text3ta (two exact columns)-- Plan or "P" text
- points0 -- head or symmetrical points
- points1 -- TR points
- points2 -- TL points
- points3 -- BR points
- points4 -- BL points
- datemodified
- datecreated