Events and Group Scheduling
How to schedule group events in Open ACU.
- Create an Event in Open ACU
- Event Notifications
- Adding EHR Notes to an Event
- Creating a Multi-day Event
- Register Attendees for an Event
- All Events page
- Event Waiting List
- Event Report
- Registering for an Event: Patient Portal
- Collecting Payment for an Event
- Issuing a Refund for an Event
- Online Events
- Checking in Event Attendees
- Event URL
- Remove an Attendee from an Event
- Cancel an Event
Create an Event in Open ACU
Open ACU allows you to schedule group events with multiple participants.
Video overview:
Read on for step-by-step instructions...
1. Create a new event
Select your date on the schedule. At the top of the day's page, click Day Tools --> New Group Event:

2. Event Setup
You'll now follow the Event Setup steps to enter all the details about your event:
Setup
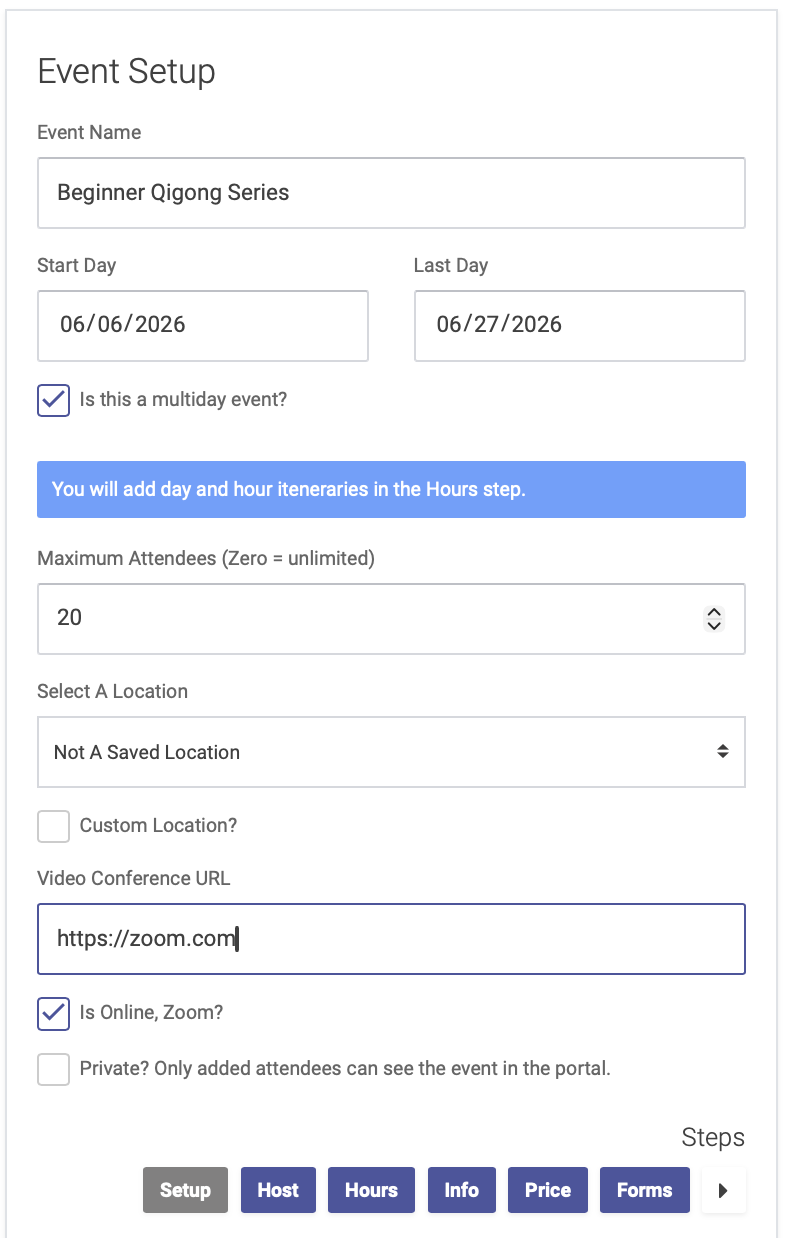
On the Setup page, you'll enter:
- Event Name
- Start date (see this article for multiday events)
- Maximum number of attendees (zero = unlimited attendees)
- Location (you can select your clinic location, a custom location, or an online location such as Zoom)
- Event image
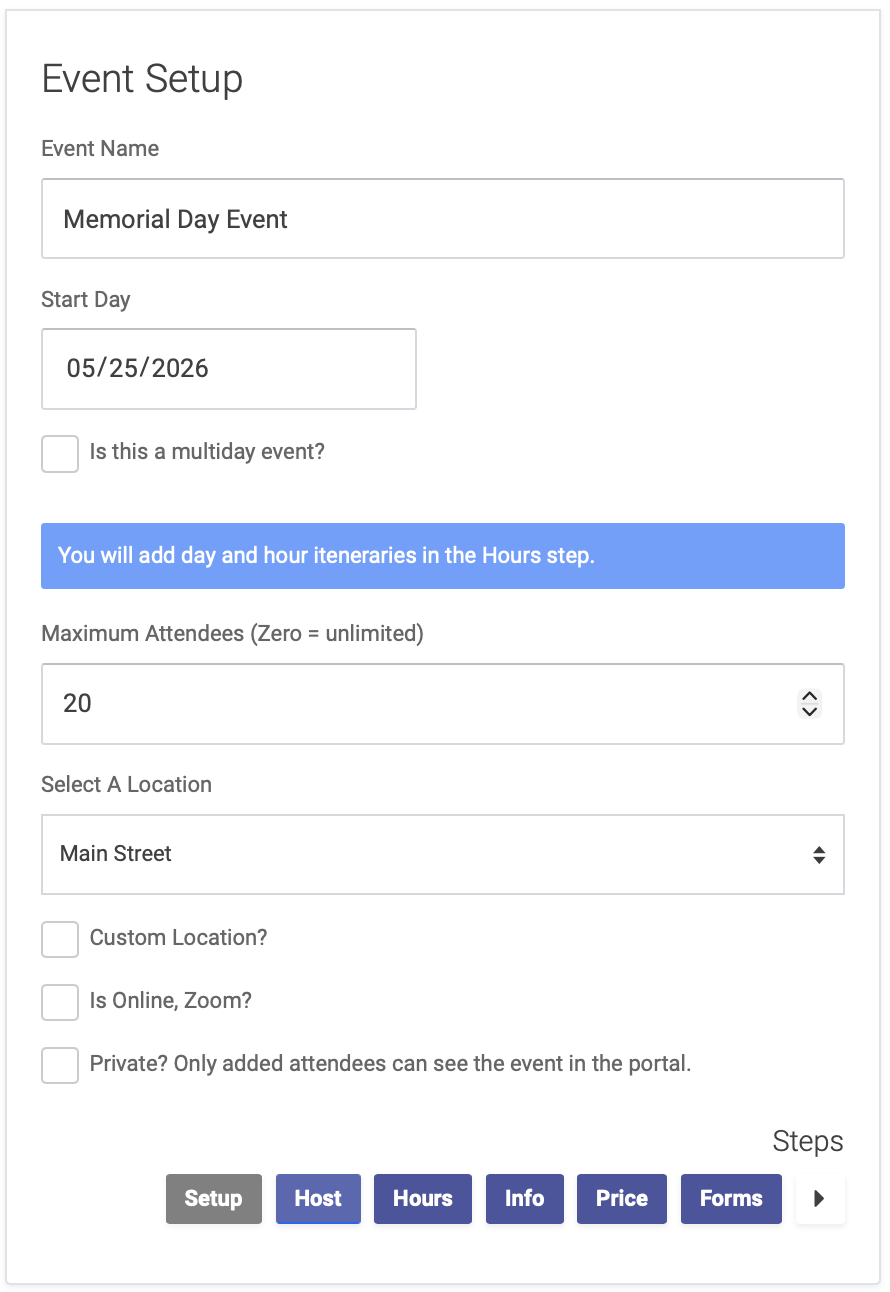
Click the right arrow at the bottom of the page to advance to the next step: Host
Host
On the Host page, you'll enter:
- Event Host from a dropdown menu of your clinic's Practitioners. To add a Practitioner, select their name from the dropdown menu, then click the Add Practitioner button. You can add multiple practitioners per event.
- Click the "Add EHR notes to this event" checkbox if you want to enter and save health records for this event.
- If you have other event presenters or hosts who are not on the menu of your clinic's Practitioners, you can add their name in the Other Presenters box
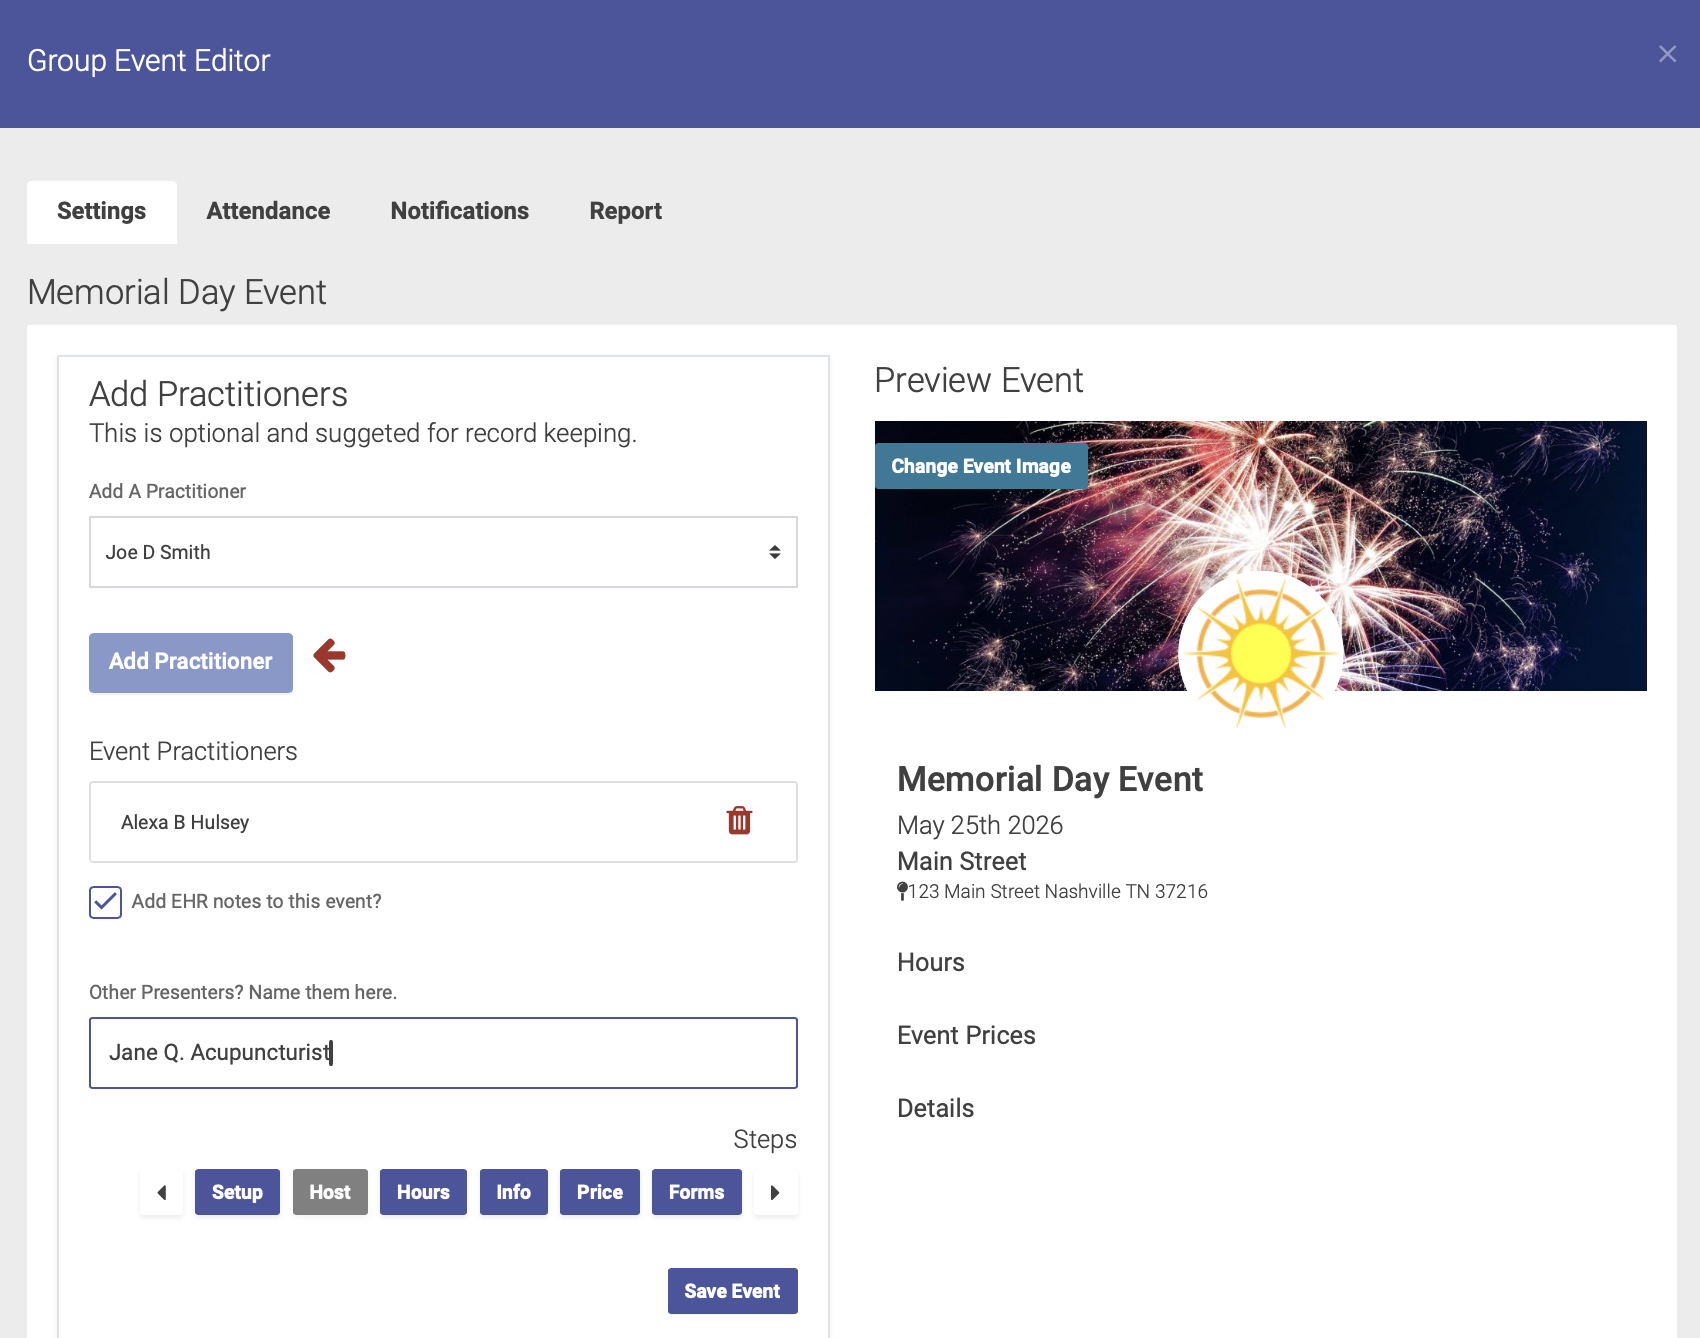
Click the right arrow at the bottom of the page to advance to the next step: Hours
Hours
On the Hours page, enter the start and end times for your event:
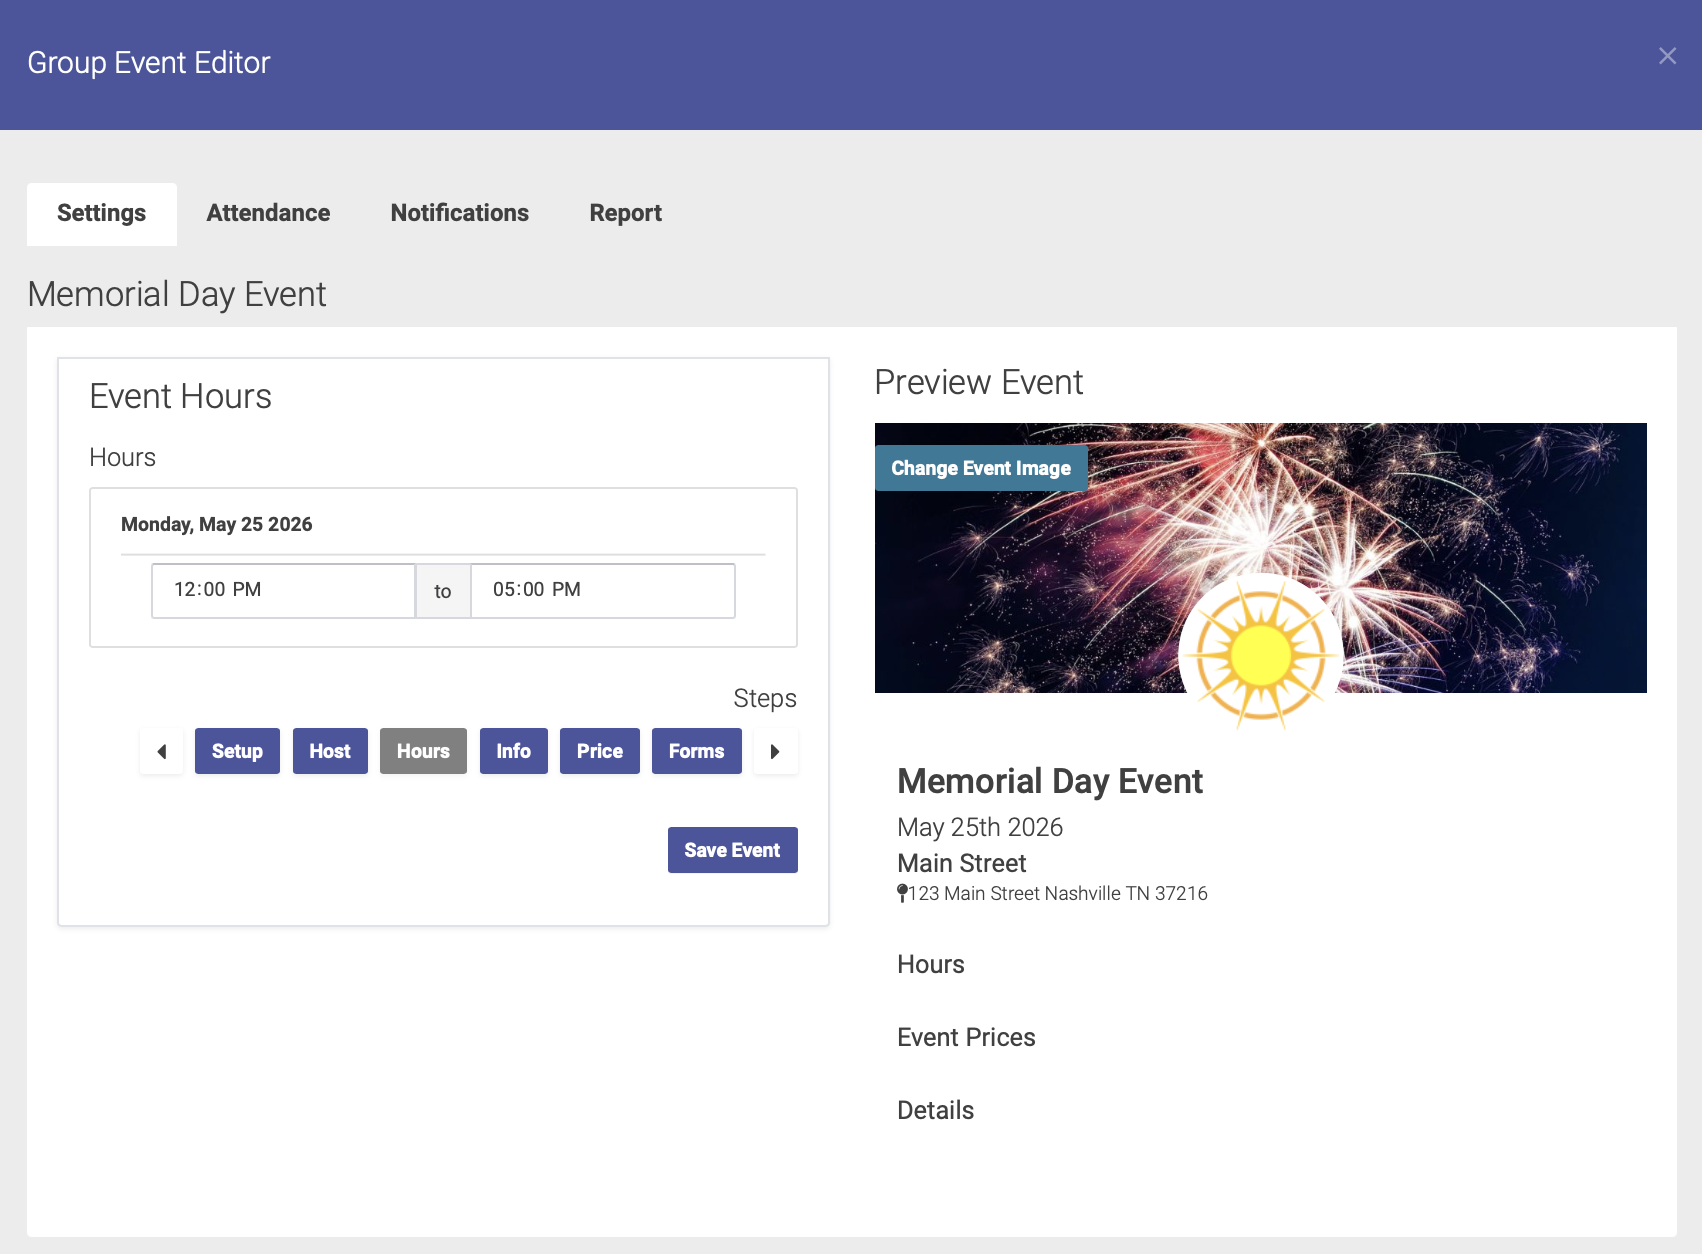
Click on the right arrow at the bottom of the page to advance to the next step: Info
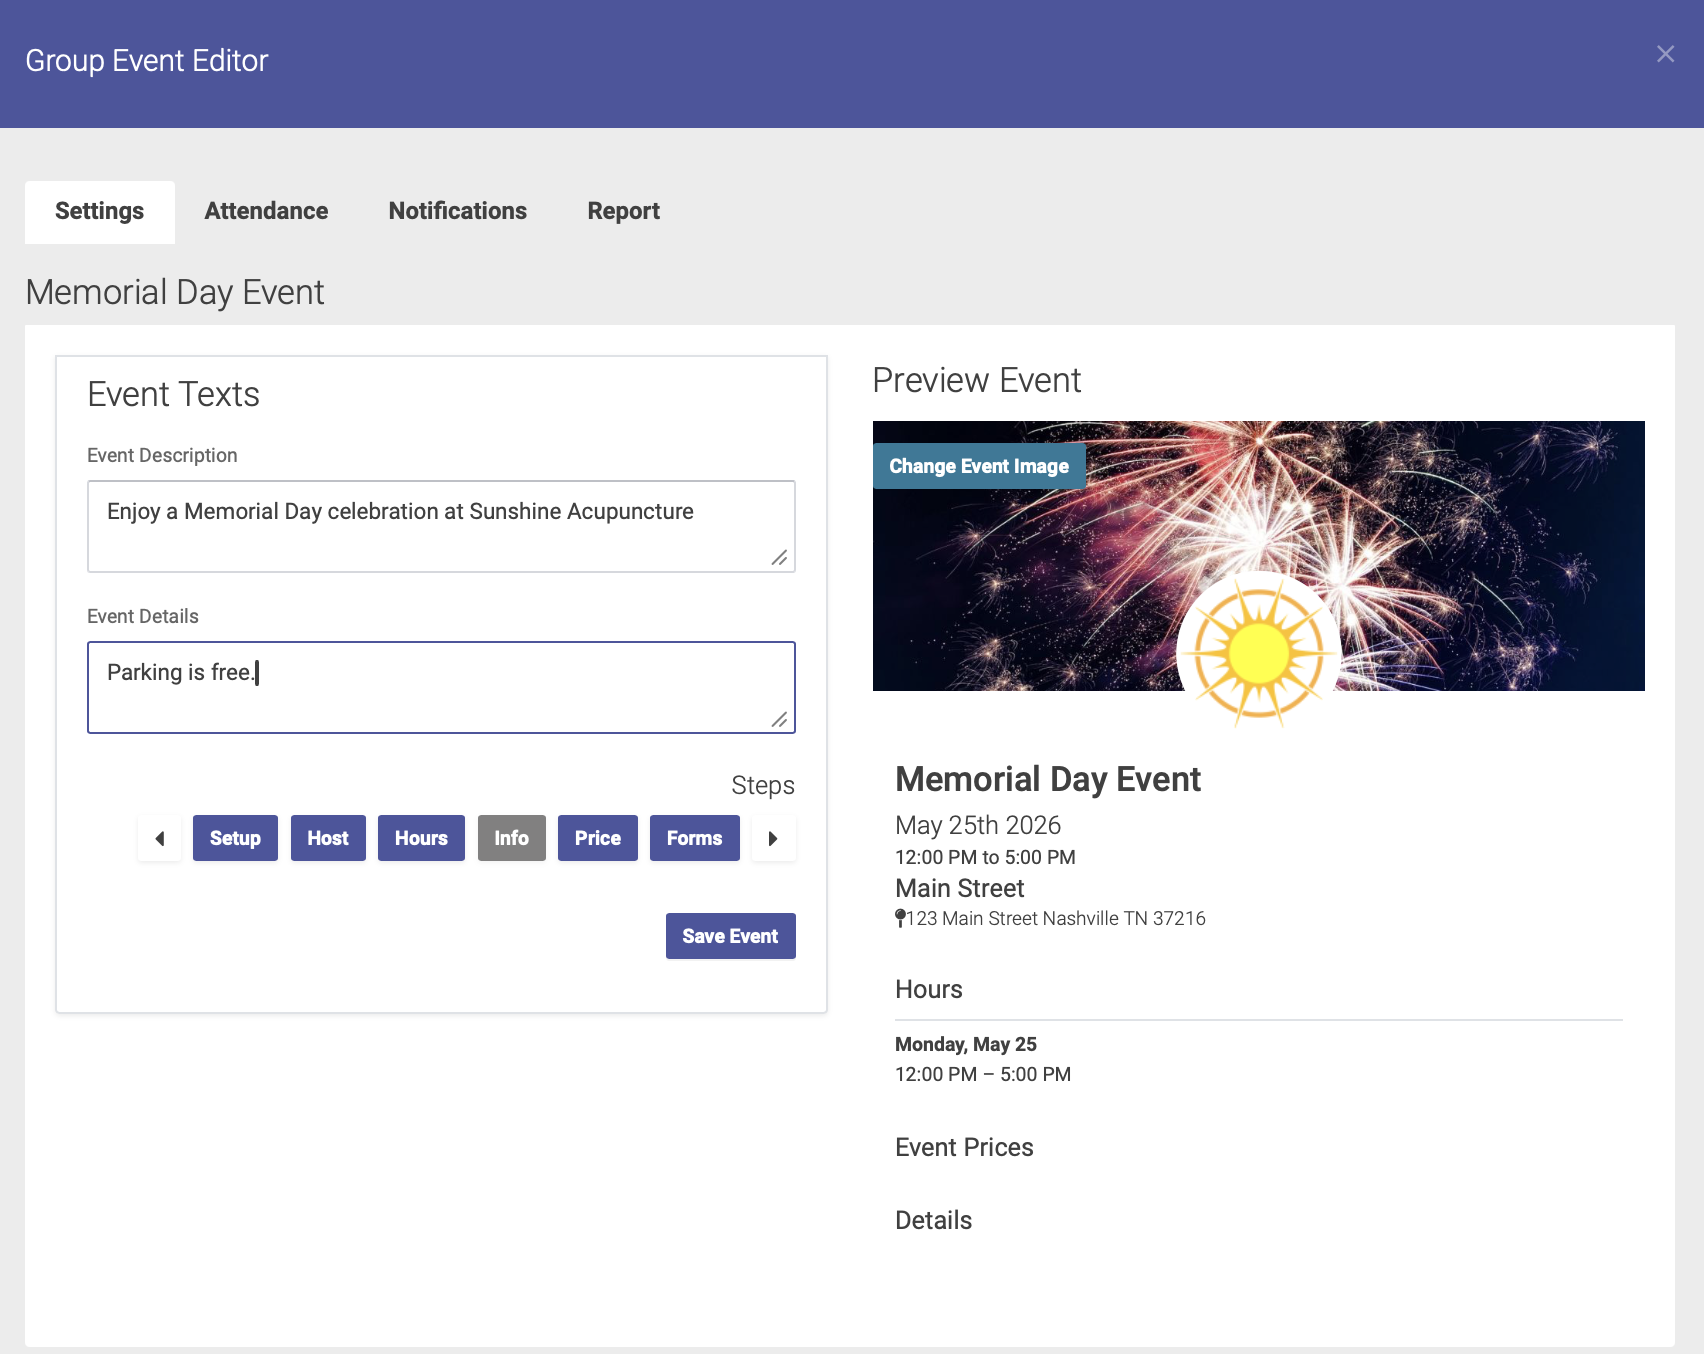
Info
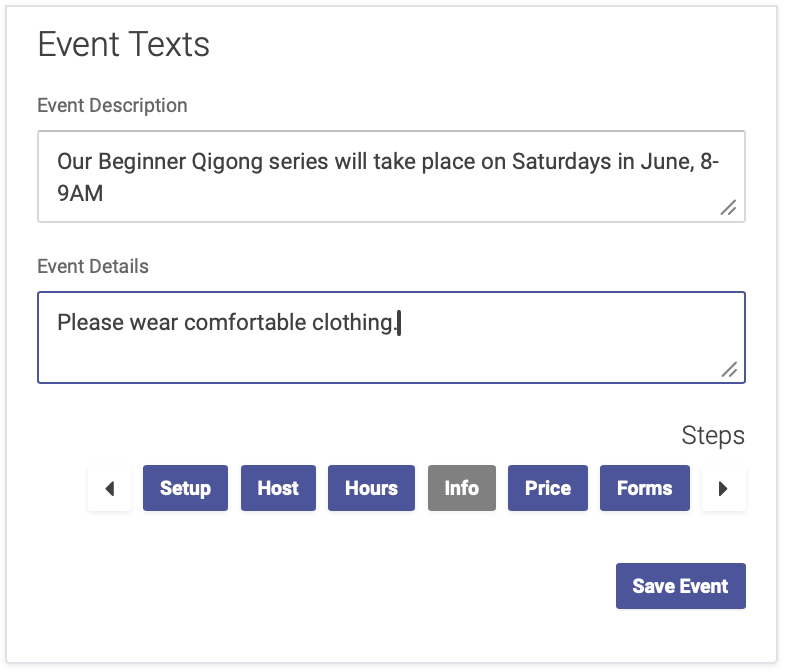
On the Event Info page, you'll enter more details about your event:
- Event Description: enter a description of your event so attendees know what to expect
- Event Details: here's where you'll enter the fine print such as cancellation policy, parking information, etc
Click on the right arrow at the bottom of the page to advance to the next step: Price
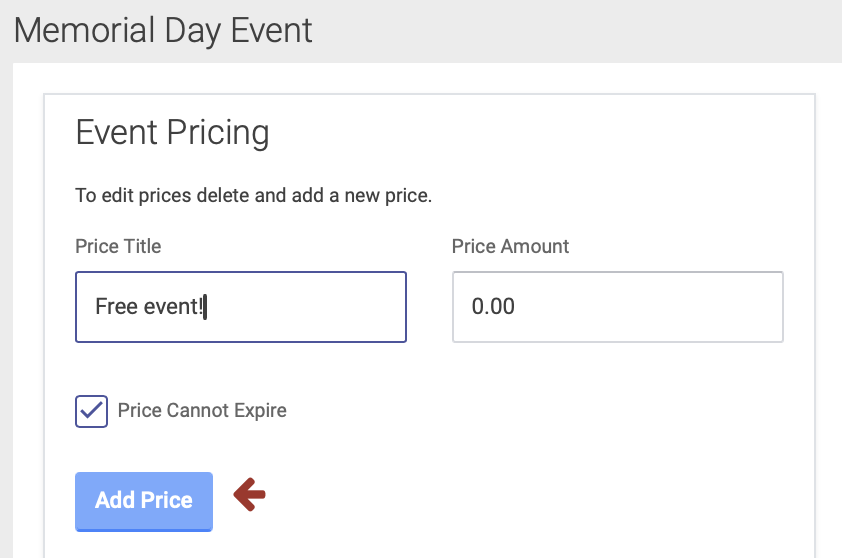
Price
On the Price page, you'll enter your pricing for the event.
For a free event: Enter your price title and 0.00 for your price amount. Click the Add Price button to save:
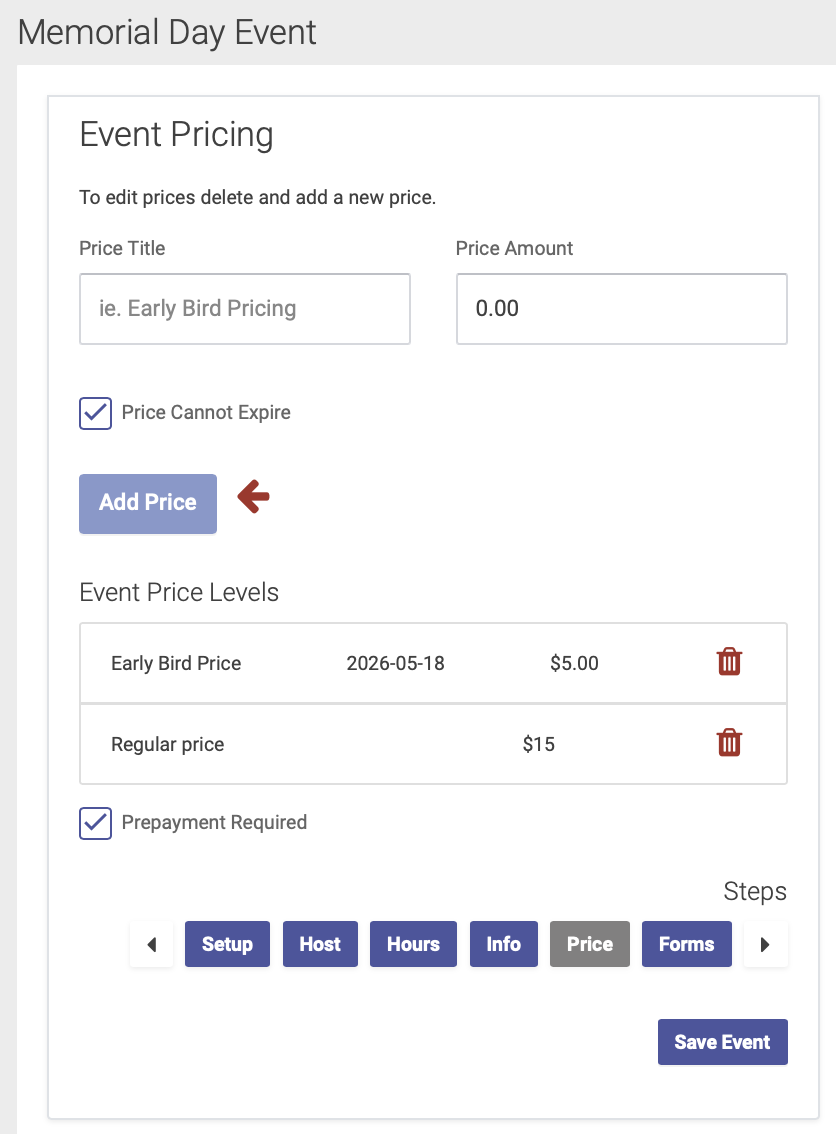
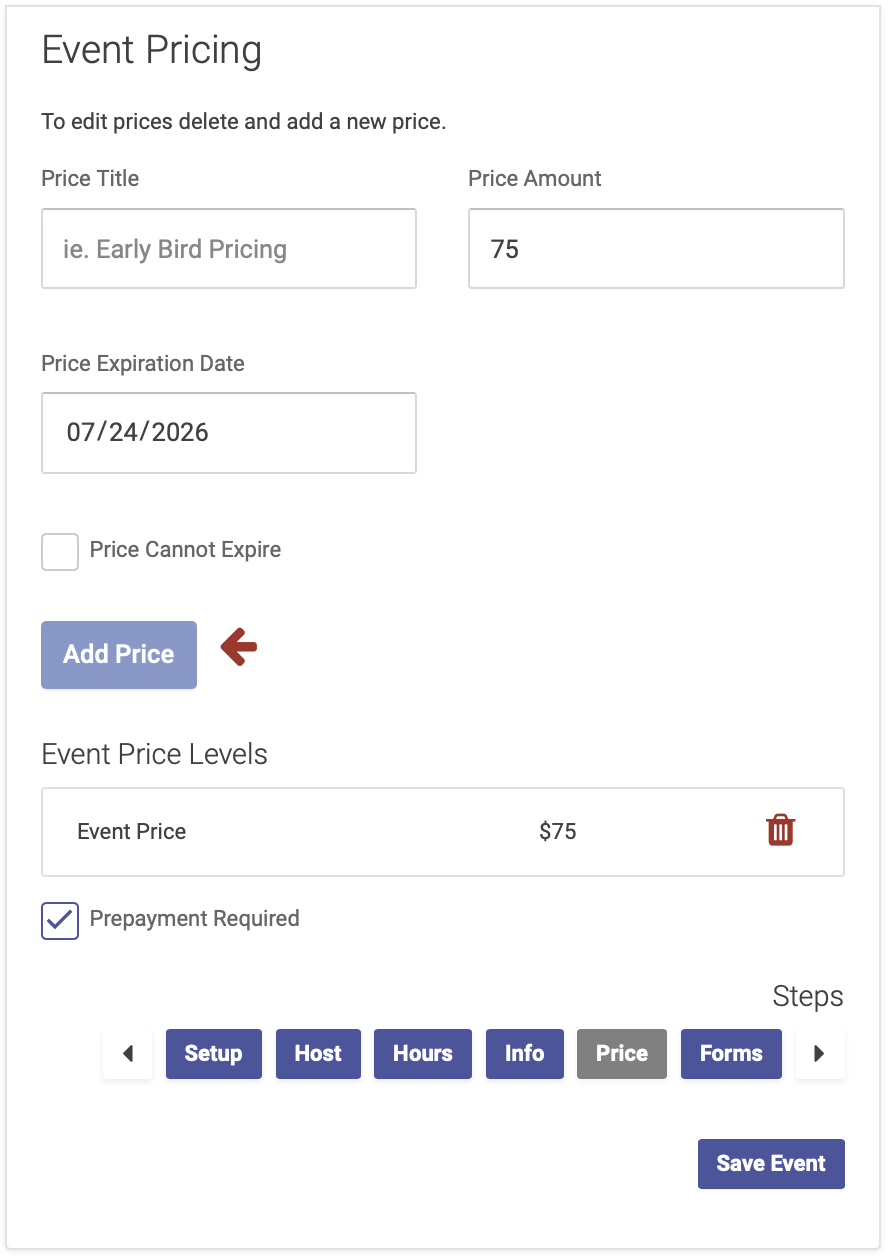
For a paid event:
- Enter your price title, amount, and expiration date (if applicable). Then click the Add Price button.
- You can add expiration dates to a price for an early-bird pricing option.
- If you want to require prepayment, click the Prepayment Required box (note: you must use Open ACU's Stripe integration feature to enable prepayment for Events).
Click on the right arrow at the bottom of the page to advance to the next step: Forms
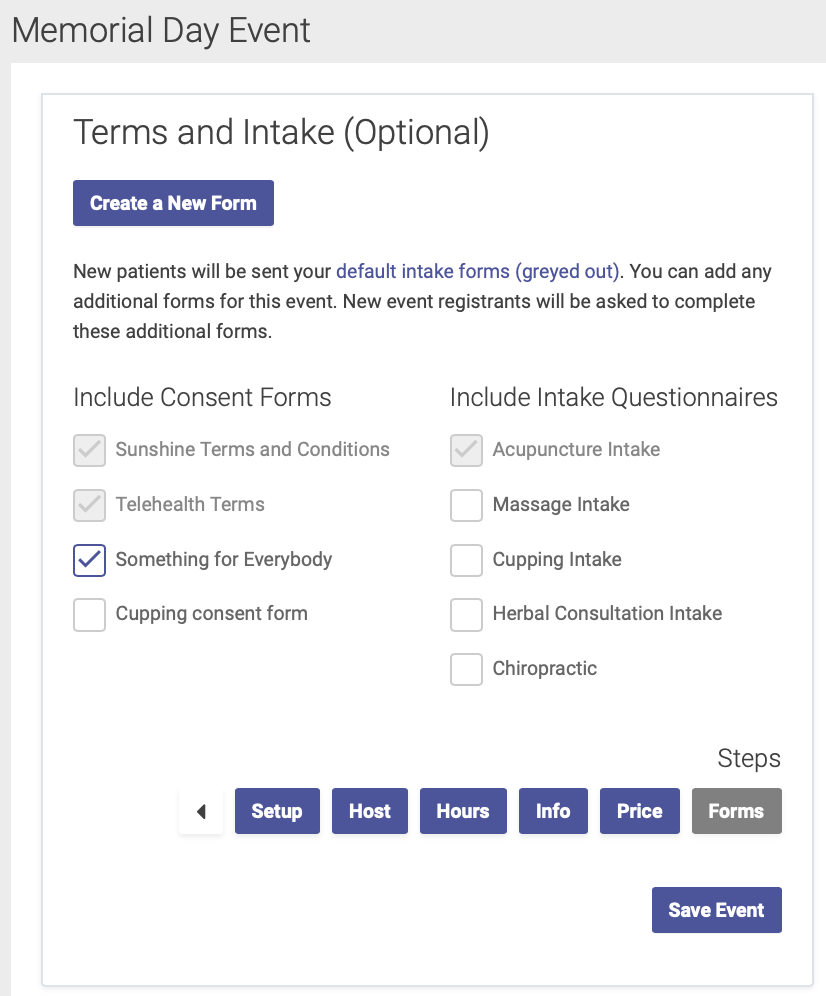
Forms
On the Forms page, you have the option of sending forms to attendees, to be completed in advance of the event.
- Select the forms you'd like to send from your clinic's Intake Form options,
- Or click the Create a New Form to create a new form for your event. This will take you to your Intake Settings page.
- You can skip this step if you do not require attendees to fill out a form for this event.
Click Save Event to finish the event setup process
Next step: Event Notifications
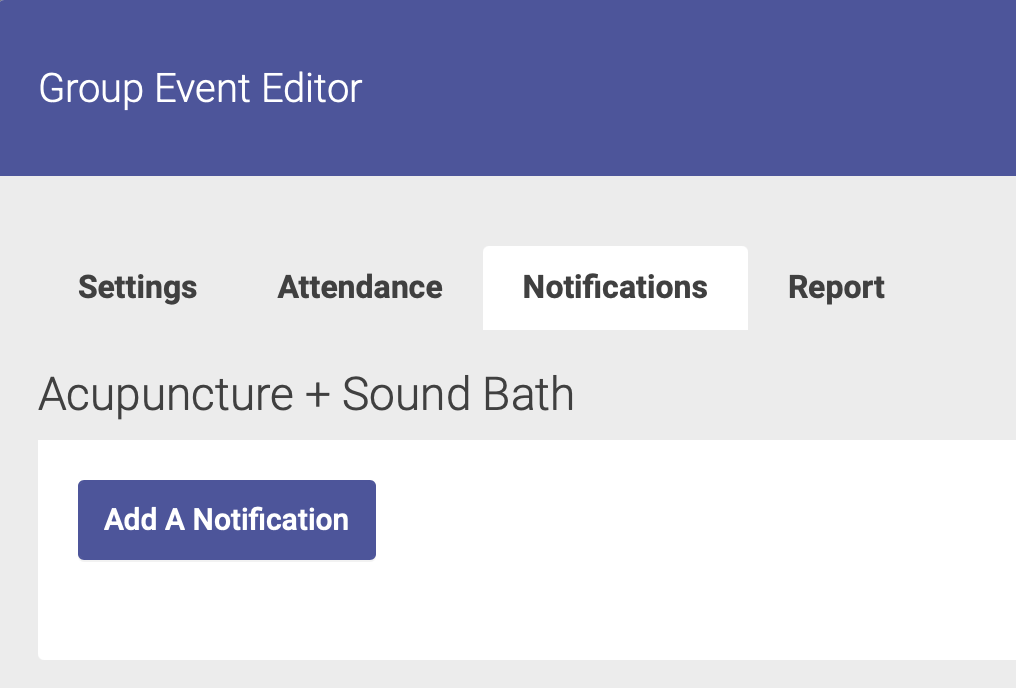
Event Notifications
You can create notifications for your event by clicking on the Notifications tab on the Event Editor. Click Add A Notification to start:
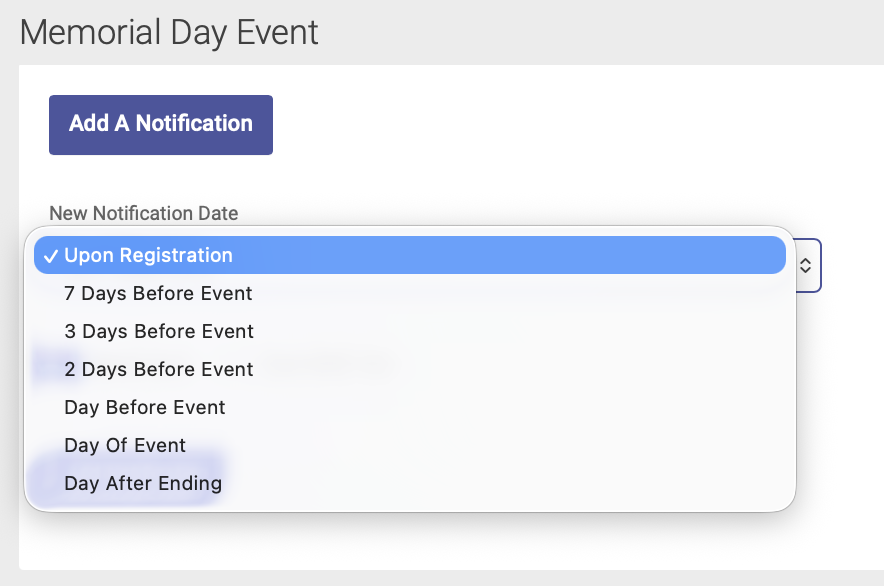
Step 1: Choose Notification Date
Select your notification date from the drop-down menu, then click the Add Notification button below the menu:
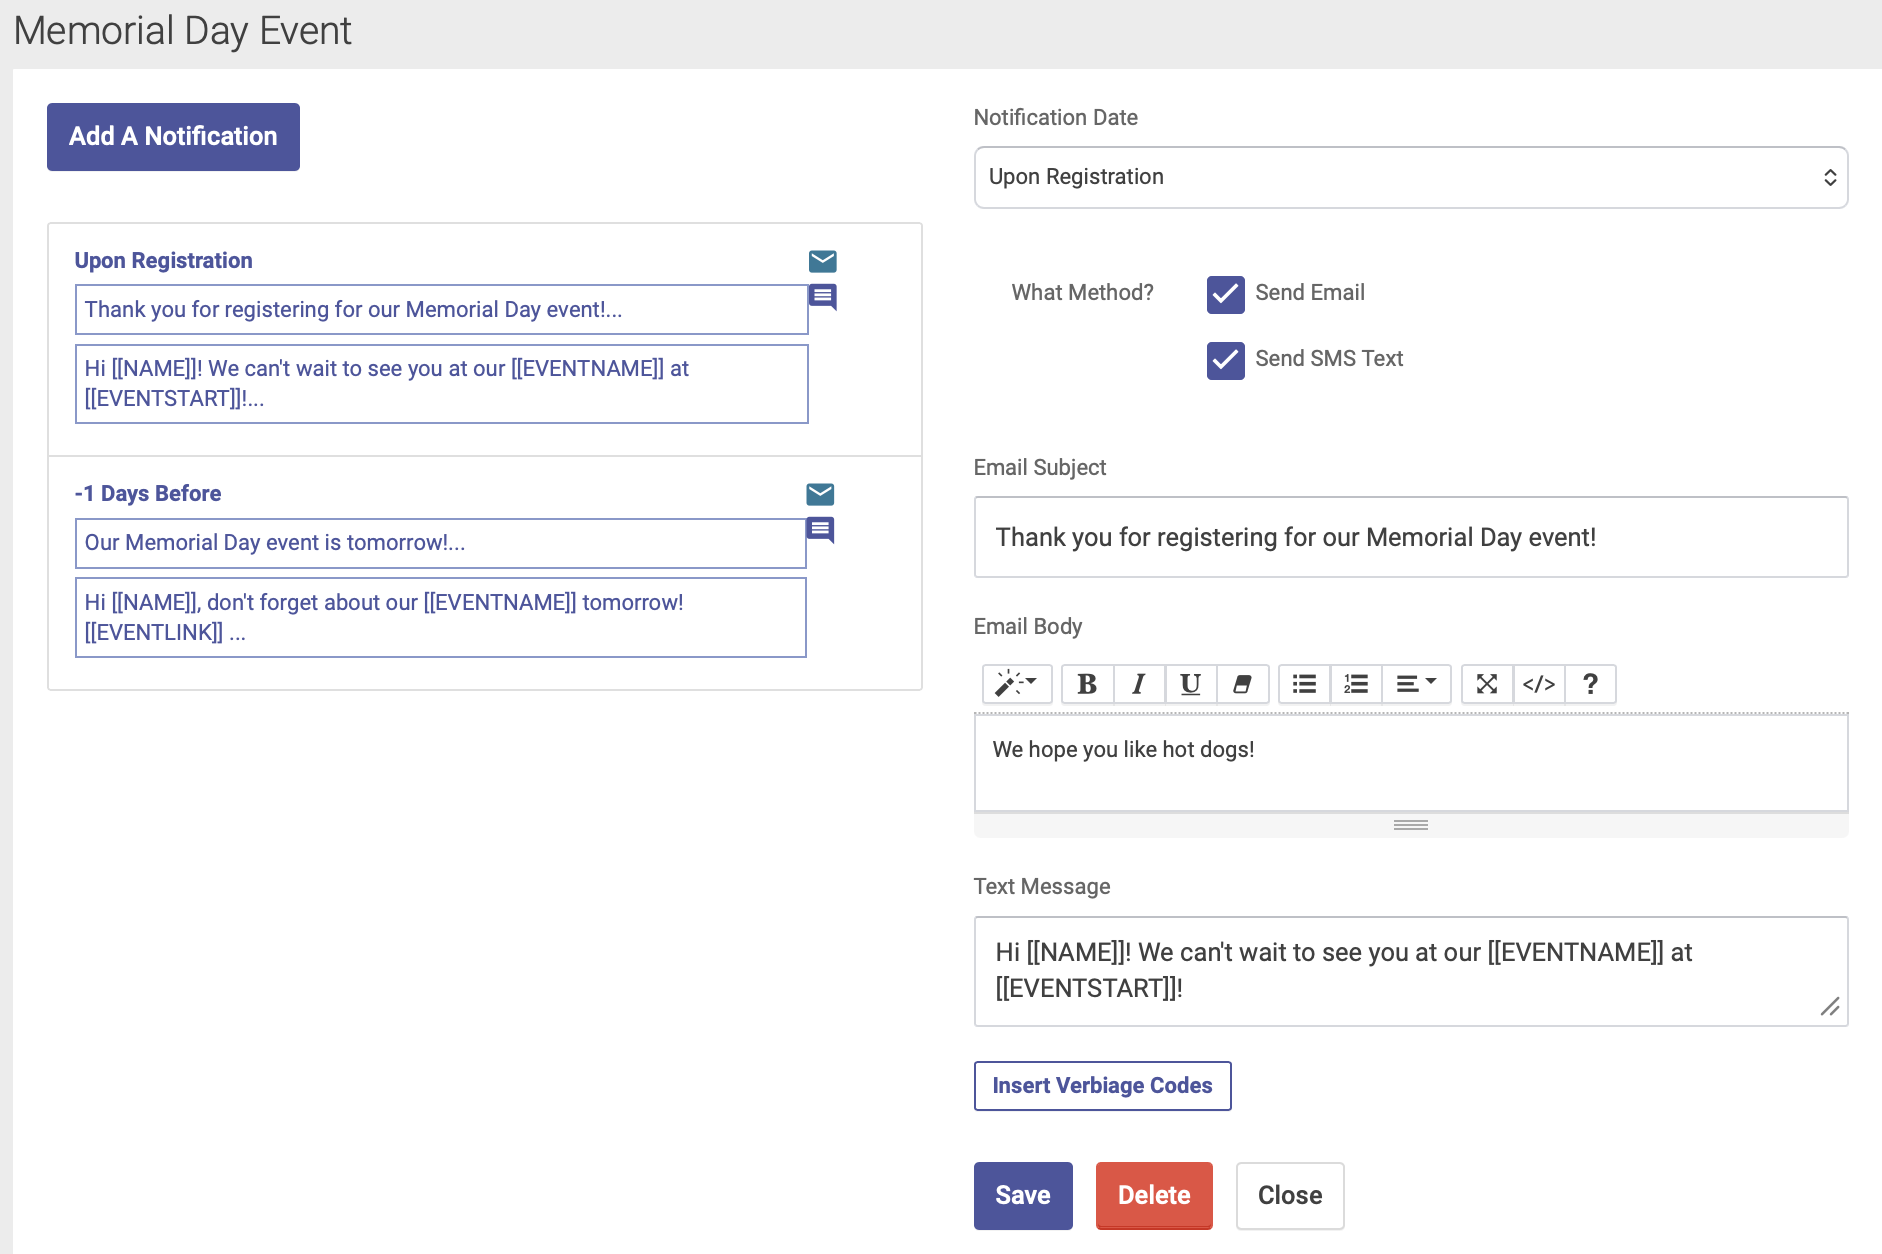
Step 2: Add Email and/or Text Message Details
Add your email subject and body text, and/or text message details:
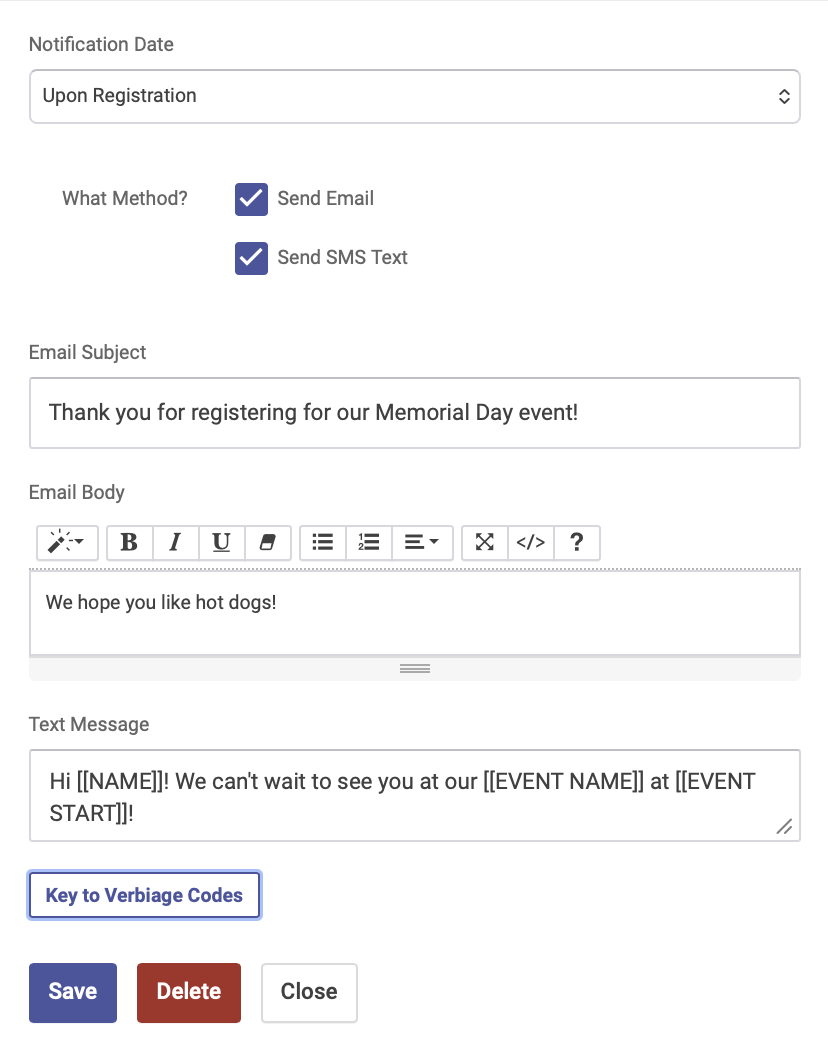
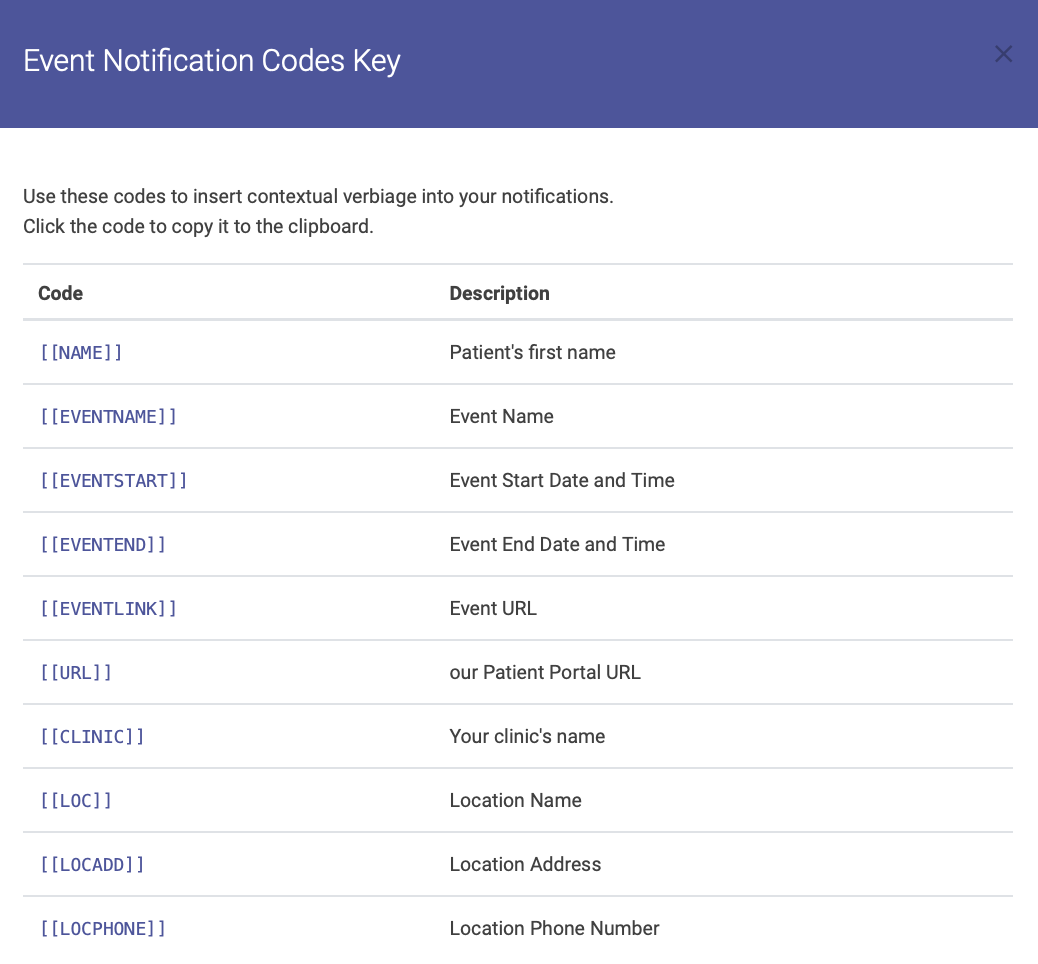
Click the Key to Verbiage Codes button to see your options for text message notifications:
Click Save when you're finished to save your notifications.
Managing Notifications
You can add multiple notifications per event. Your saved notifications will appear on the Notifications tab:
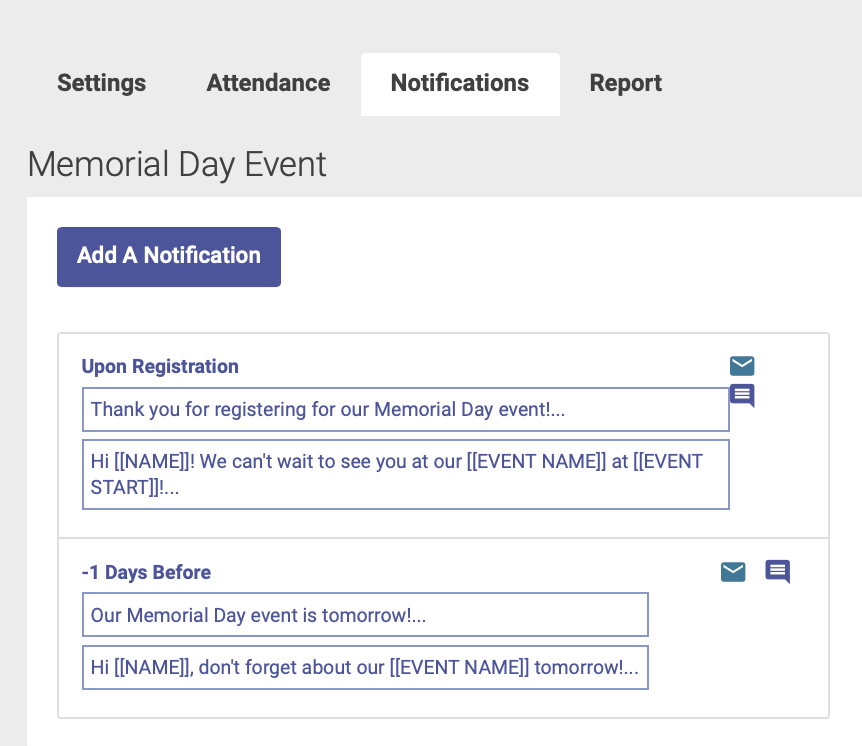
Editing or Deleting Notifications
To edit or delete a notification, click on the notification you wish to edit from your list. The notification details will appear on the right hand side of the page, and from there you can edit and save your notifications, or use the delete button at the bottom to delete a notification:
Adding EHR Notes to an Event
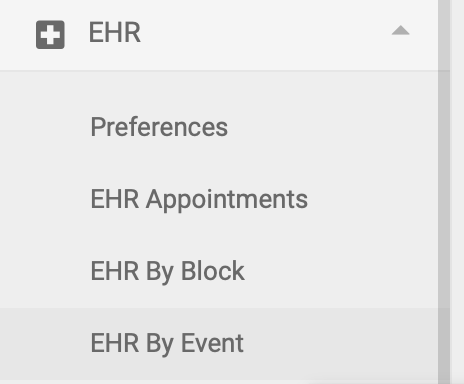
If your event includes EHR notes, the process is very similar to recording EHR notes for appointments. You'll record your notes on the EHR by Event page, which is on the left-hand side menu:
Note: only Users with Practitioner level access can add EHR notes to an Event.
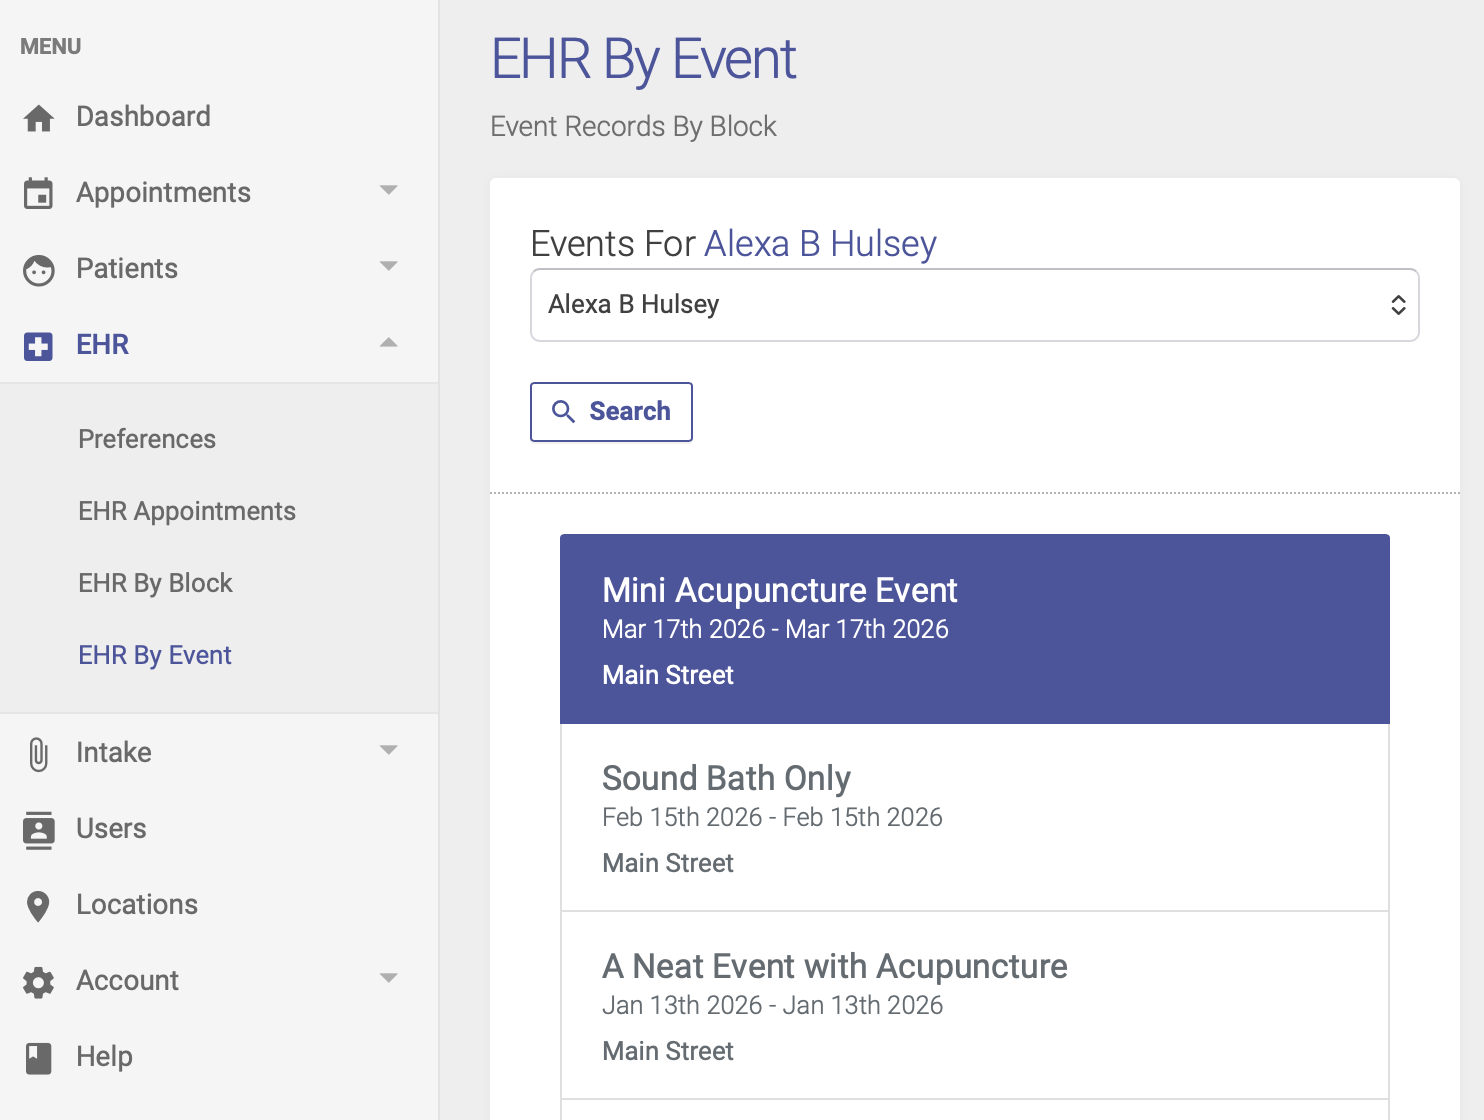
Step 1:
On the EHR Event page, click your Event title to highlight it and open the list of attendees on the right hand side of the page:
Step 2:
Once your list of attendees appears on the right hand side of the page, click the pencil icon to record your EHR notes for the event:
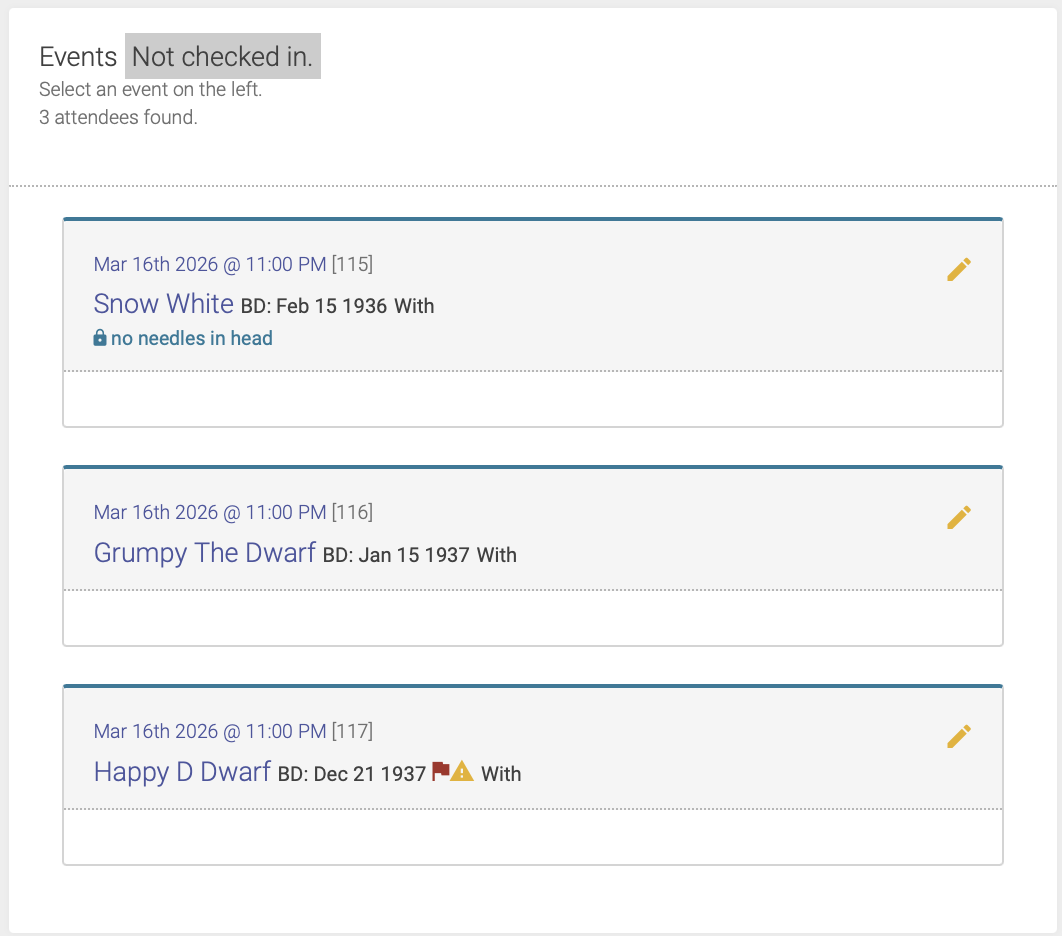
Note: You will only be able to enter EHR notes after the attendee has been checked in.
Step 3:
You can then enter your notes and points into the corresponding fields, just like you would for EHR notes for a regular appointment.
Once you've entered your notes, you'll click Save to save your notes, then Lock to approve and lock the record.
Creating a Multi-day Event
Our Events function allow you to create an event that spans multiple dates. Here's how to do that.
Event Setup
On the Event Setup page, click the box next to "Is this a multiday event?" You can then enter the start and end dates for your event:
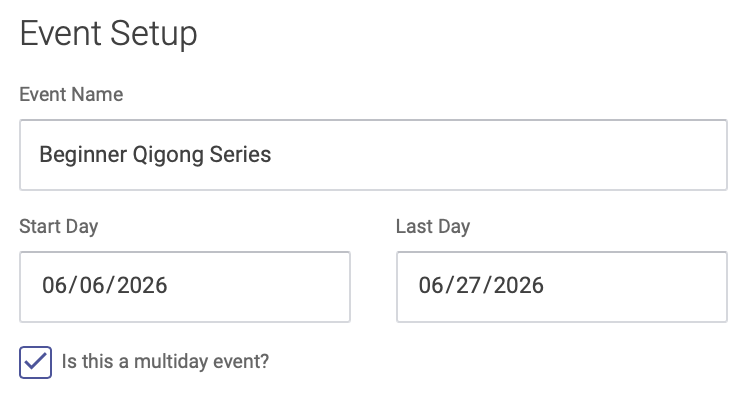
Note: You'll select individual dates for your event on the Hours tab.
Click the right arrow at the bottom of the page to advance to the next step: Host
Host
On the Host page, you'll enter information about the event host(s), the same as you would for a single-day event:
- Add Event Host from a dropdown menu of your clinic's Practitioners. To add a Practitioner, select their name from the dropdown menu, then click the Add Practitioner button. You can add multiple practitioners per event.
- Click the "Add EHR notes to this event" checkbox if you want to enter and save health records for this event.
- If you have other event presenters or hosts who are not on the menu of your clinic's Practitioners, you can add their name in the Other Presenters box
Click the right arrow at the bottom of the page to advance to the next step: Hours
Hours
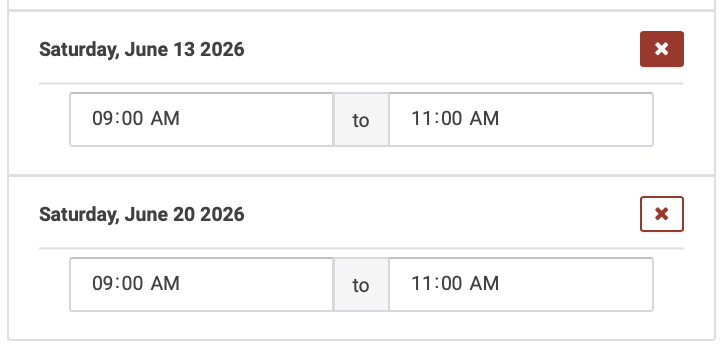
On the Hours page, you'll enter the hours for each of your separate dates. Click the box below "Session Dates" and a drop-down calendar will appear. Click dates on the calendar to select each date of your multi-day event, then click Add Dates:
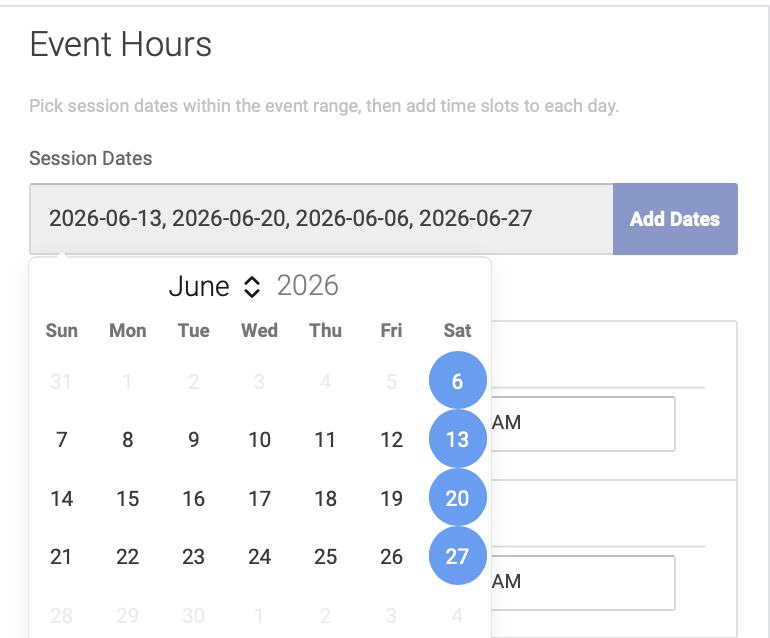
You will then enter the hours for that date. By default, the hours at set to start time 9:00AM and end time 11:00AM. Simply highlight the hours to edit them:
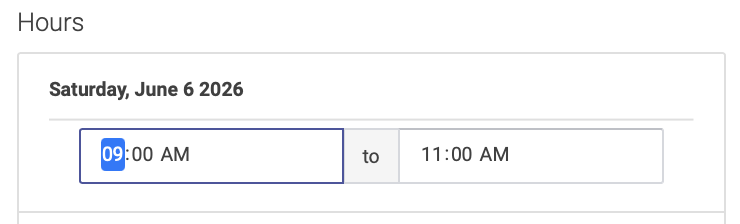
To delete a date from your multi-day event, click the X box next to the event date (note: you cannot delete the start or end date of a multi-day event):
Click the right arrow at the bottom of the page to advance to the next step: Event Info
Event Info
Enter your description and details for the event, like you would for a single-day event.
Click the right arrow at the bottom of the page to advance to the next step: Price
Price
On the Price page, you'll enter your pricing for the event, the same as you would for a single-day event. You can add expiration dates to a price for an early-bird pricing option.
- Enter your price title, amount, and expiration date (if applicable). Then click the Add Price button.
- If you want to require prepayment, click the Prepayment Required box (note: you must use Open ACU's Stripe integration feature to enable prepayment for Events).
Click the right arrow at the bottom of the page to advance to the next step: Forms
Forms
On the Forms page, you have the option of sending forms to attendees, to be completed in advance of the event.
- Select the forms you'd like to send from your clinic's Intake Form options,
- Or click the Create a New Form to create a new form for your event. This will take you to your Intake Settings page.
- You can skip this step if you do not require attendees to fill out a form for this event.
Click Save Event to finish the event setup process
Next step: Event Notifications
Register Attendees for an Event
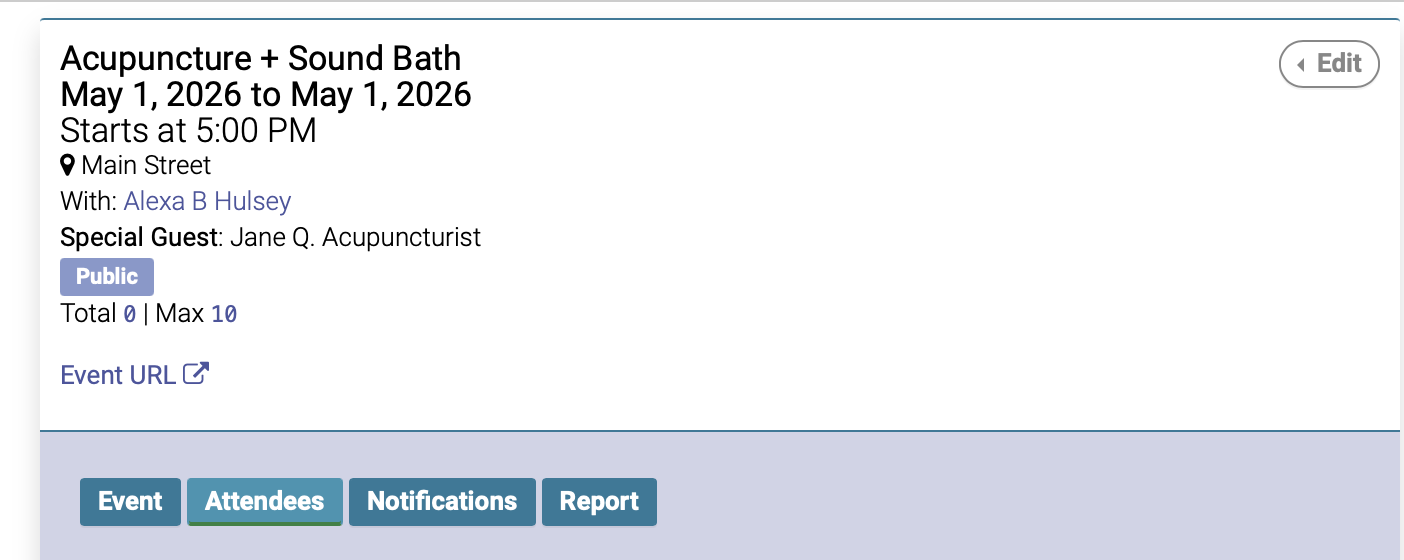
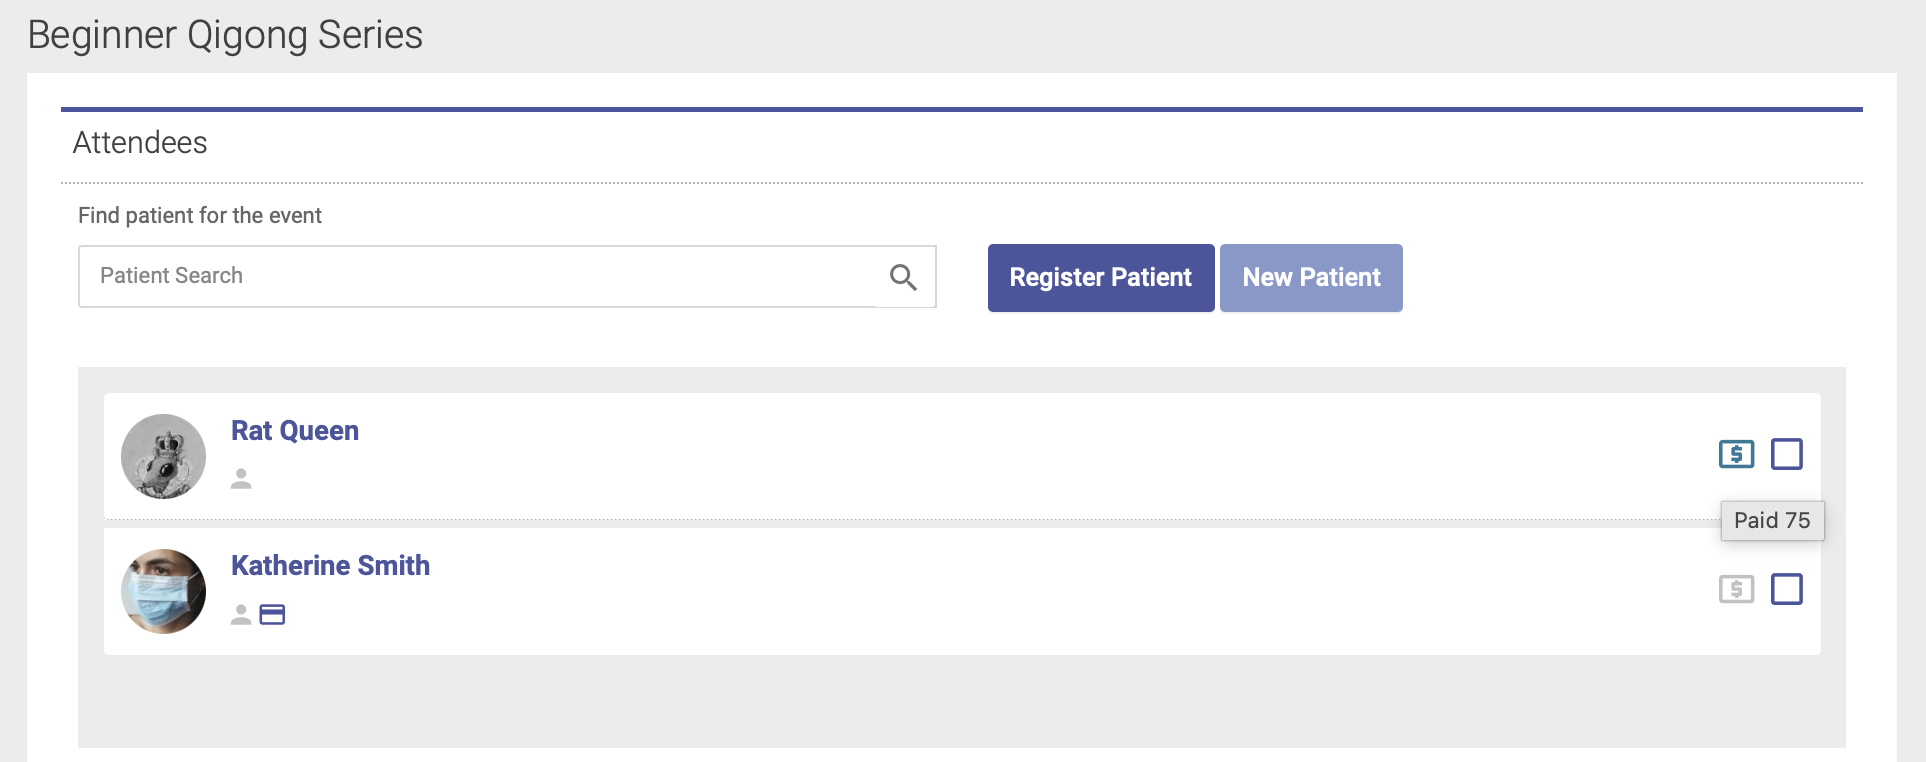
To register attendees for an event, navigate to the event date on the calendar, then click the Attendees tab:
If the attendee is an existing patient:
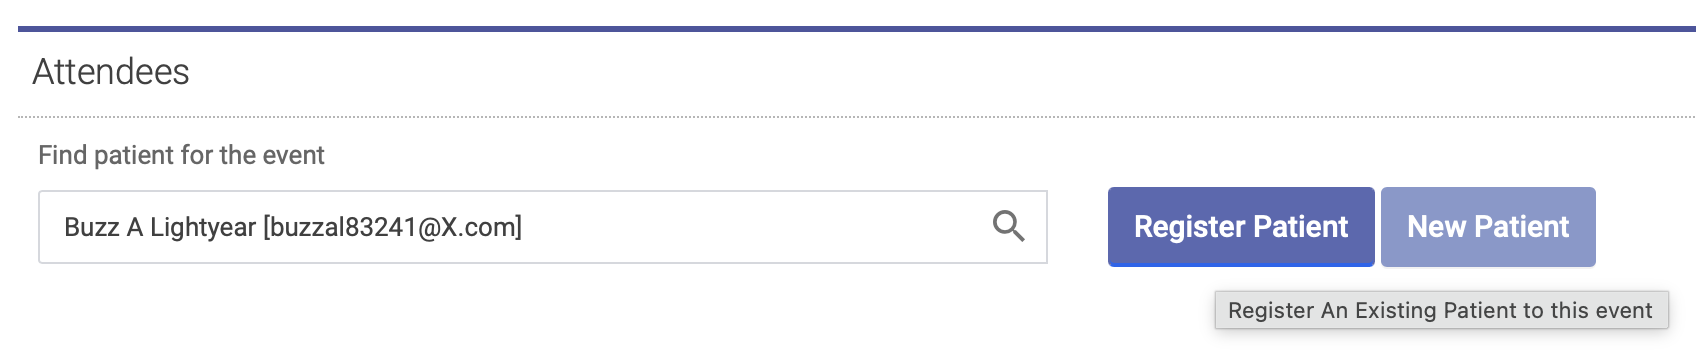
If the attendee is already an existing patient in your database, start typing their name into the Patient Search box:
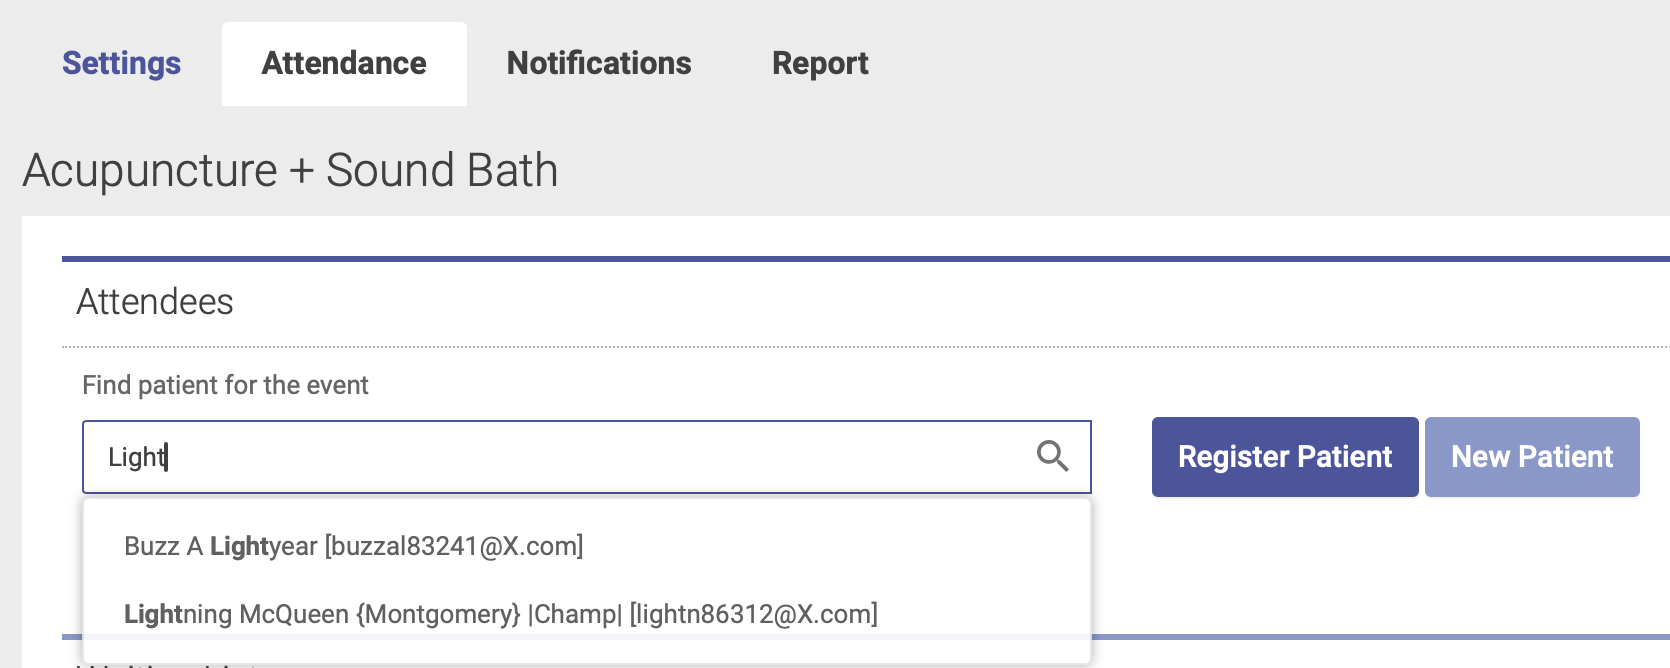
Then highlight their name, and click Register Patient - just like you would do for scheduling an appointment:
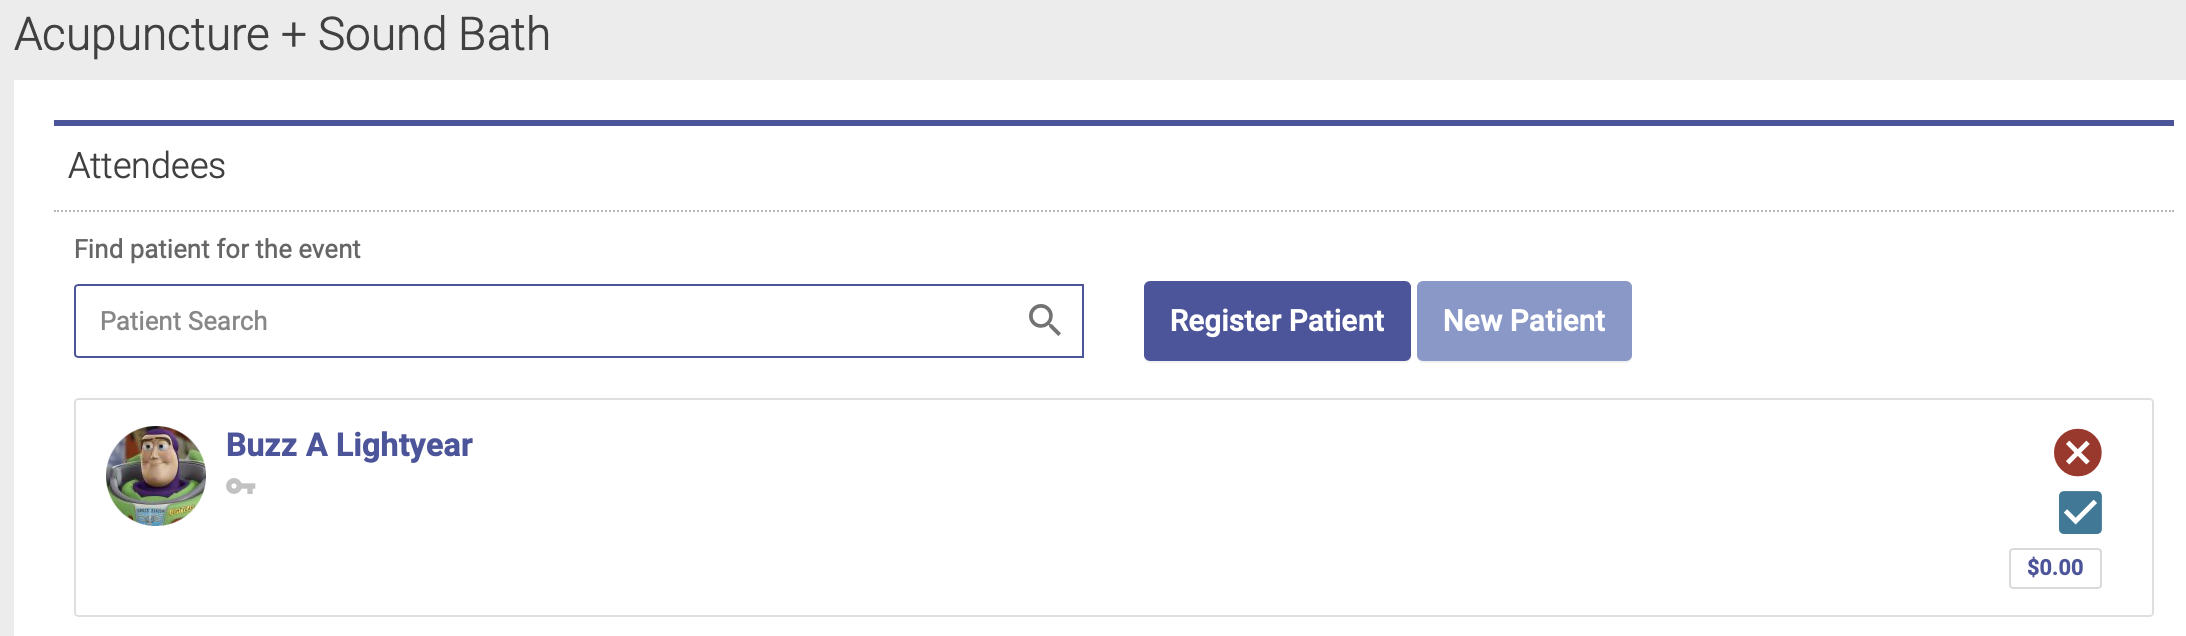
One the patient is registered, you'll see their name on the Attendees list:
If the attendee is NOT an existing patient:
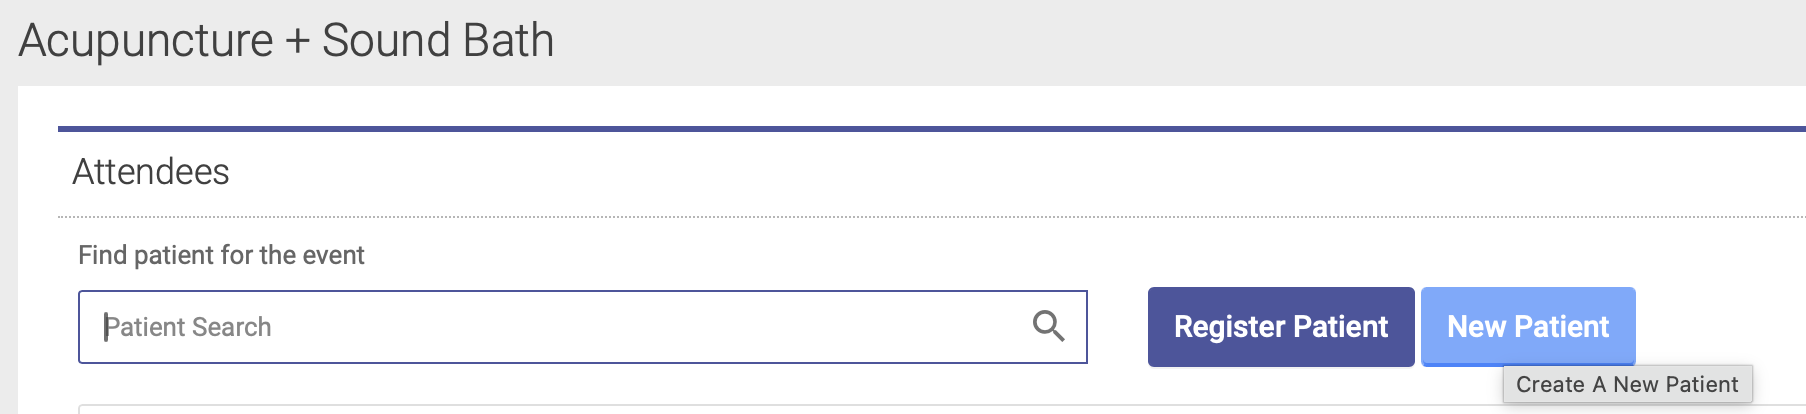
If the attendee is not already an existing patient in your database, you'll first need to create a New Patient account for them. Click the New Patient button to create a new patient account:
You'll then be prompted to walk through the steps of adding them as a new patient. Once they're added to your database, you can then complete the registration steps like you would for an existing patient.
See This Article for information on how participants can register themselves for an event via the Event URL on the patient portal.
All Events page
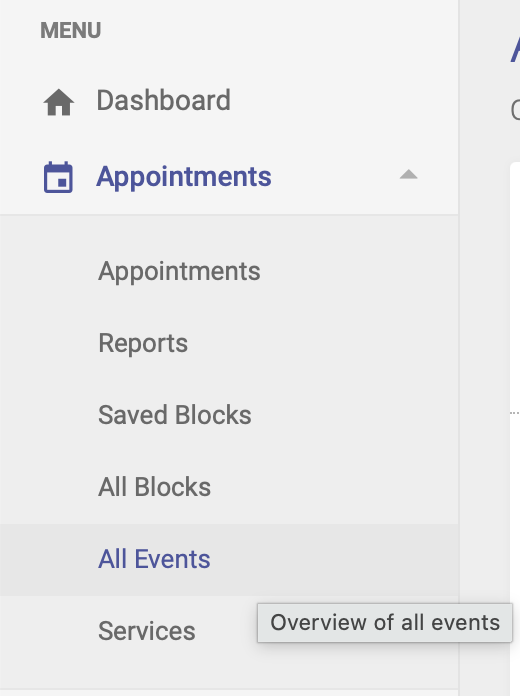
Your All Events page shows a list of all past and future events. On the left-hand side menu, click Appointments --> All Events:
When you click on an Event listing, you'll be taken to the Event date on the calendar:
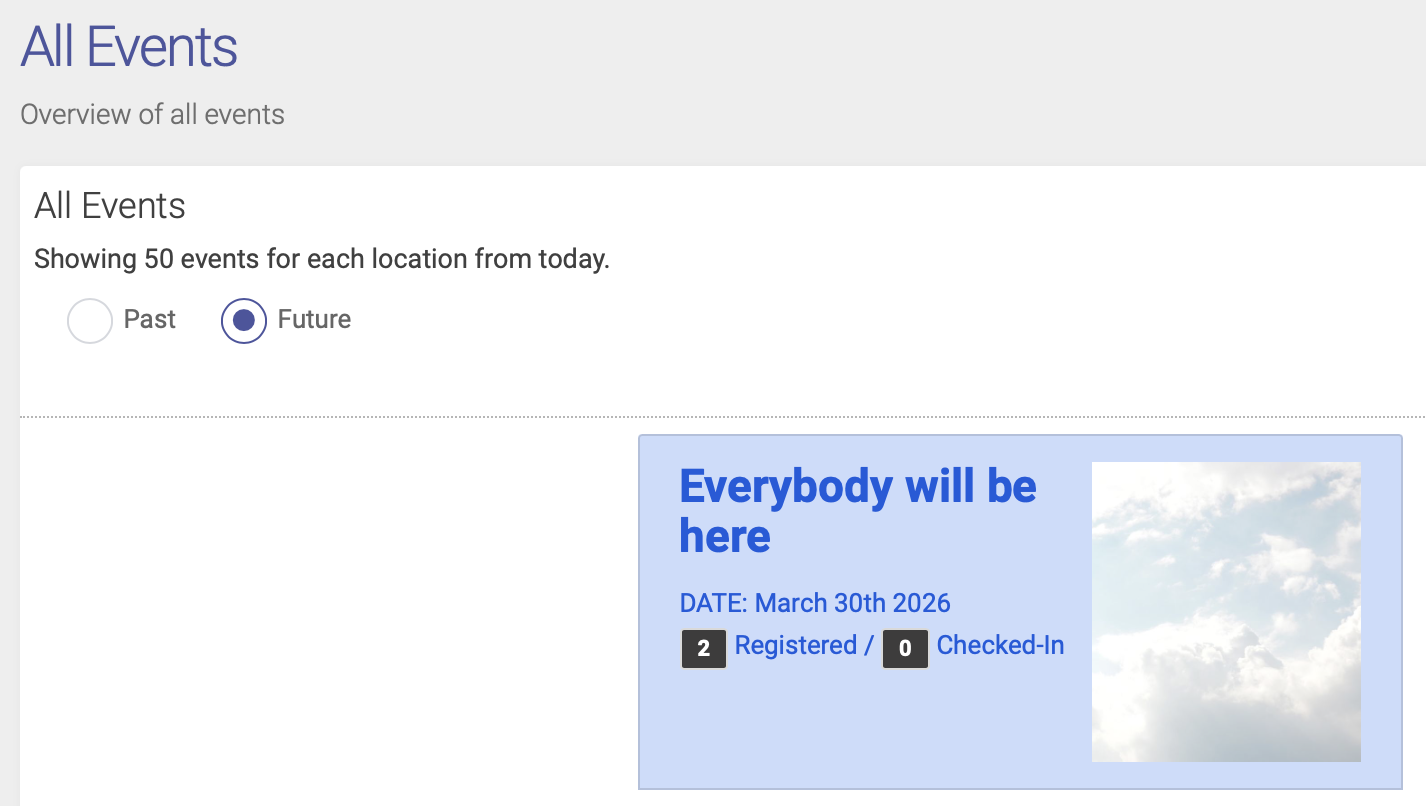
From there, you can edit your event, register attendees, edit notifications, and view reports.
Event Waiting List
If your event registration is full, you can add people to the waiting list.
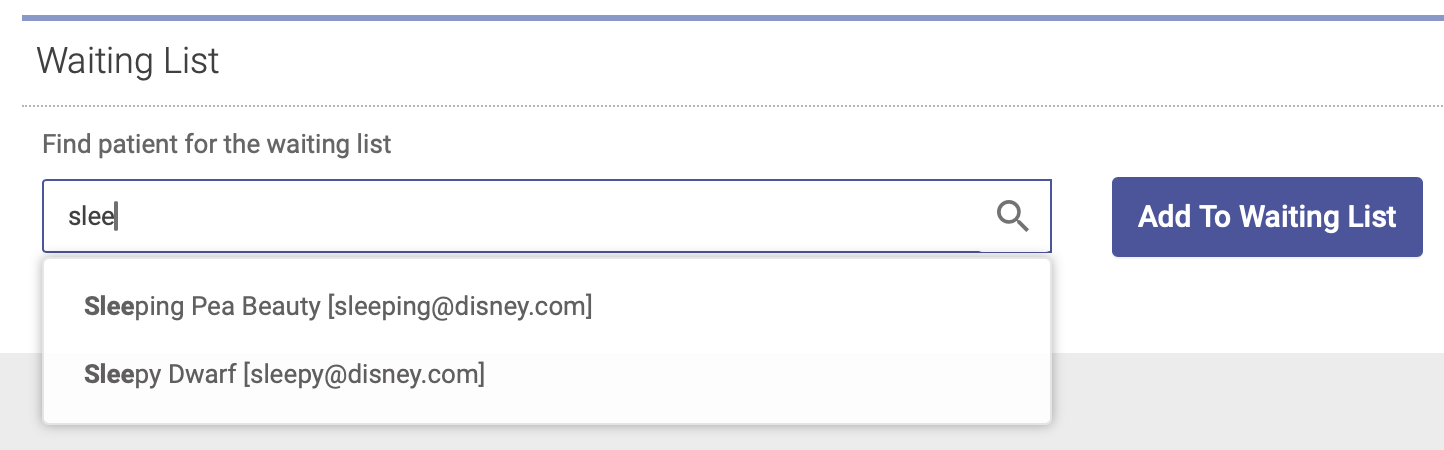
Add someone to the waiting list
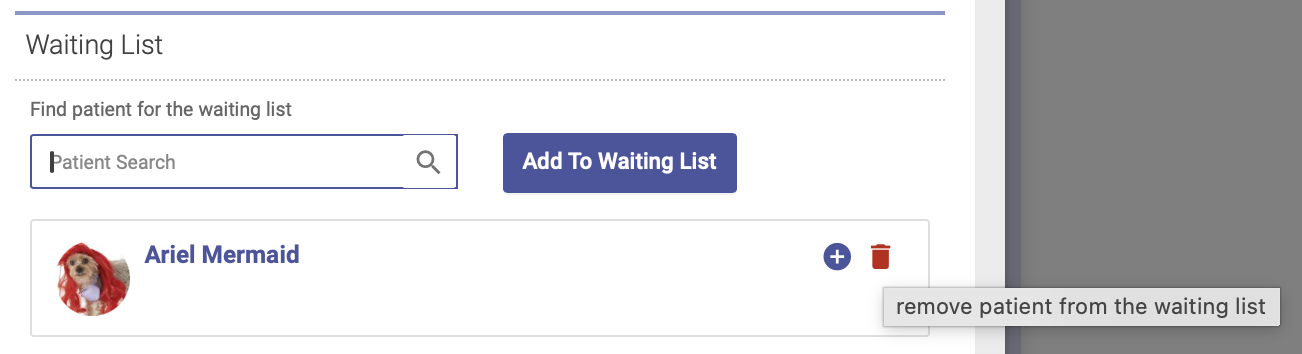
To add someone to the event waiting list, open the Attendees tab on your Group Event Editor and scroll down to the Waiting List section. Type a patient's name into the search field, highlight their name, then click Add to Waiting List:
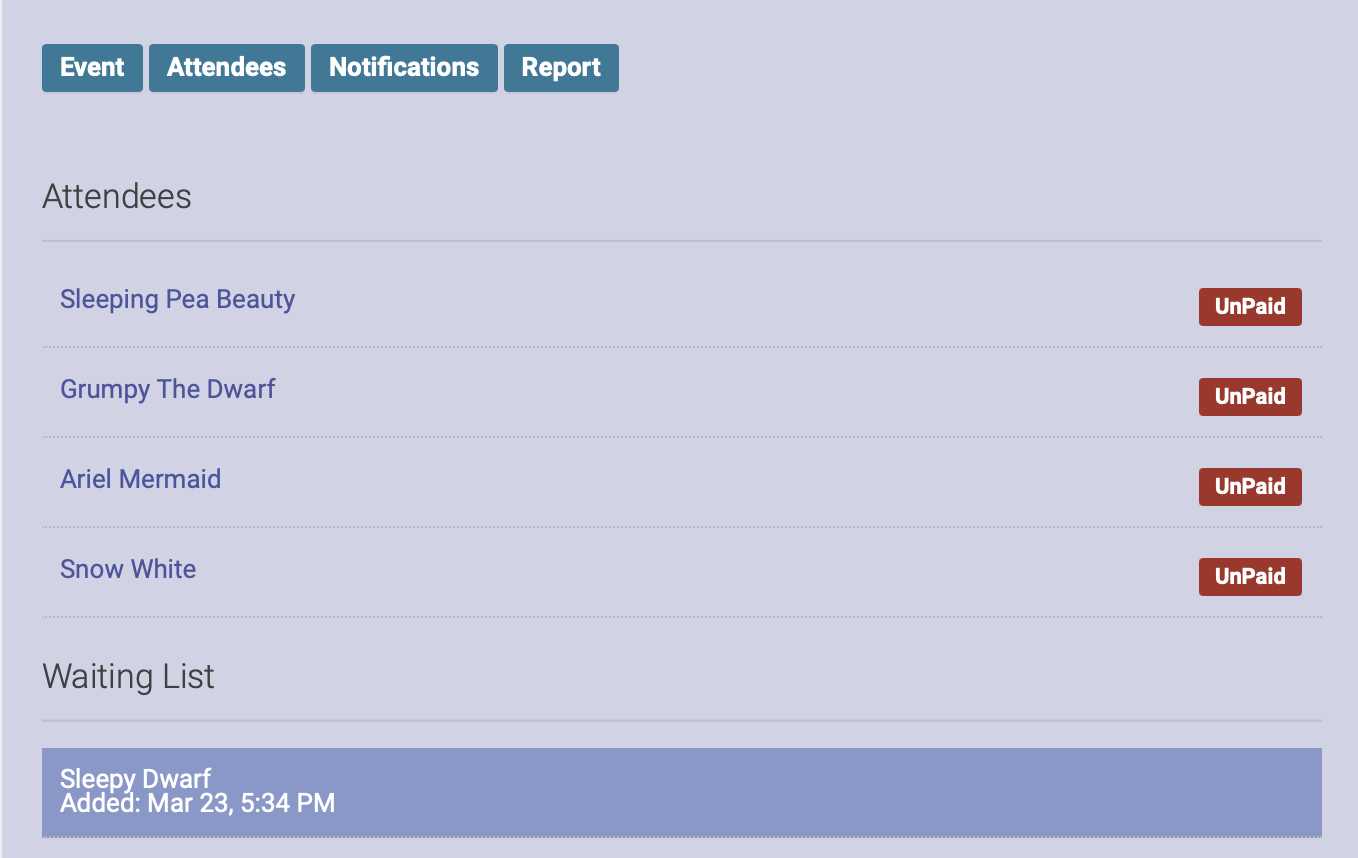
You will now see their name on the event waiting list, under the list of registered attendees:
Register someone on the waiting list for the event
If a spot opens up and you want to register someone on the waiting list for the event, open up the Attendees tab. Click on the plus sign (+) next to the person's name. This will move them off the waiting list and register them for the event:
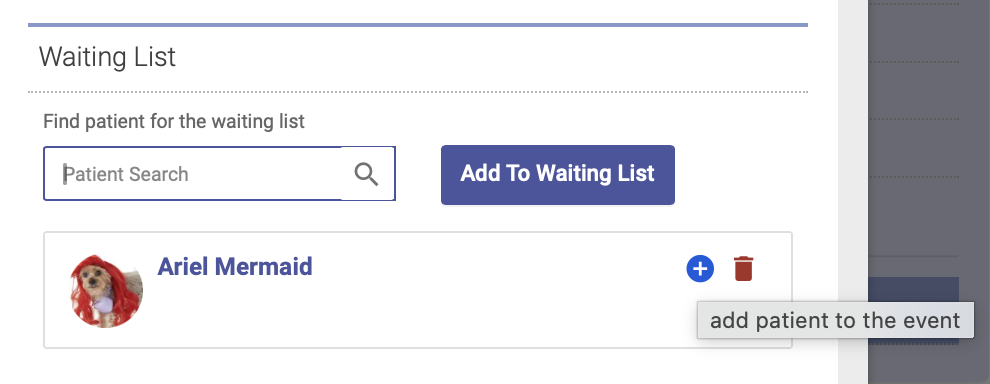
Remove someone from the waiting list
To remove someone from the waiting list, open the Attendees tab, then click on the trash can icon next to their name. This will remove them from the waiting list:
Waiting list via Patient Portal
People can also add themselves to the waiting list via the event URL.
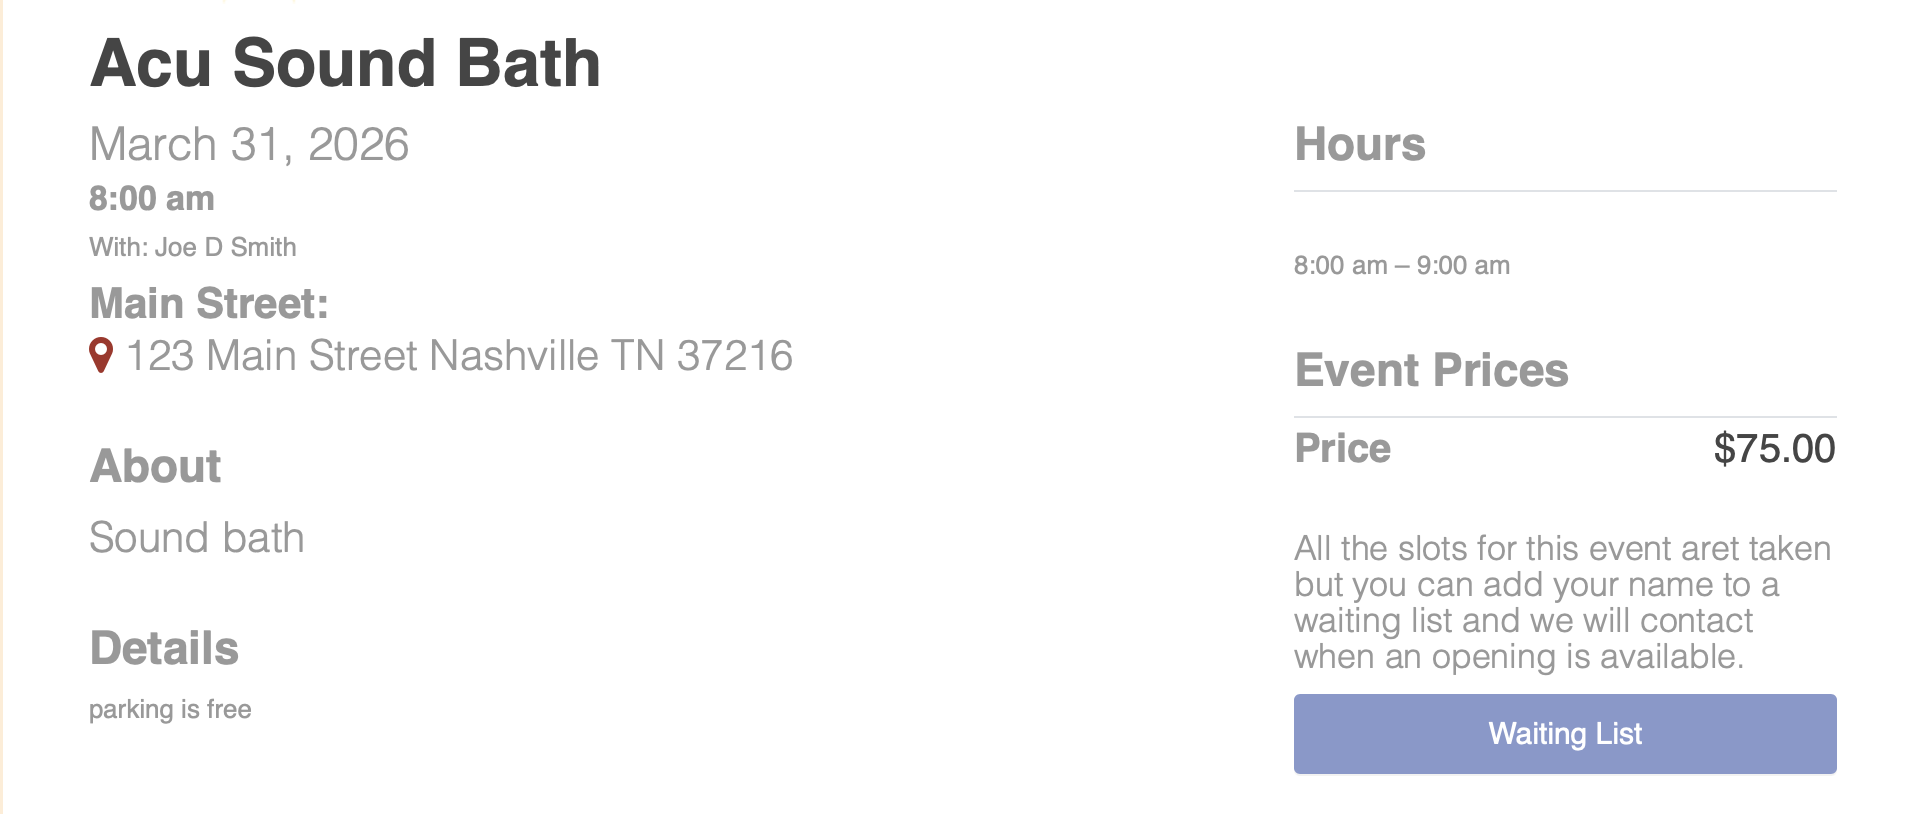
If registration is full, the event URL will display a message that registration is full, with a button for people to add themselves to the waiting list:
Once they click that button, they'll be prompted to sign in and complete the steps to add their name to the waiting list:

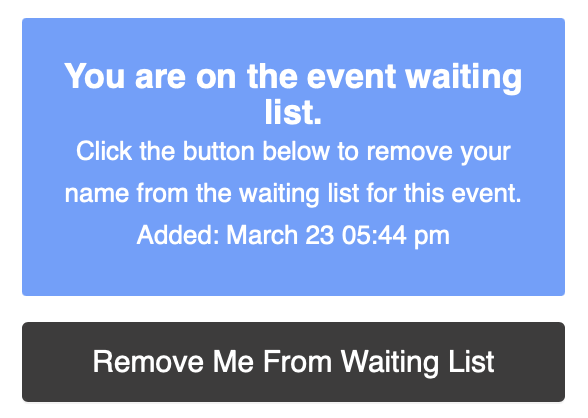
The event URL will then show a message that they've successfully added their name to the waiting list. They can click the "Remove Me from Waiting List" button to take their name off the waiting list:
Event Report
The Event Report tab shows you a list of event attendees, registration and check-in dates, payment amounts and payment methods.
Click the Report tab on your Event Block:
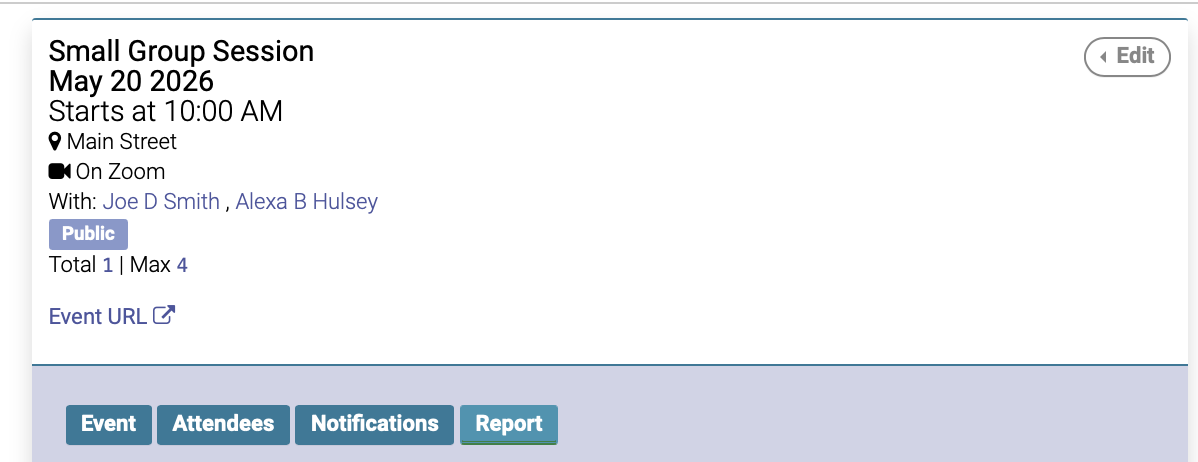
You will then see a report that shows Attendees, Date registered and checked in, and payment information:
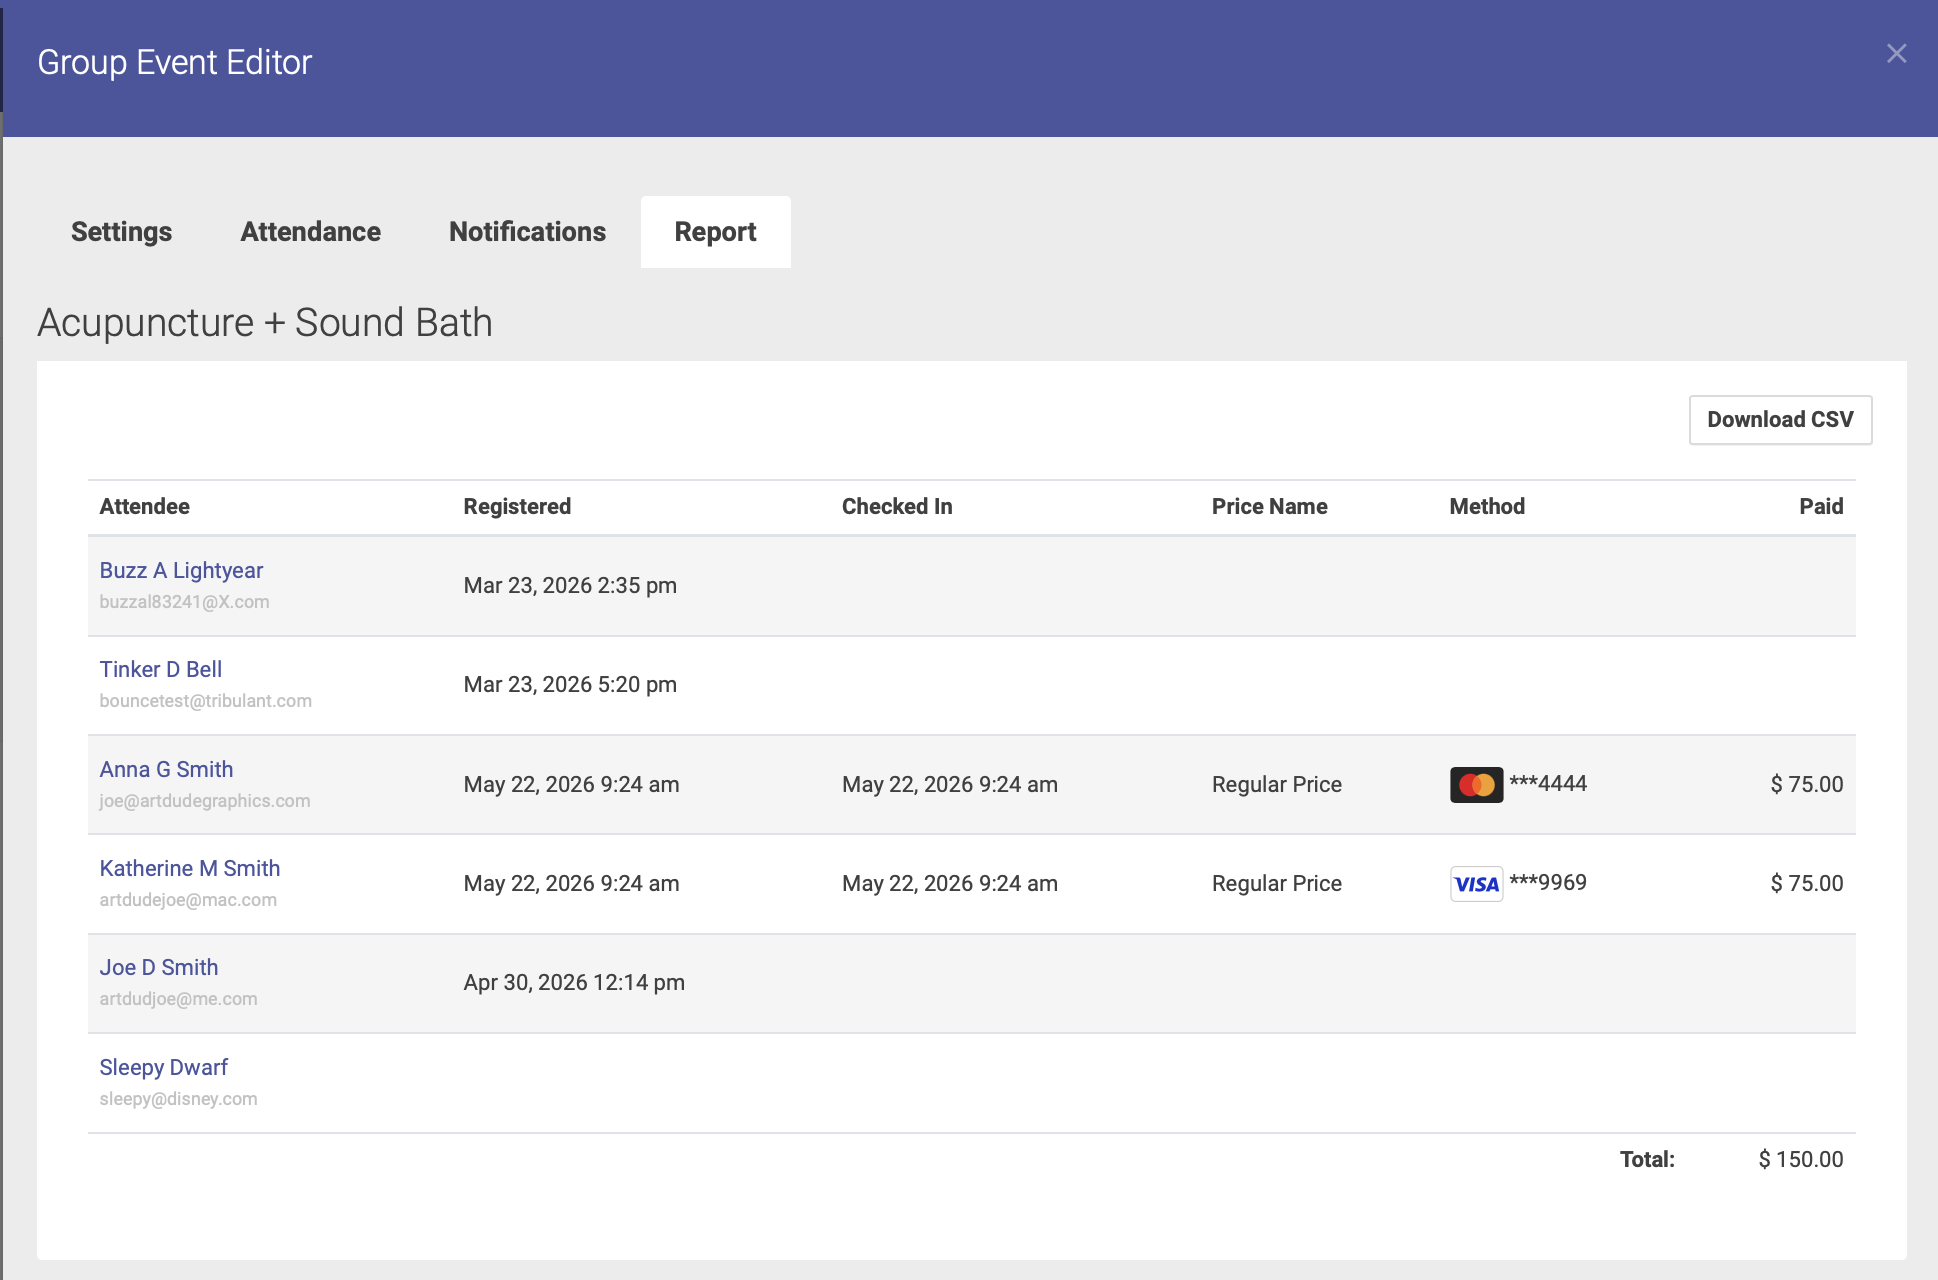
You can click the Download CSV button to download your report to a spreadsheet.
Registering for an Event: Patient Portal
Participants can register themselves for an event via the Event URL on the patient portal.
Step 1: Sign In
If you are not already signed in to your account, you can sign in on the clinic's Patient Portal home page.
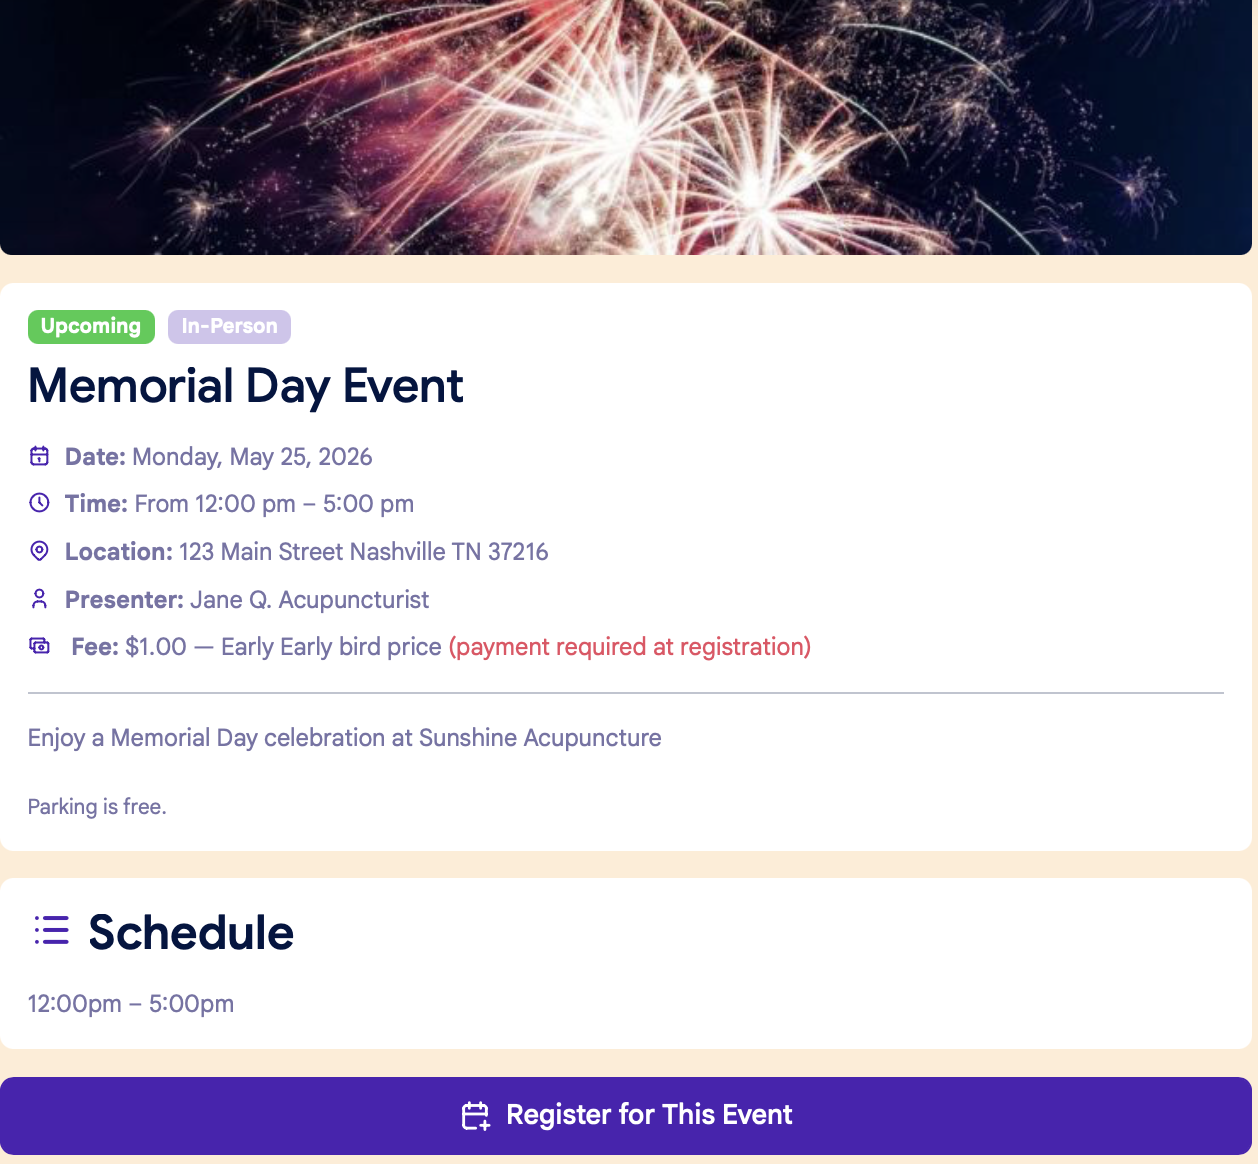
Step 2: Event Page
On the Event page, click the "Register for This Event" button at the bottom of the page:
Step 3: Confirm info
You'll see a popup window to confirm your information:
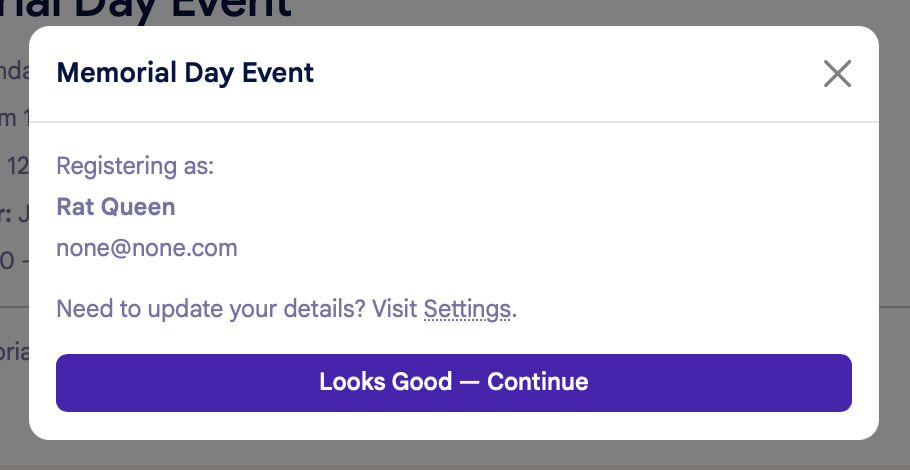
After the you confirms your information, the next step will vary based on payment options.
Free Events:
Click the green "Complete Registration" button to confirm your registration:

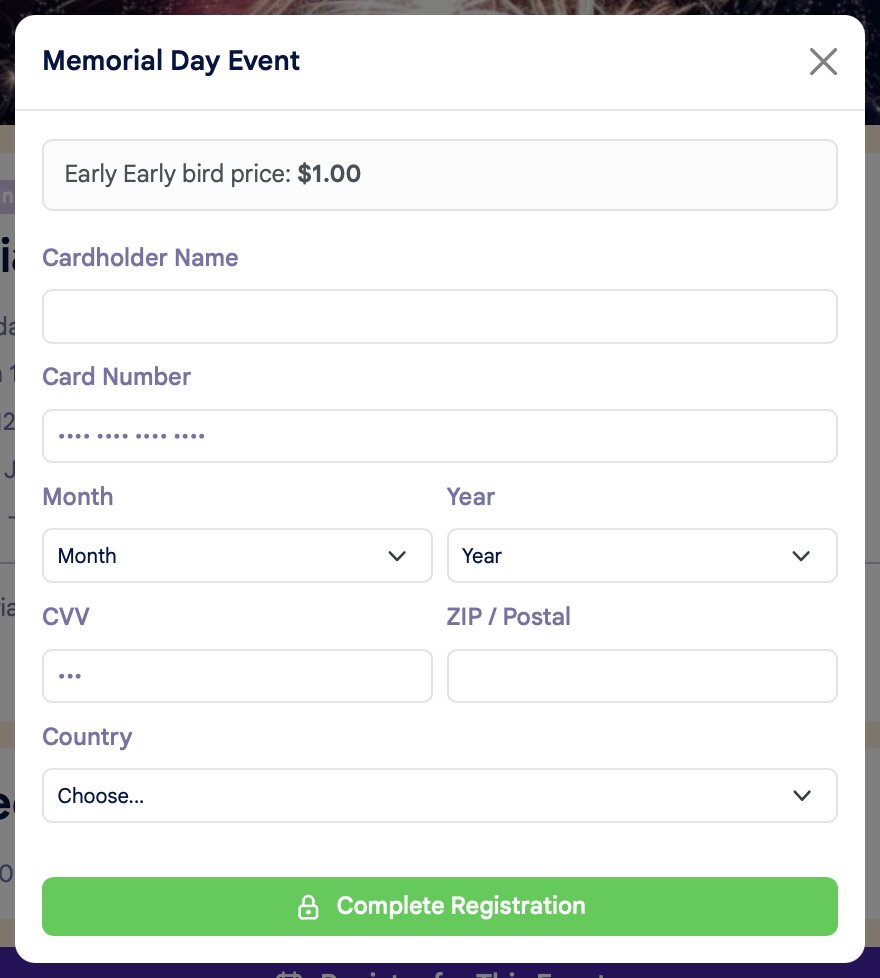
If prepayment is required and you do NOT have a card on file:
You'll be prompted to enter your credit card details to complete your registration:
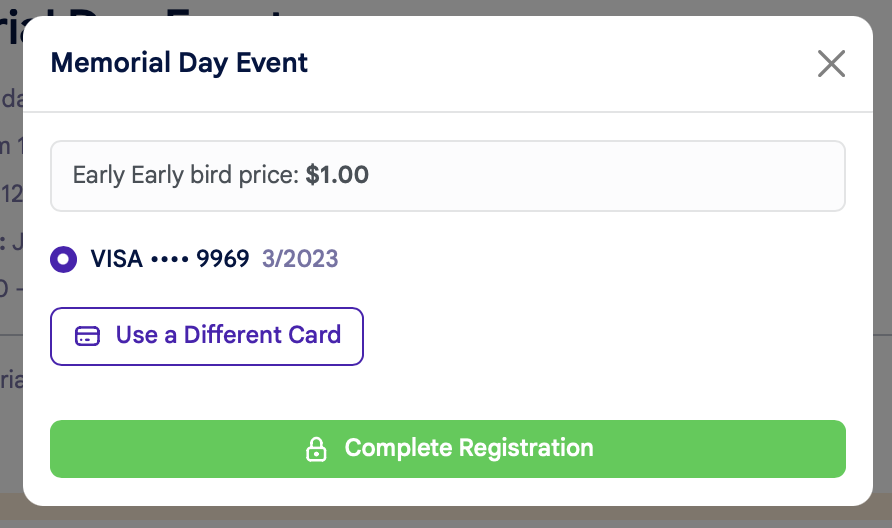
If prepayment is required and you DO have a card on file:
You'll be asked to confirm your credit card details, or you have the option to use another card:
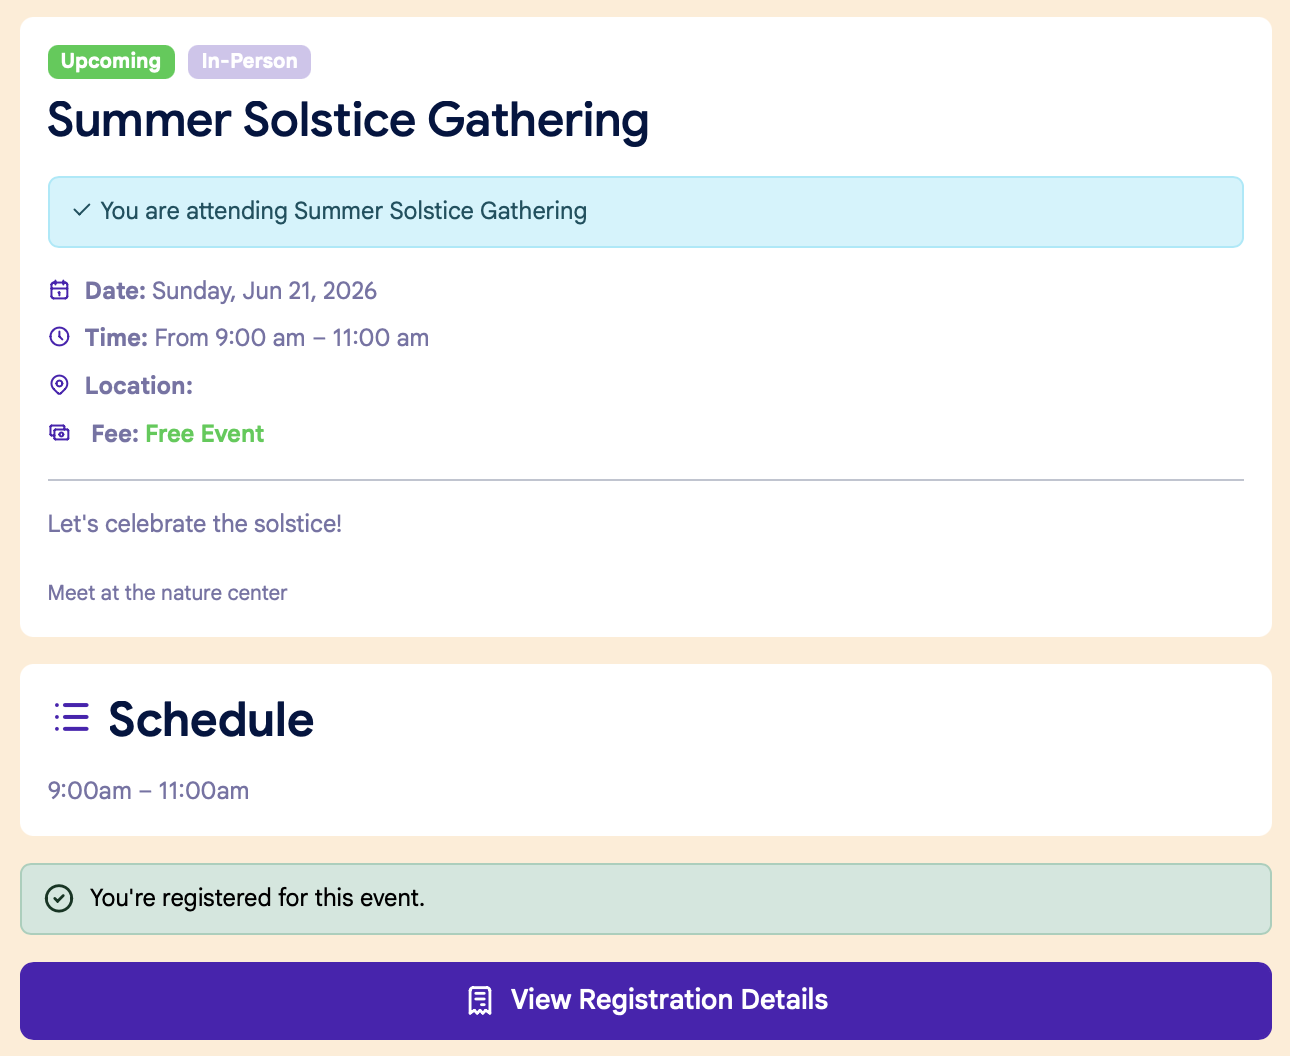
Once you've completed your registration, you'll see a confirmation page:
Collecting Payment for an Event
There are two ways to collect payment for an Event:
1. At the time of registration
You can collect payment for an Event at the time of registration only if you use Open ACU's Stripe integration.
To require payment at the time of registration, click the "Prepayment Required" checkbox on the Event Pricing tab:
Participants will then be prompted to enter their payment details at the time of registration in order to reserve their spot.
2. At the time of the Event
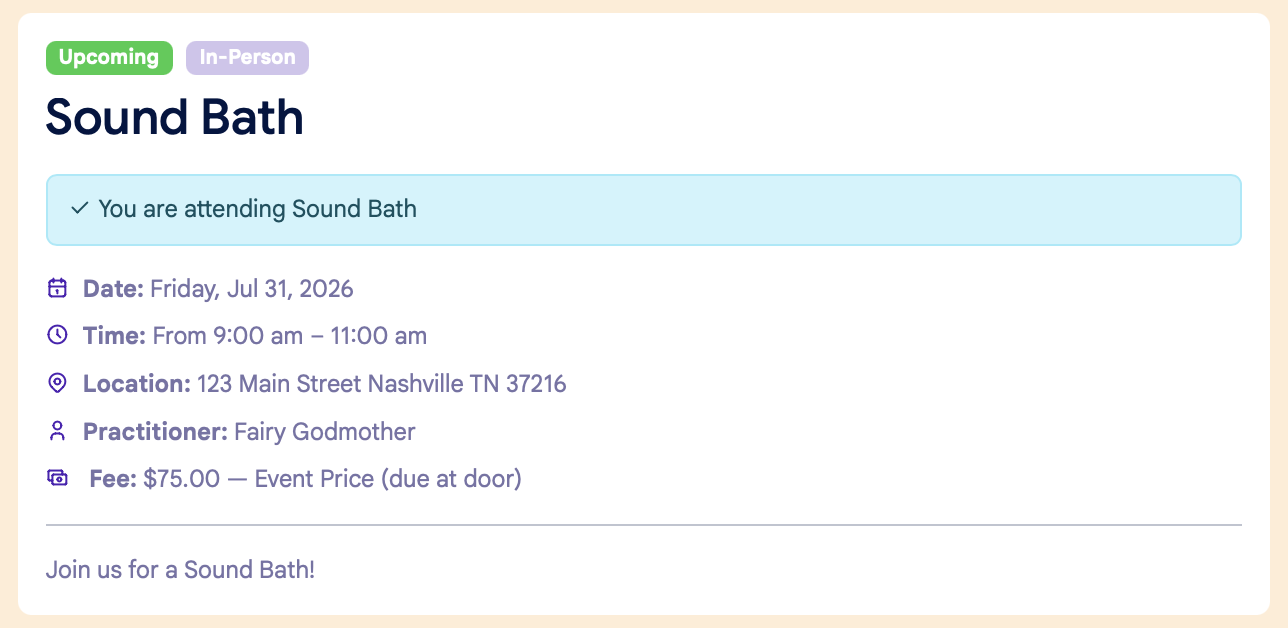
You can also collect payment at the time of the Event. In this case, you won't check the "Prepayment Required" button on the Event Pricing page when creating your Event.
Attendees will be able to complete their registration without paying, and on the registration confirmation page, they'll see a message that payment is due at the door:
You can then collect payment when an attendees checks in for the event, like you would when checking in for an appointment.
Issuing a Refund for an Event
To issue a refund for an event, go to the Event date on the calendar, then click on the Attendees tab for the Event:
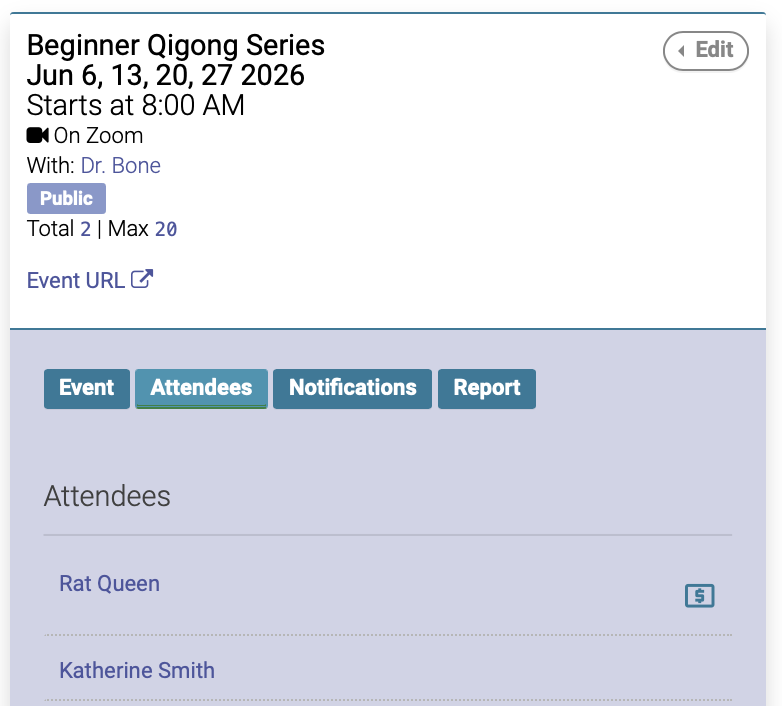
The green dollar sign next to the attendee's name will indicate that they have paid:
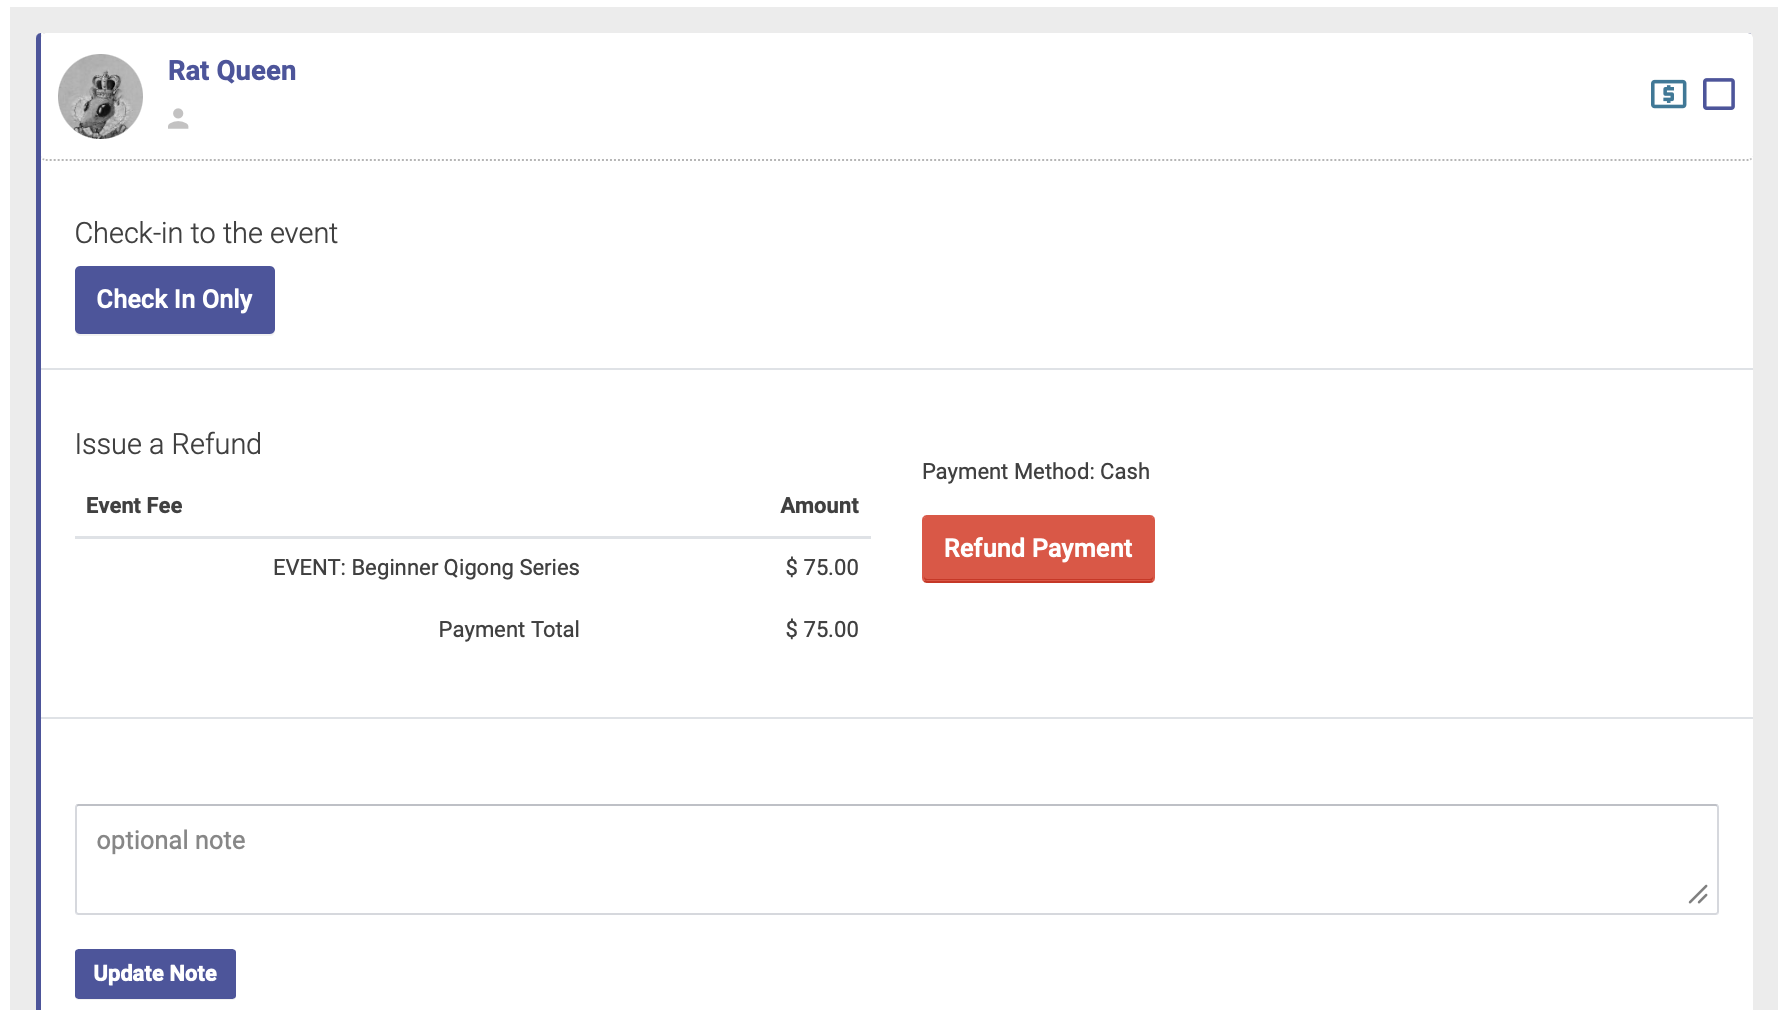
Click the checkbox next to the dollar sign to expand, then click the red Refund Payment button. If they have paid via credit card using Stripe, their payment will be refunded to their card:
Online Events
If you're scheduling an online or virtual event, you'll enter the Event URL on the Event Setup page.
How to Create an online Event
Check the box that says "Is Online, Zoom?" and then enter your video conferencing URL (Zoom link, Google meet, etc):
How to join an online Event
Attendees can join the online event by clicking the link, which will appear in several places:
All Events Page
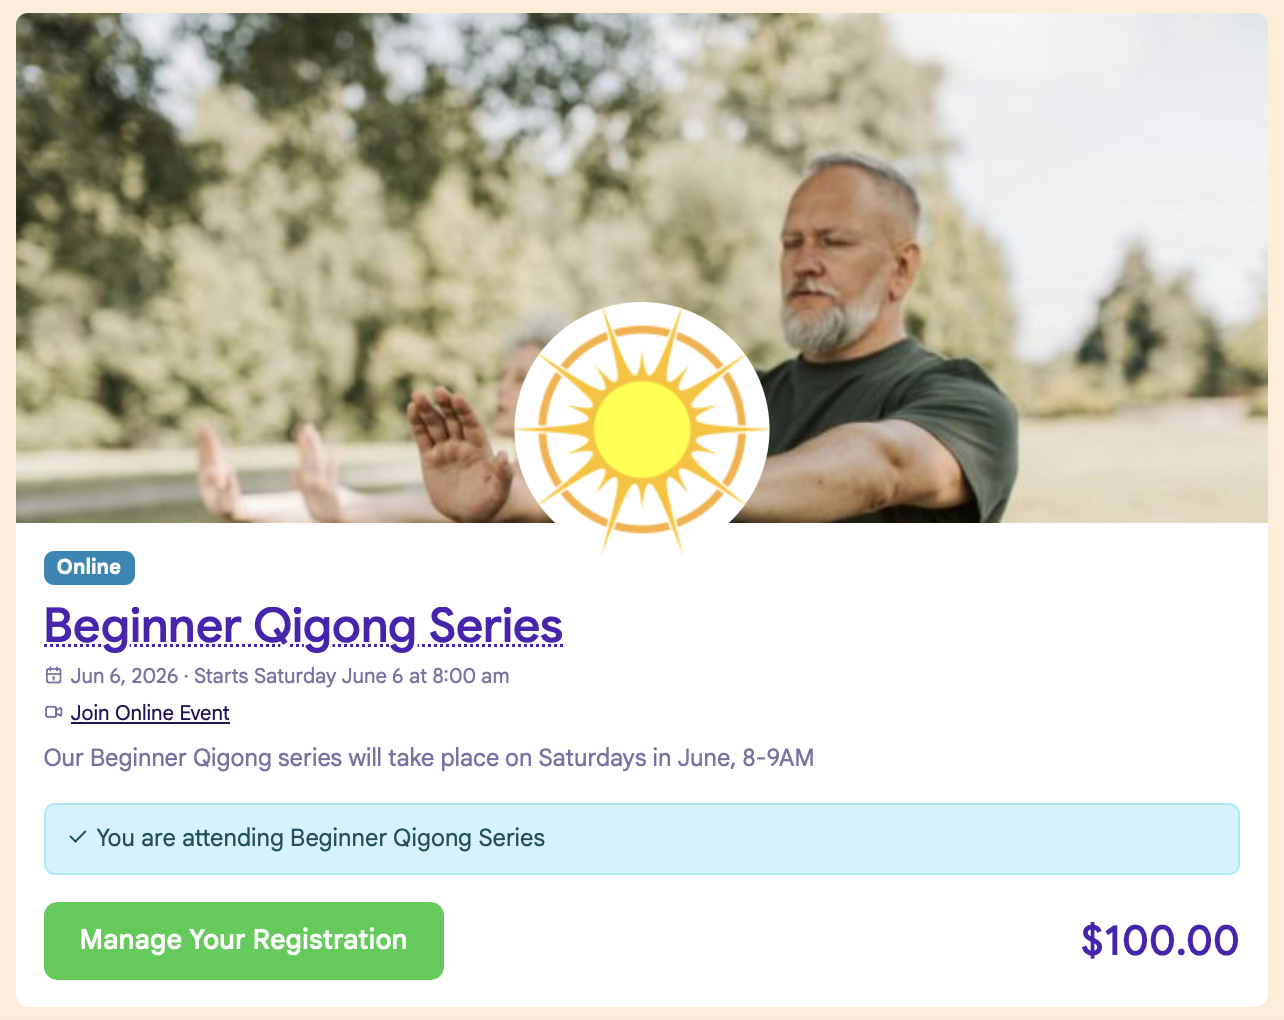
The All Events page on the patient portal will list all upcoming events. Attendees can click "Join Online Event" to join:
Event URL
The individual event URL will also have an event link:
Email and SMS Notifications
We also recommend adding your video conferencing URL to your email and SMS reminders, which you can do from the Notifications tab for your Event.
Checking in Event Attendees
At the time of your Event, you'll check in attendees when they arrive, similar to checking in for an appointment.
Step 1:
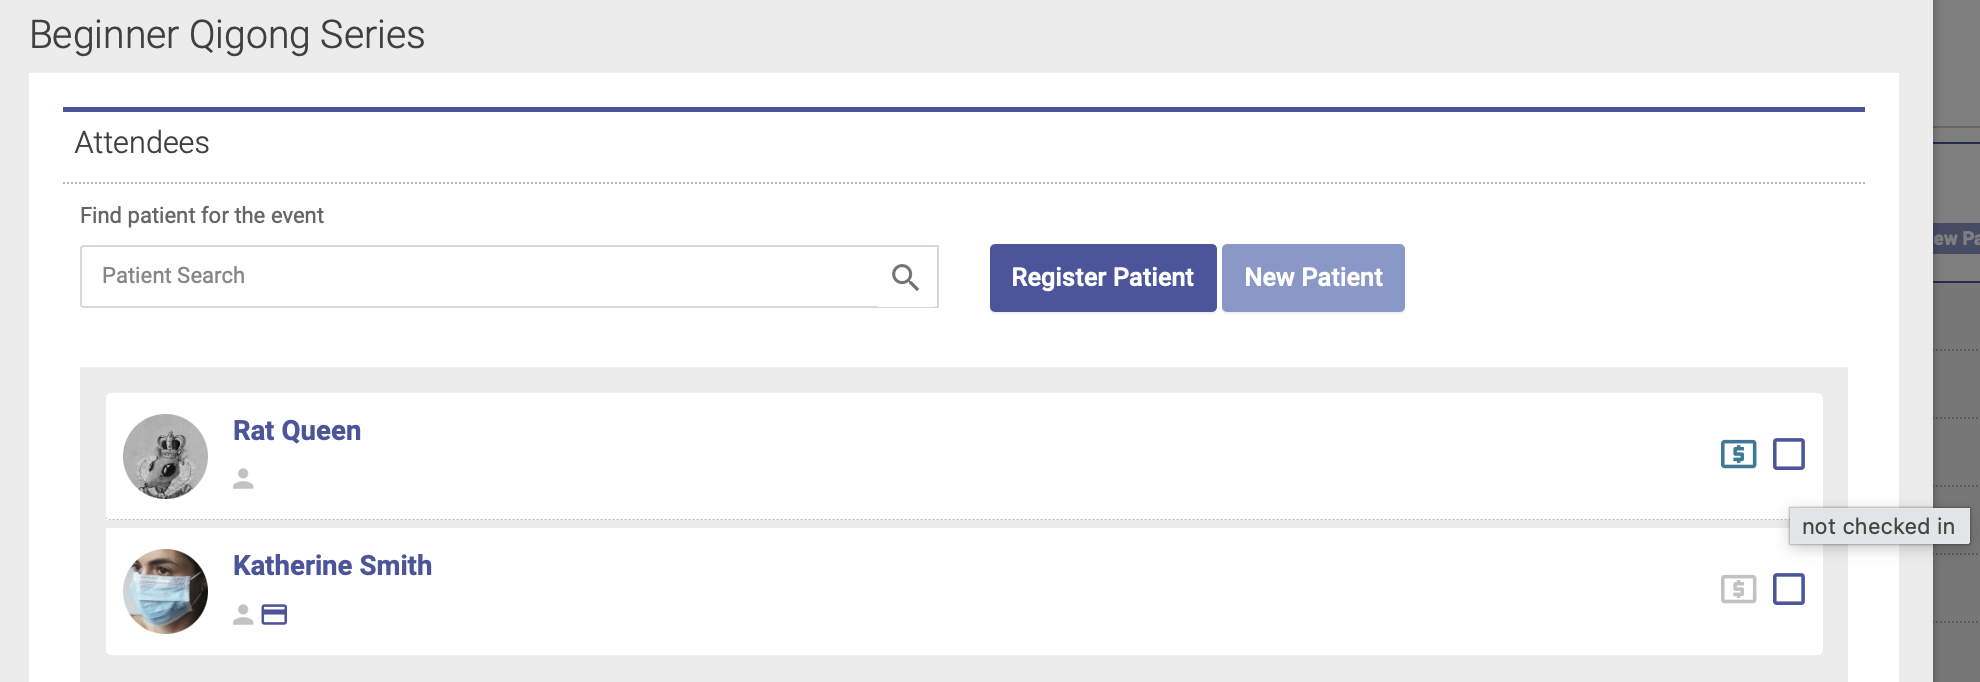
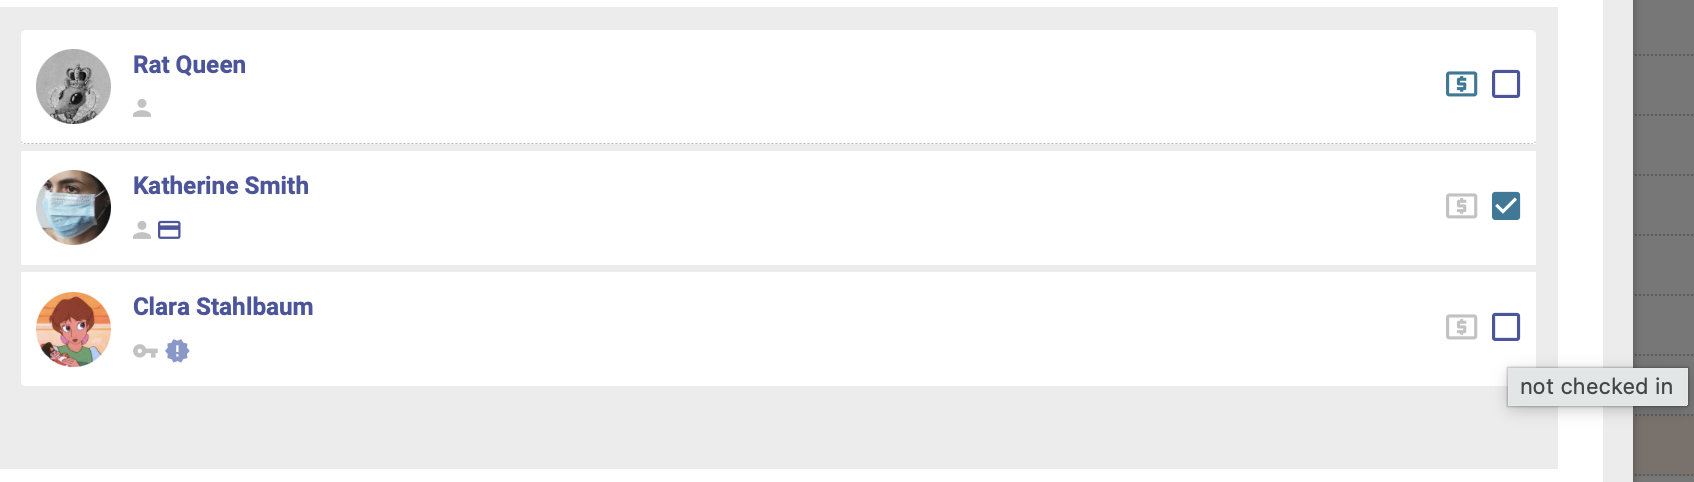
Go to the Event date on the calendar, then click the Attendees tab. If an attendee has a dollar sign icon next to their name, that means they have pre-paid for the Event:
Step 2:
To check in an attendees, click the checkbox icon next to their name on the Attendees tab:
Step 3:
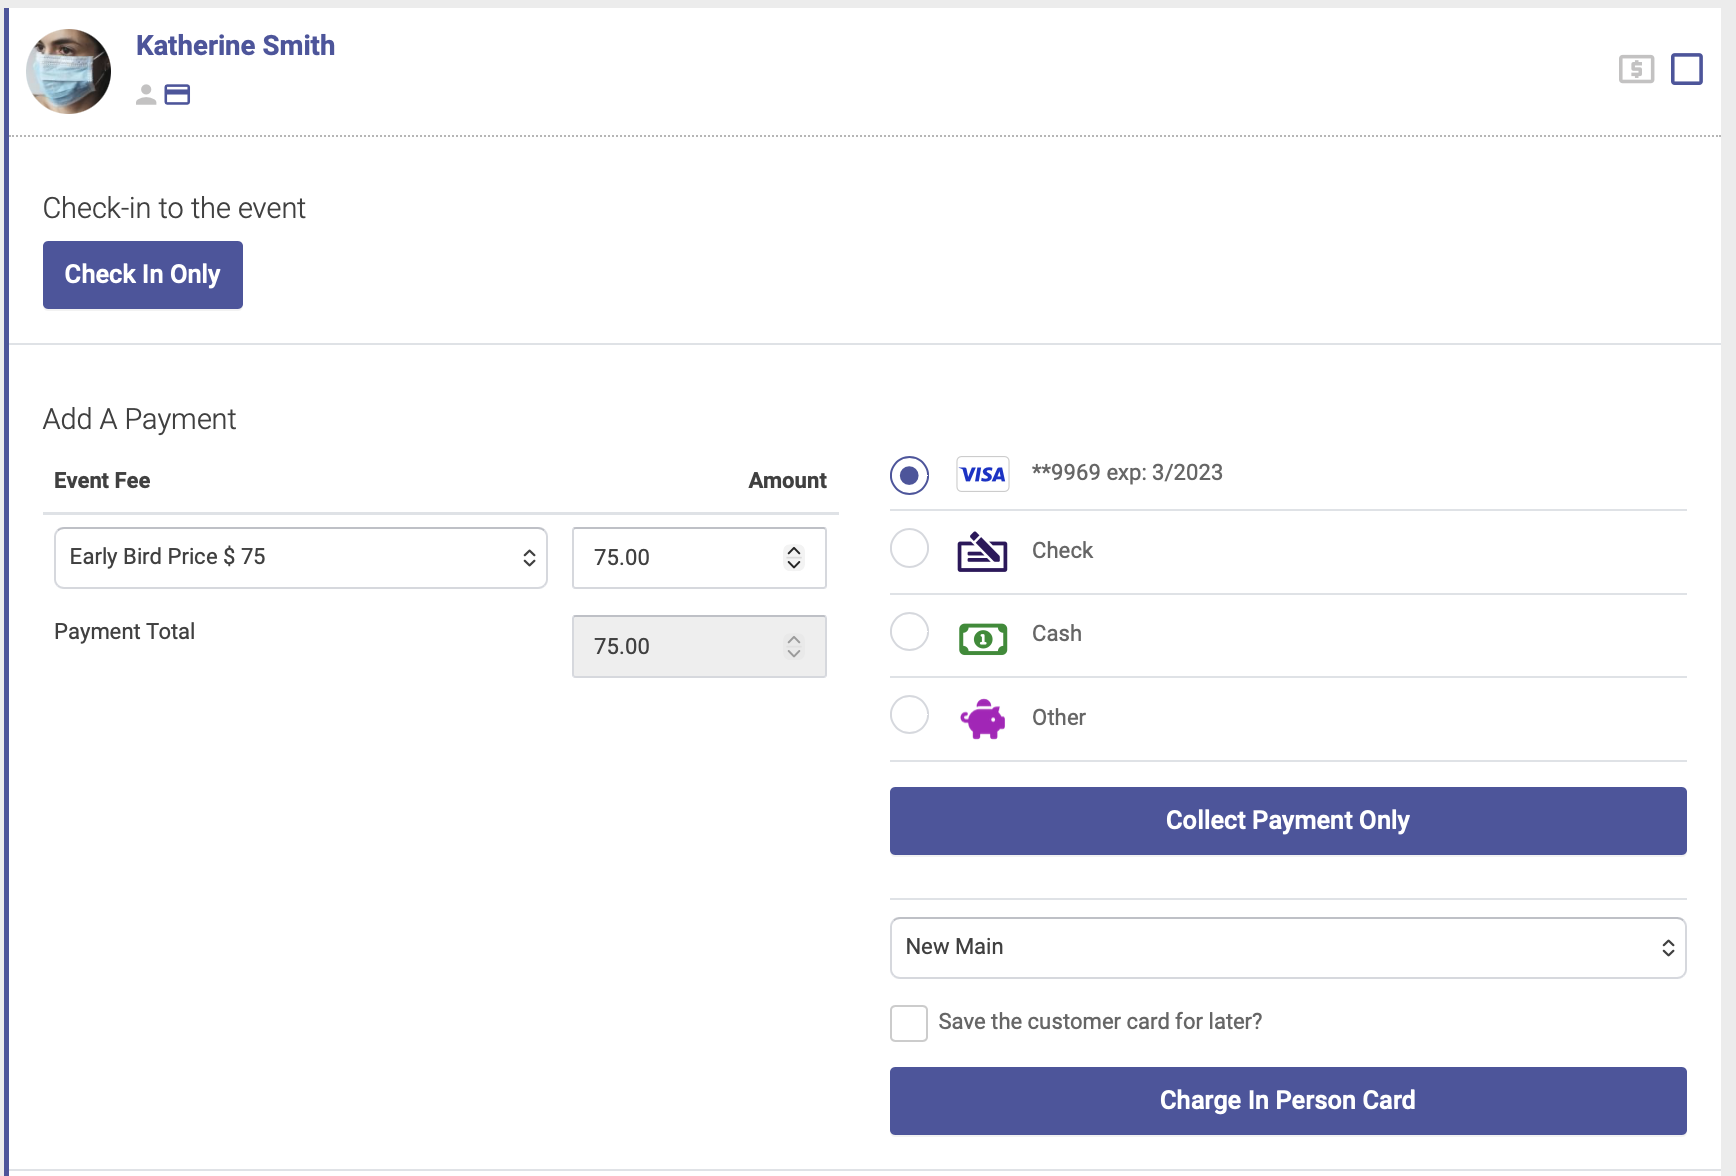
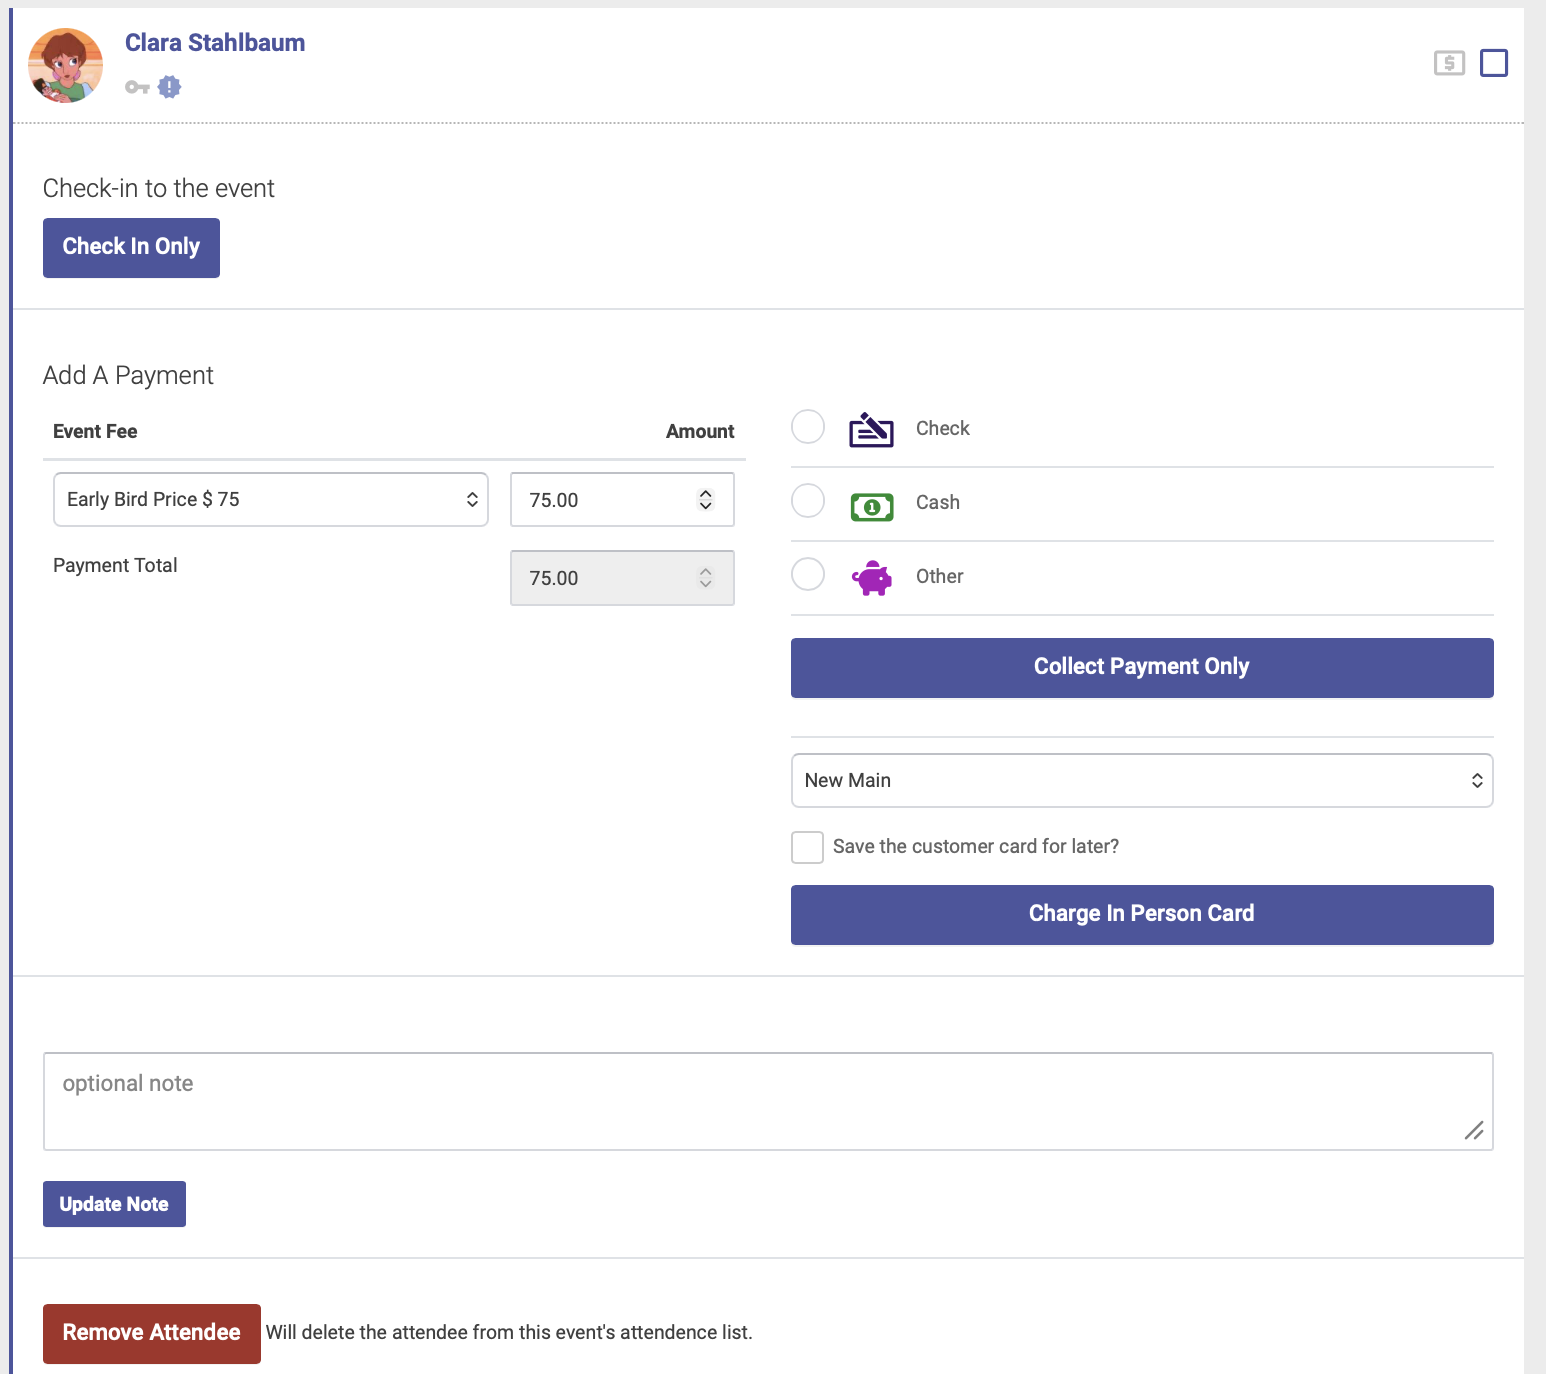
A window will now appear where you can check in the attendees, and complete their payment if needed:
Once you've completed the checkin, a check will appear next to their name on the Attendees tab:

If your event includes EHR notes, you must check in an attendee first before recording EHR notes.
Event URL
When you create an Event in Open ACU, each Event will have its own unique Event URL which you can share on your website, social media, email newsletters, etc.
To see your Event URL, go to the Event date on the calendar. Under the Event information heading, you'll see a Event URL link:
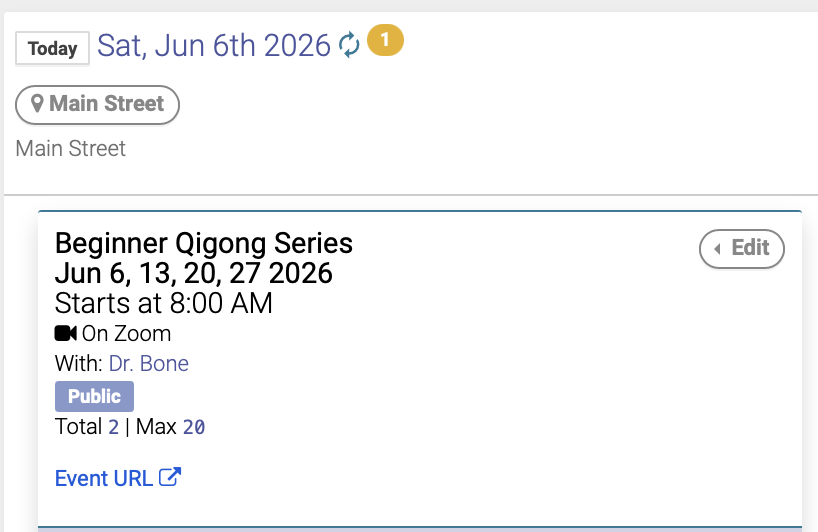
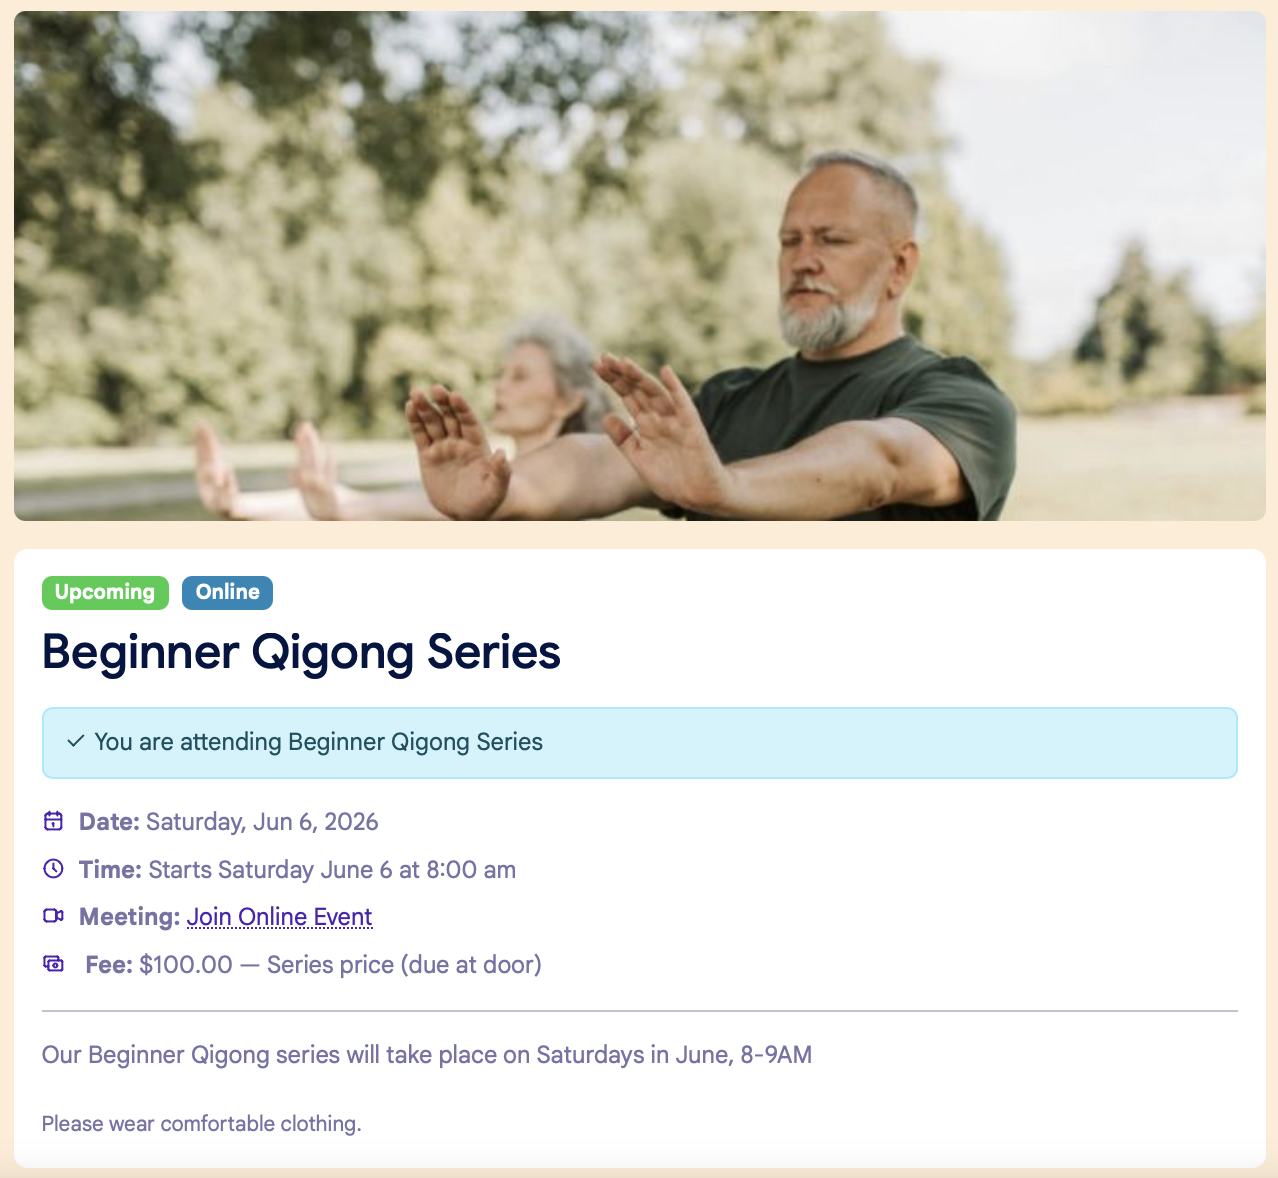
The Event URL will be housed on the Events page on your patient portal, and will contain all the information about your Event you entered when you created the Event:
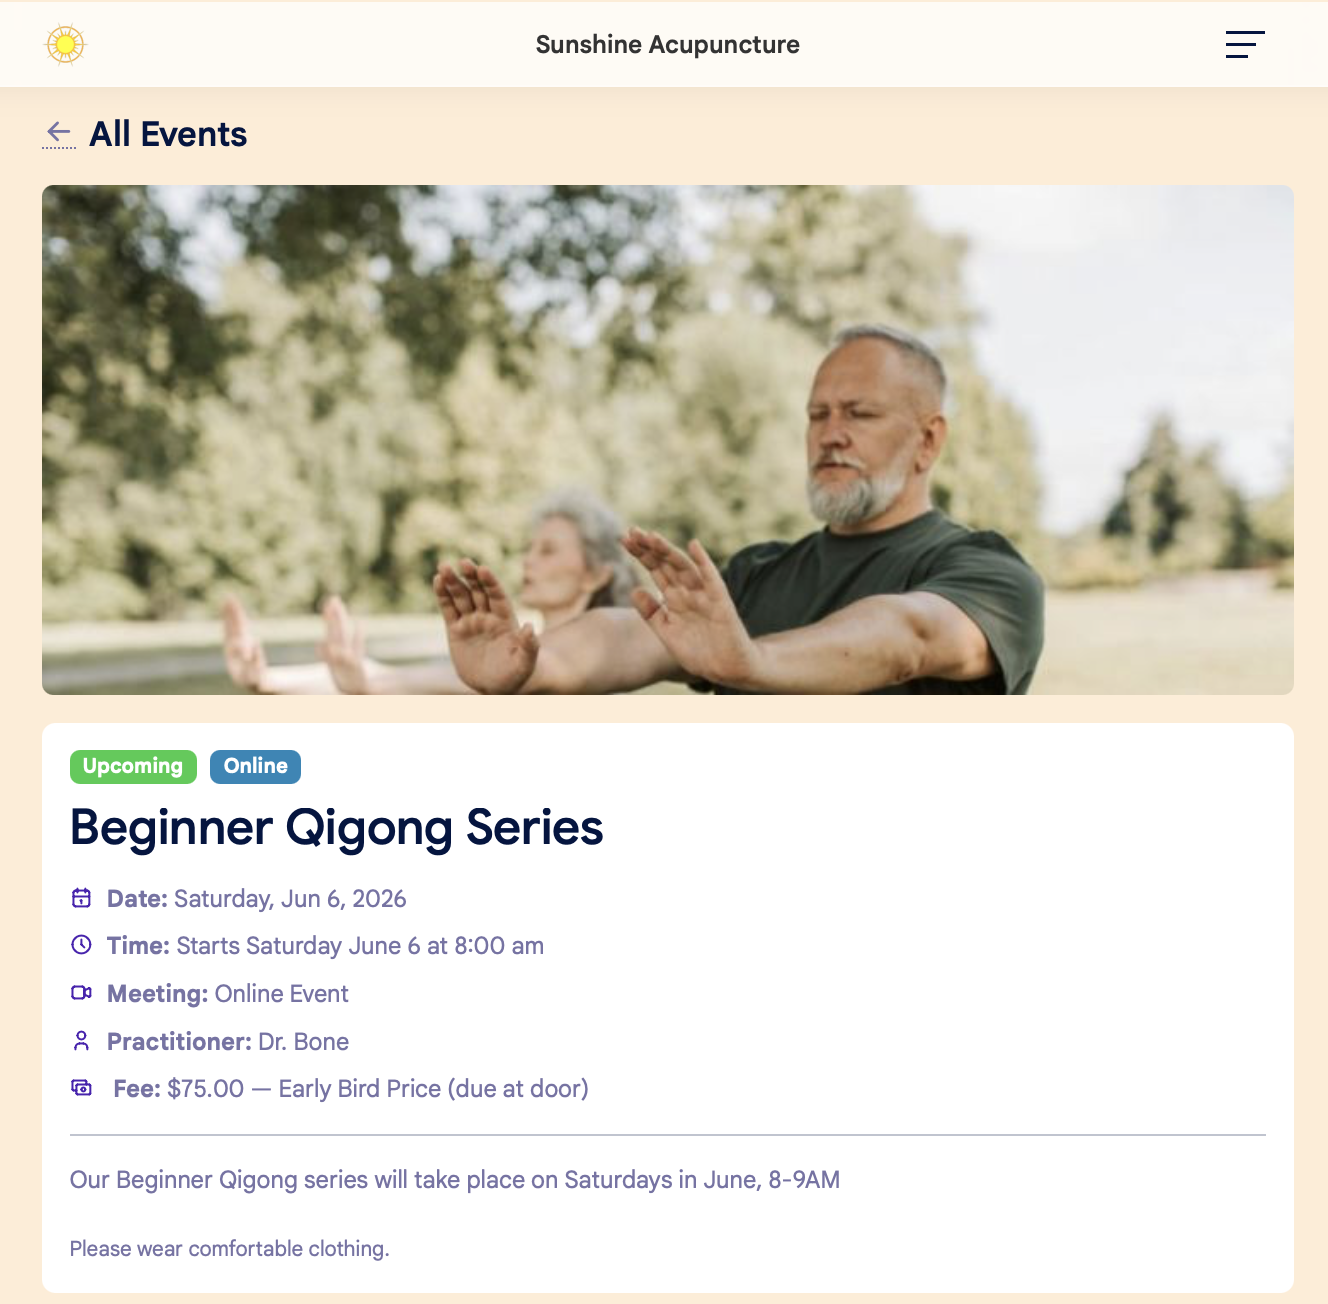
Potential attendees do NOT need to be logged in to the patient portal to view the details on the Event URL. However, they must be logged in to their patient account to register. If they don't have a patient account, they will be prompted to create one.
Remove an Attendee from an Event
To remove a registered attendee from an Event, go to the Event date on the calendar and click the Attendees tab.
Select the attendee you'd like to remove by clicking the checkbox next to their name on the Attendees tab:
In the window that opens, click the red Remove Attendee button:
Click OK to confirm:
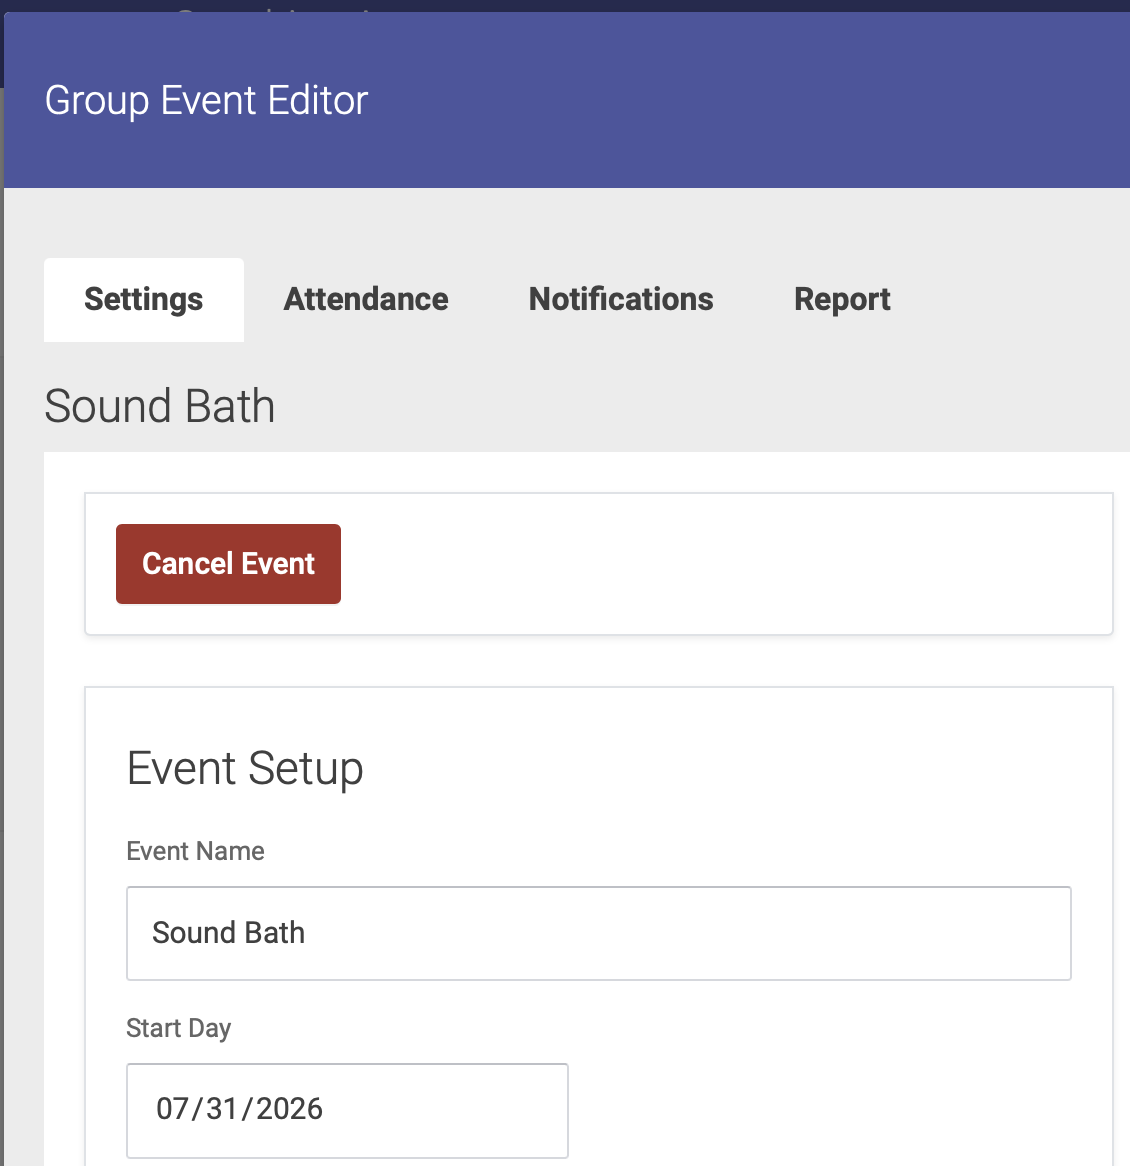
Cancel an Event
To cancel an Event, go to the Event date on the calendar, then click the Event tab to open the Event editor:

Click the red Cancel Event button at the top of the Event editor window: