Check in without recording a transaction
You can check in a patient without recording a transaction by enabling the checkin without transaction feature.
Getting started
To turn on this feature, go to your Settings page. In the Basics section, click the Allow Checkin without a Transaction box:
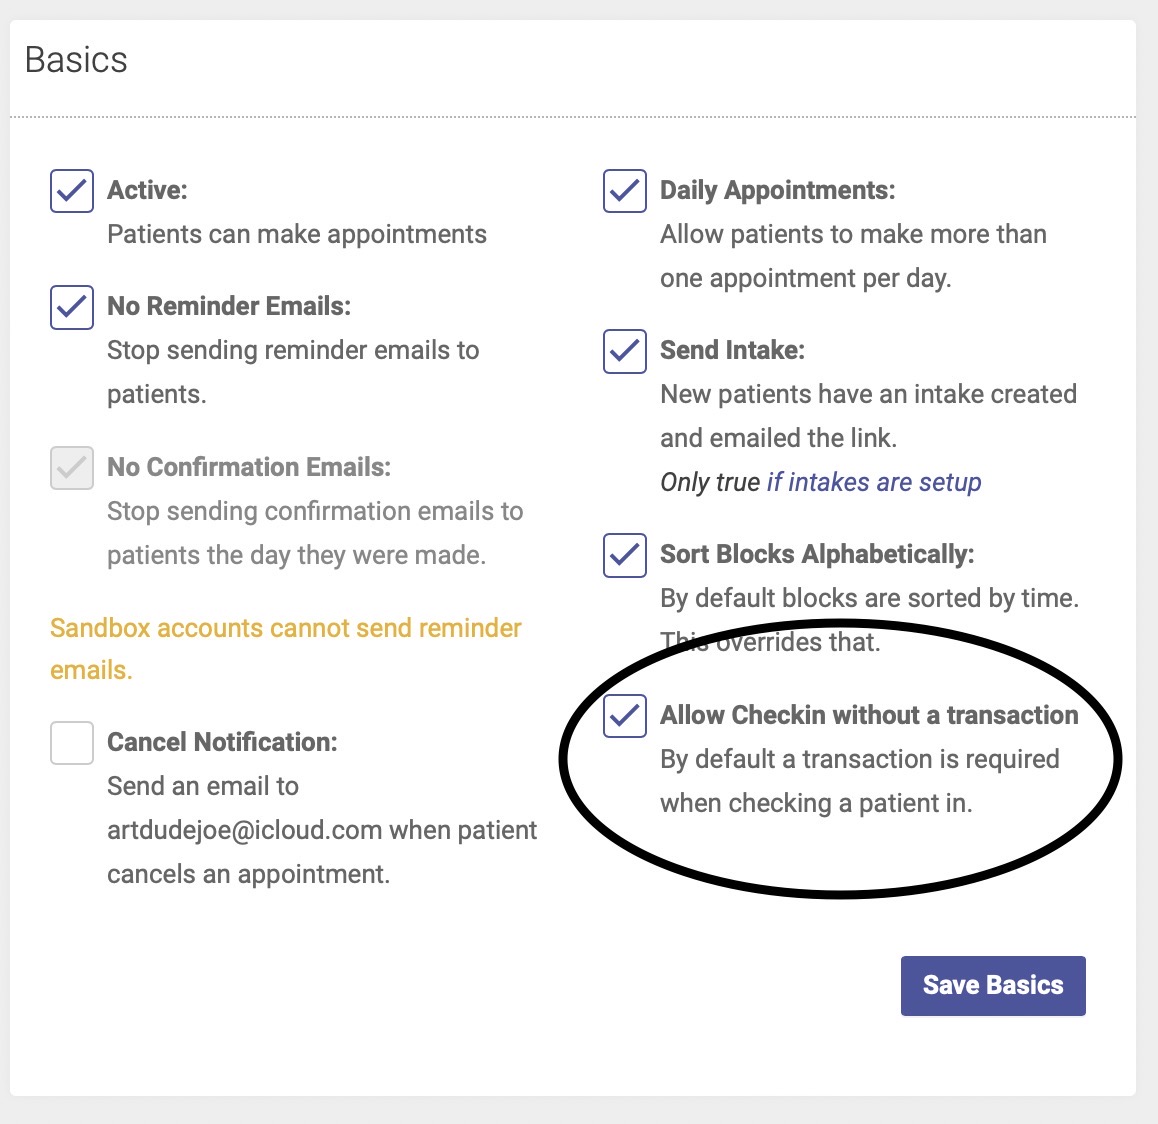
Note: the default setting is to require a transaction at the time of checkin. If you’d like to check in patients without a transaction, you’ll need to opt in to this feature.
Be sure to click Save Basics when you’re finished.
How to check-in without recording a payment
First, click the checkbox next to the patient’s name on the schedule. The popup that appears will show two options: Check In + Payment or Check In Only:
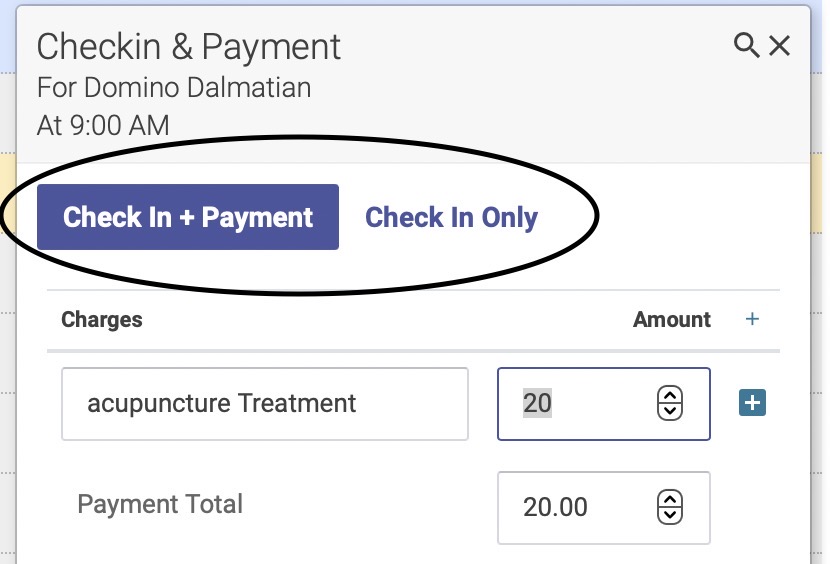
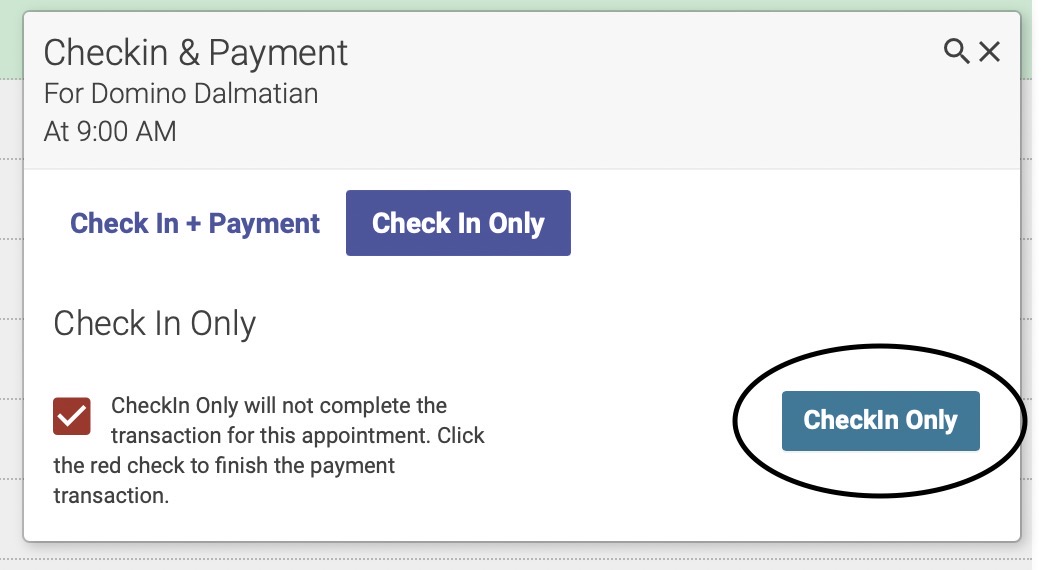
Click Check In Only—this will eliminate the payment and transaction boxes from the popup window. Then click the green Checkin Only button in the bottom right hand corner of the popup box:
The checkin check box next to the patient’s name will now appear in RED—this is your reminder that you still need to collect and record the patient’s payment:

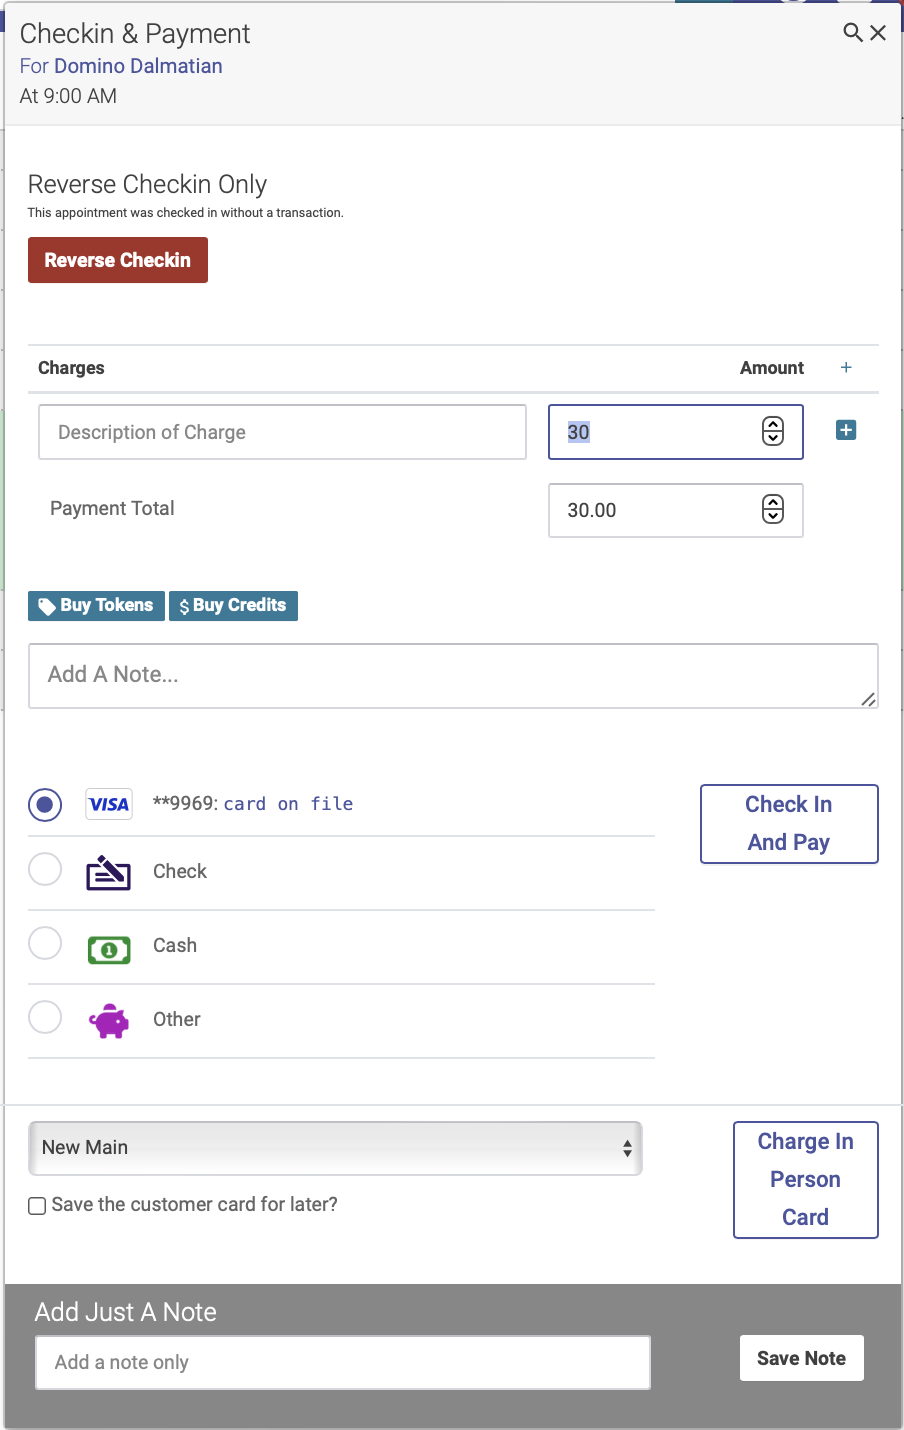
When you’re ready to collect and record payment, click the red check box. This will bring up the popup window, where you can record the transaction (you also have the option here to reverse the checkin, if you checked in this patient by mistake):
Once you’ve recorded and saved the payment, the patient will appear in yellow on the schedule:

Here's a quick screen recording showing how it works: